|
|
| (7 intermediate revisions by 2 users not shown) |
| Line 1: |
Line 1: |
| <!DOCTYPE html>
| | This page is dedicated to '''monitoring and recording vital signs''', providing a snapshot of the patient's current health status and trends over time. Then select '''Vitals''' at the top of the page. |
| <html lang="en">
| |
| <head>
| |
| <meta charset="UTF-8">
| |
| <meta name="viewport" content="width=device-width, initial-scale=1.0">
| |
| <title>Vitals - Vehrdict Support Wiki</title>
| |
| <style>
| |
| body {
| |
| font-family: Arial, sans-serif;
| |
| line-height: 1.6;
| |
| margin: 20px;
| |
| background-color: #f9f9f9;
| |
| color: #333;
| |
| }
| |
| .container {
| |
| max-width: 900px;
| |
| margin: 0 auto;
| |
| padding: 20px;
| |
| background-color: #fff;
| |
| border-radius: 8px;
| |
| box-shadow: 0 0 10px rgba(0, 0, 0, 0.1);
| |
| }
| |
| h1 {
| |
| text-align: center;
| |
| color: #007BFF;
| |
| }
| |
| p {
| |
| margin-bottom: 20px;
| |
| }
| |
| .step {
| |
| margin-top: 20px;
| |
| }
| |
| .step img {
| |
| width: 100%;
| |
| border: 1px solid #ccc;
| |
| border-radius: 8px;
| |
| margin-top: 10px;
| |
| }
| |
| .step h2 {
| |
| font-size: 1.2em;
| |
| color: #0056b3;
| |
| }
| |
| .highlight {
| |
| font-weight: bold;
| |
| }
| |
| </style>
| |
| </head>
| |
| <body>
| |
| <div class="container">
| |
| <h1>Vitals - Vehrdict Support Wiki</h1>
| |
| <p>This page is dedicated to monitoring and recording vital signs, providing a snapshot of the patient's current health status and trends over time. Then select <span class="highlight">Vitals</span> at the top of the page.</p>
| |
|
| |
| <div class="step">
| |
| <h2>Step 1: Patient Dashboard</h2>
| |
| <p>Vitals must be linked to an encounter. In order to enter vitals, first navigate to the dashboard of the patient.</p>
| |
| <img src="file-CmEFeK5x5Zs4CZzWskra2jV2" alt="Patient Dashboard">
| |
| </div>
| |
|
| |
| <div class="step">
| |
| <h2>Step 2: Search for the Patient</h2>
| |
| <p>This can be done by searching for the patient under the search tab or by clicking on the appointment from the calendar and selecting <span class="highlight">patient chart</span>.</p>
| |
| <img src="file-EIYc7c4Bj9zUMdewUO4DnCZF" alt="Search for the Patient">
| |
| </div>
| |
|
| |
| <div class="step">
| |
| <h2>Step 3: Enter Vitals</h2>
| |
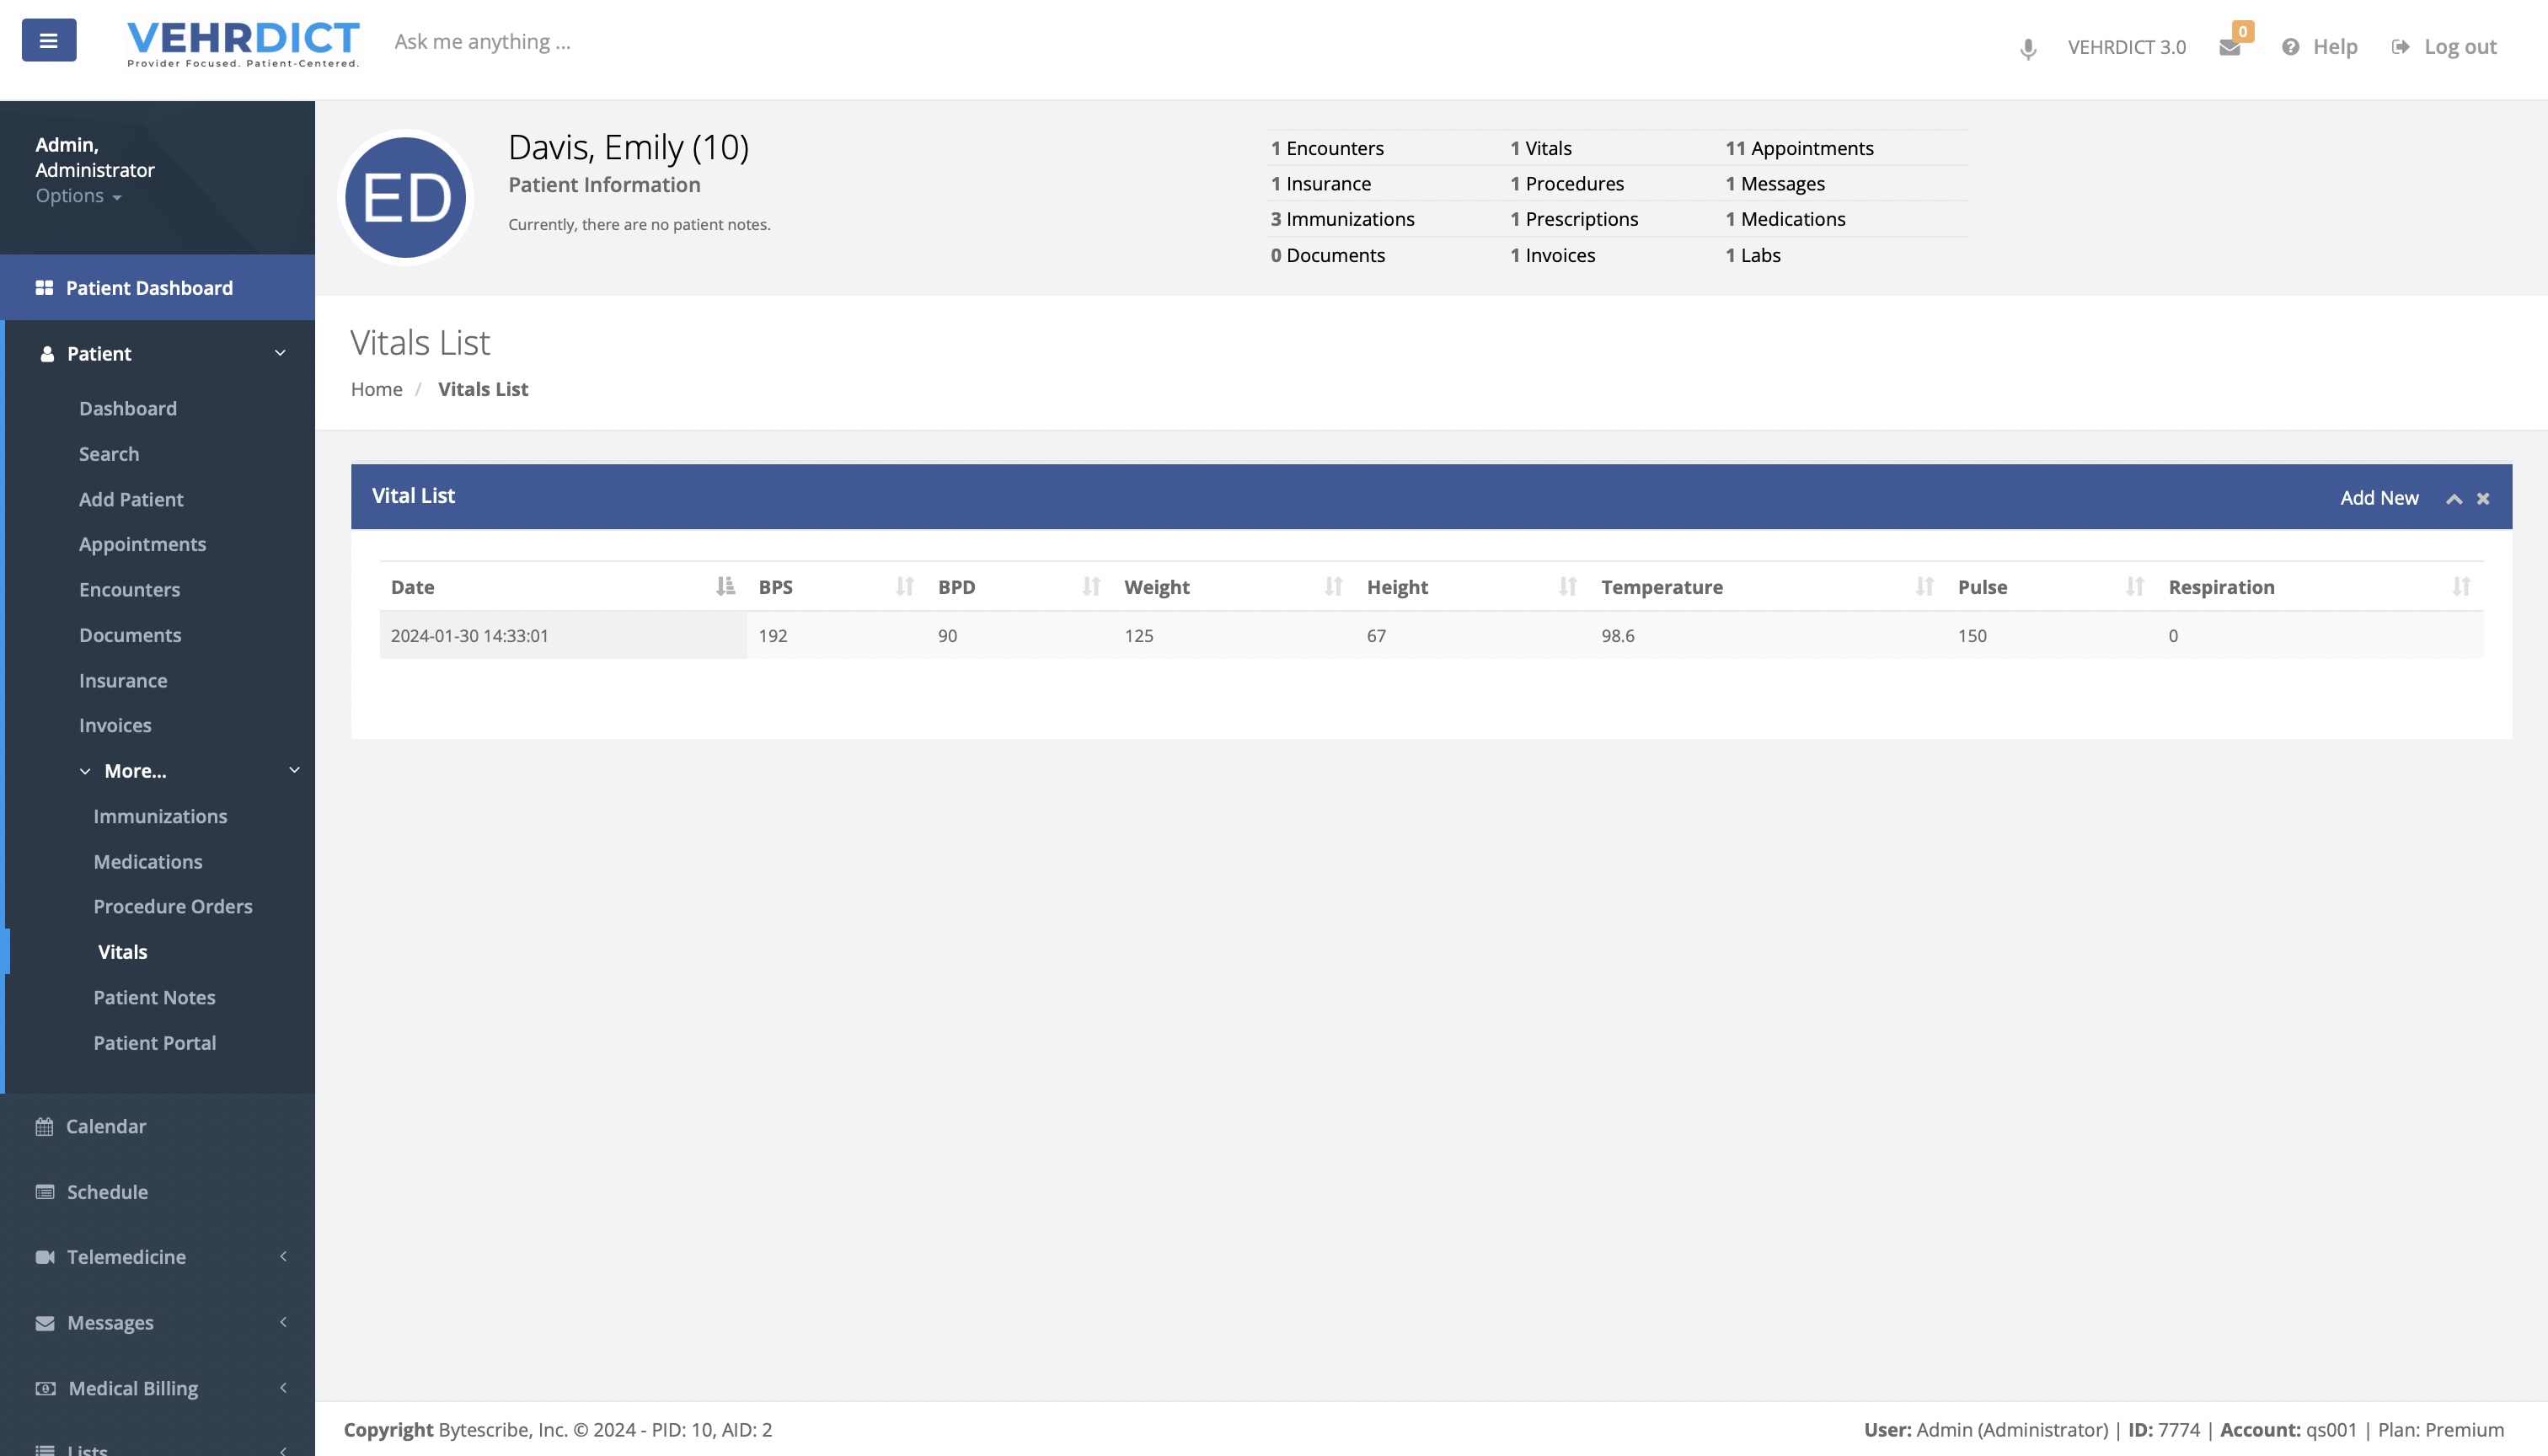
| <p>From the <span class="highlight">Vitals List</span> page, click <span class="highlight">Add New</span> to enter new vitals for the patient.</p>
| |
| <img src="file-VY0v5xxXp6y5IyDn9gnrm0Ug" alt="Vitals List">
| |
| </div>
| |
| </div>
| |
| </body>
| |
| </html>
| |
|
| |
|
| This page is dedicated to monitoring and recording vital signs, providing a snapshot of the patient's current health status and trends over time. Then select Vitals at the top of the page.
| | ==Step 1: Patient Dashboard== |
|
| |
|
| | Vitals must be linked to an encounter. In order to enter vitals, first navigate to the '''dashboard of the patient'''. |
|
| |
|
|
| |
|
| Line 79: |
Line 9: |
|
| |
|
|
| |
|
| | ==Step 2: Search for the Patient== |
| | This can be done by searching for the patient under the '''search tab''' or by clicking on the appointment from the calendar and selecting '''patient chart'''. |
|
| |
|
| ==Vitals== | | ==Step 3: Enter Vitals== |
| | |
| | |
| Vitals must be linked to an encounter. In order to enter vitals first navigate to the dashboard of the patient.
| |
|
| |
|
| | From the '''Vitals List''' page, click '''Add New''' to enter new vitals for the patient. |
|
| |
|
|
| |
|
| [[File:Vitals.jpg|800px]] | | [[File:Vitals.jpg|800px]] |
|
| |
|
| |
|
| |
| This can be done by searching for the patient under the search tab or by clicking on the appointment from calendar and selecting "patient chart."
| |
|
| |
|
| |
|
| |
| [[File:Calendar.jpg|800px]]
| |
This page is dedicated to monitoring and recording vital signs, providing a snapshot of the patient's current health status and trends over time. Then select Vitals at the top of the page.
Step 1: Patient Dashboard
Vitals must be linked to an encounter. In order to enter vitals, first navigate to the dashboard of the patient.

Step 2: Search for the Patient
This can be done by searching for the patient under the search tab or by clicking on the appointment from the calendar and selecting patient chart.
Step 3: Enter Vitals
From the Vitals List page, click Add New to enter new vitals for the patient.