Appointments: Difference between revisions
No edit summary |
No edit summary |
||
| Line 18: | Line 18: | ||
</ul> | </ul> | ||
[[File:New.jpg|800px]] | |||
<h2>Appointment Categories</h2> | <h2>Appointment Categories</h2> | ||
<p>When scheduling an appointment, you can select from various categories such as:</p> | <p>When scheduling an appointment, you can select from various categories such as:</p> | ||
| Line 87: | Line 89: | ||
[[File:HELP.jpg|800px]] | [[File:HELP.jpg|800px]] | ||
If you wish to change information about your appointment, click any appointment on the list. | If you wish to change information about your appointment, click any appointment on the list. | ||
Revision as of 12:33, 30 May 2024
Appointments
To schedule an appointment, click on Appointments > Add Appointment. Select an available appointment at a time and date that works with your schedule. Next, select a category for your appointment, for example, click Telemedicine Call if you plan to do a virtual meeting with your doctor. Once you have entered all of the information regarding your appointment, click Save Changes.
Navigating the Appointment List
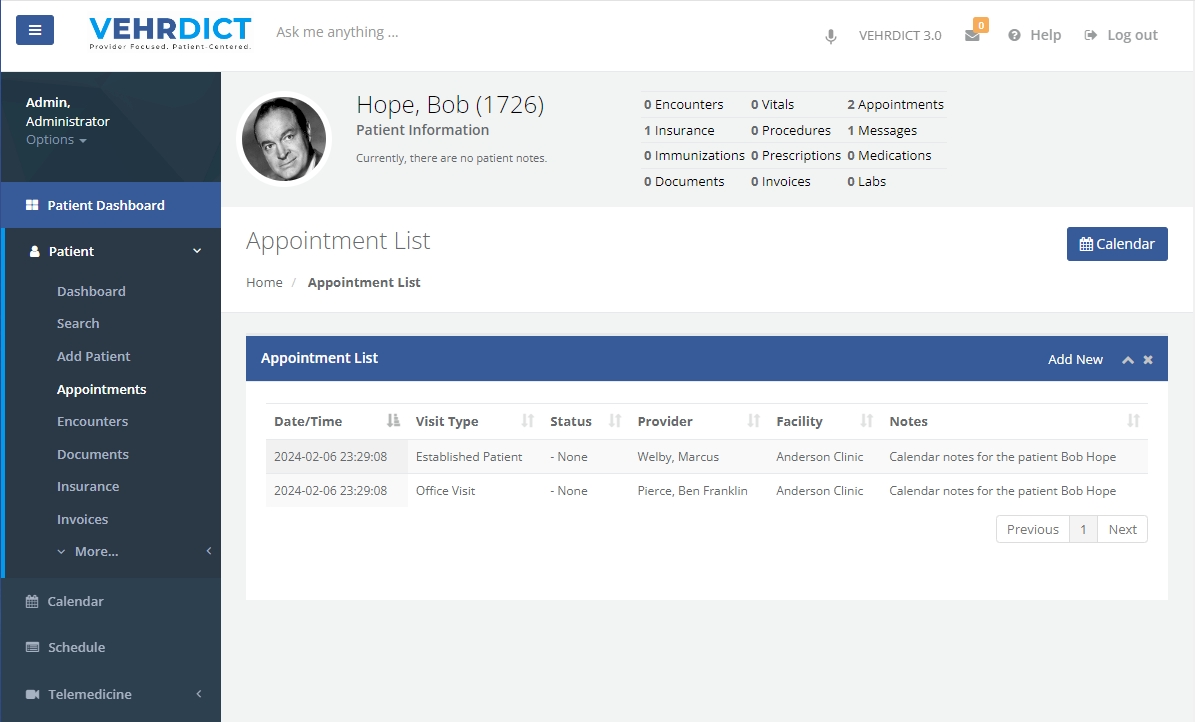
- Patient Dashboard: Access the patient dashboard by clicking on Patient Dashboard from the left-side menu. Here you can view detailed patient information, including encounters, vitals, appointments, insurance, procedures, messages, immunizations, prescriptions, medications, documents, invoices, and labs.
- Viewing Appointments: Under the Appointments section, you can view a list of all scheduled appointments. Each entry displays the date/time, visit type, status, provider, facility, and any notes associated with the appointment.
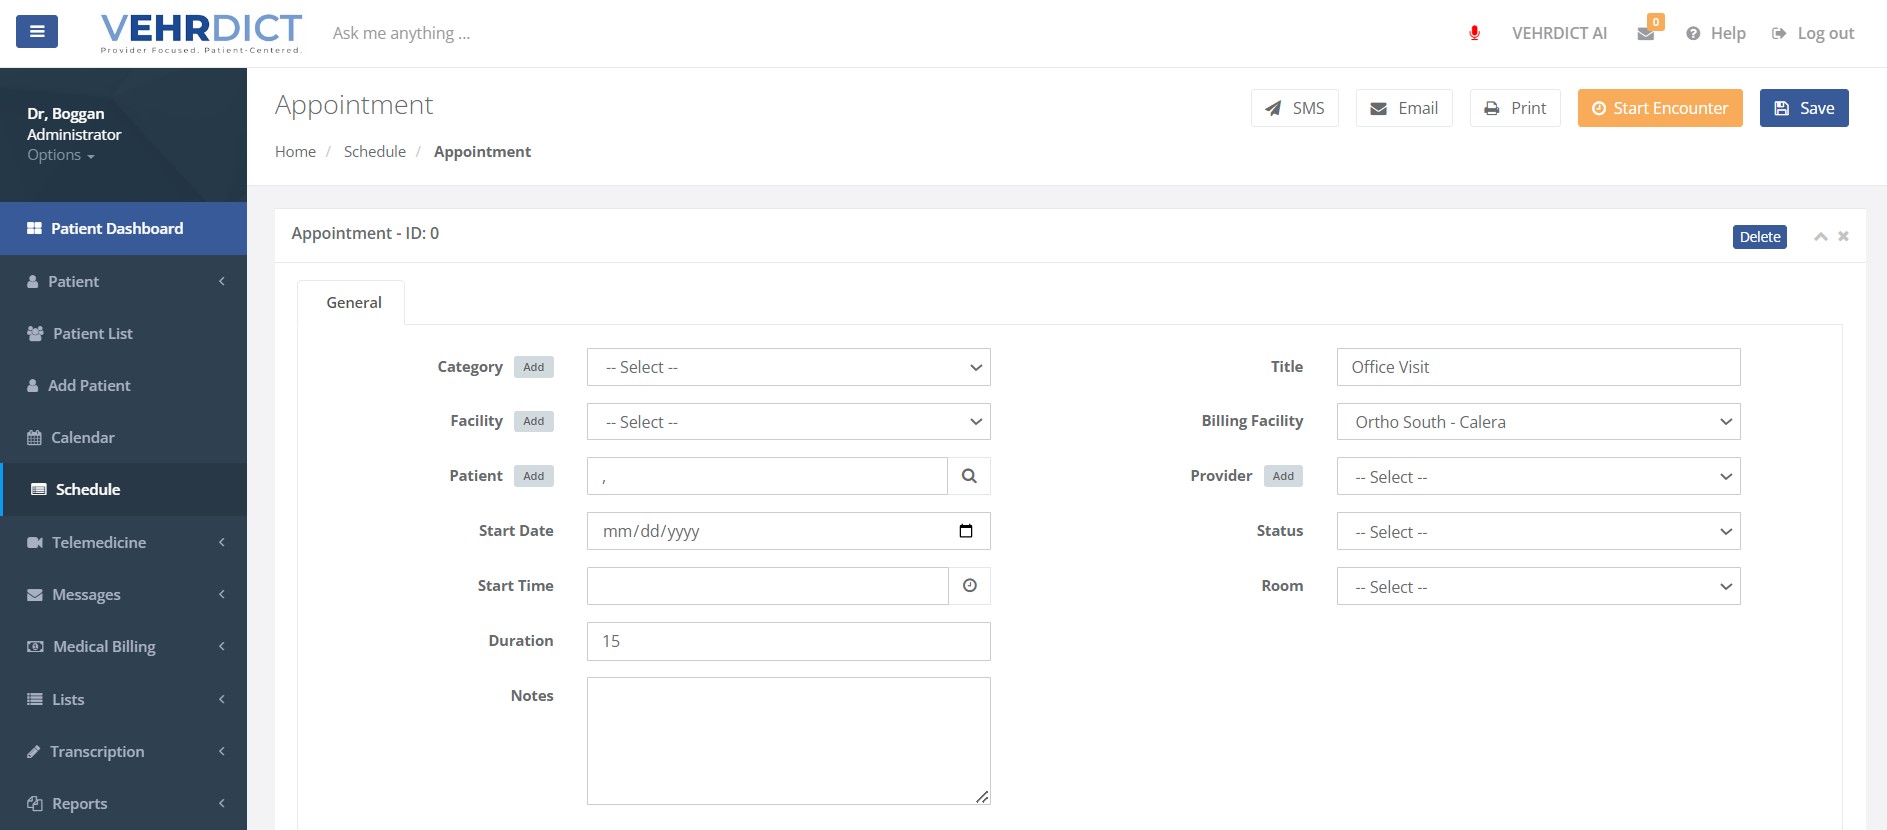
- Appointment Details: Click on an appointment to view more details. This includes the option to edit or delete the appointment, and fields such as category, facility, patient, start date, start time, duration, title, billing facility, provider, status, and room.
Using the Calendar
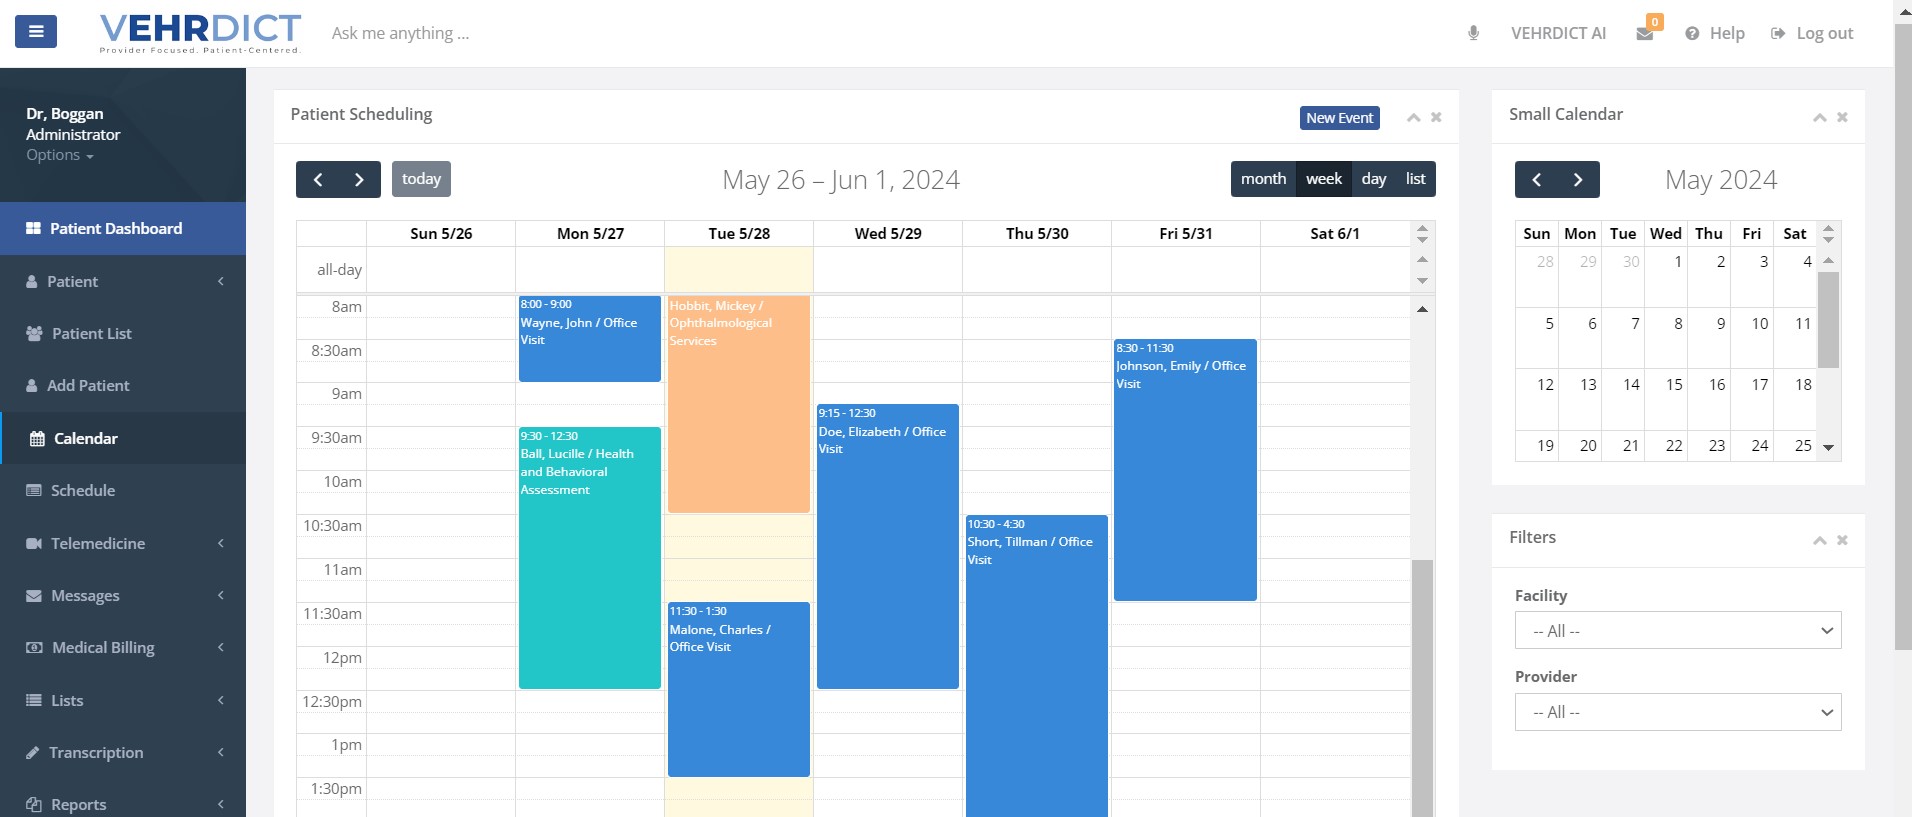
- Calendar Overview: The calendar provides a visual representation of all appointments. Appointments are color-coded for quick identification, and users can toggle between different views (day, week, month, and list).
- Scheduling an Appointment from the Calendar: To add a new appointment, click on New Event. This will open the appointment scheduling interface where you can enter the necessary details.
- Filters and Views: Utilize the filters on the right side of the calendar to sort appointments by facility and provider. This helps in managing and organizing the schedule effectively.
Appointment Categories
When scheduling an appointment, you can select from various categories such as:
- Office Visit: For in-person consultations.
- Telemedicine Call: For virtual appointments via teleconference.
- Health and Behavioral Assessment: For specialized assessments.
- Procedures: For scheduling medical procedures.
Patient Portal Integration
If the patient portal feature is enabled, patients can:
- Request, confirm, and manage their appointments.
- Schedule telemedicine sessions.
- Access their individual patient schedules seamlessly integrated with the provider's calendar.
Managing Appointments
- Updating Appointment Status: After the appointment, update the status to reflect the patient's visit.
- Modifying Appointments: Edit the appointment details if there are any changes in the patient's schedule or provider's availability.
- Viewing Patient Schedules: Access the patient dashboard to view individual patient schedules and ensure there are no conflicts.
By following these steps, you can efficiently manage patient appointments using the Vehrdict EHR system, ensuring a smooth and organized workflow for both providers and patients.
Adding an Appointment to the Calendar
To add an appointment to the calendar in our software, follow these steps:
Step 1: Select a Time Slot on the Calendar
- Navigate to the Calendar: Click on the "Calendar" option in the left-hand menu to open the calendar view.
- Choose a Date and Time:
- Single Time Slot: Click on the desired time slot on the calendar. This will open the "Edit Event" window.
- Extended Time Slot: Click and drag your mouse over multiple time slots to create a longer appointment. This will also open the "Edit Event" window with the selected time range pre-filled.
Step 2: Fill Out Appointment Details
In the "Edit Event" window, you need to enter the following details:
- Category: Select the type of appointment from the dropdown menu (e.g., "Office Visit").
- Facility: Choose the facility where the appointment will take place.
- Patient: Click "Add" to select the patient for this appointment.
- Start Date: Ensure the correct date is selected. Adjust if necessary.
- Start Time: Verify the start time. Adjust if necessary.
- Duration: Enter the duration of the appointment in minutes.
- Title: Enter a title for the appointment.
- Billing Facility: Choose the billing facility if different from the main facility.
- Provider: Select the provider from the dropdown menu.
- Status: Choose the status of the appointment (e.g., "Confirmed").
- Room: Specify the room where the appointment will be held if applicable.
- Additional Notes: Enter any additional notes or comments about the appointment in the provided text area.
Step 3: Save the Appointment
Once all necessary information is entered:
- Save Changes: Click the "Save Changes" button at the bottom of the window to save the appointment to the calendar.
- Close: If you need to cancel, click "Close" to exit without saving.
By following these steps, you can efficiently add and manage appointments in the software, ensuring all necessary information is captured and saved correctly.
If you wish to change information about your appointment, click any appointment on the list.


