Add Patient: Difference between revisions
No edit summary |
No edit summary |
||
| Line 59: | Line 59: | ||
* Basic identity information | * Basic identity information | ||
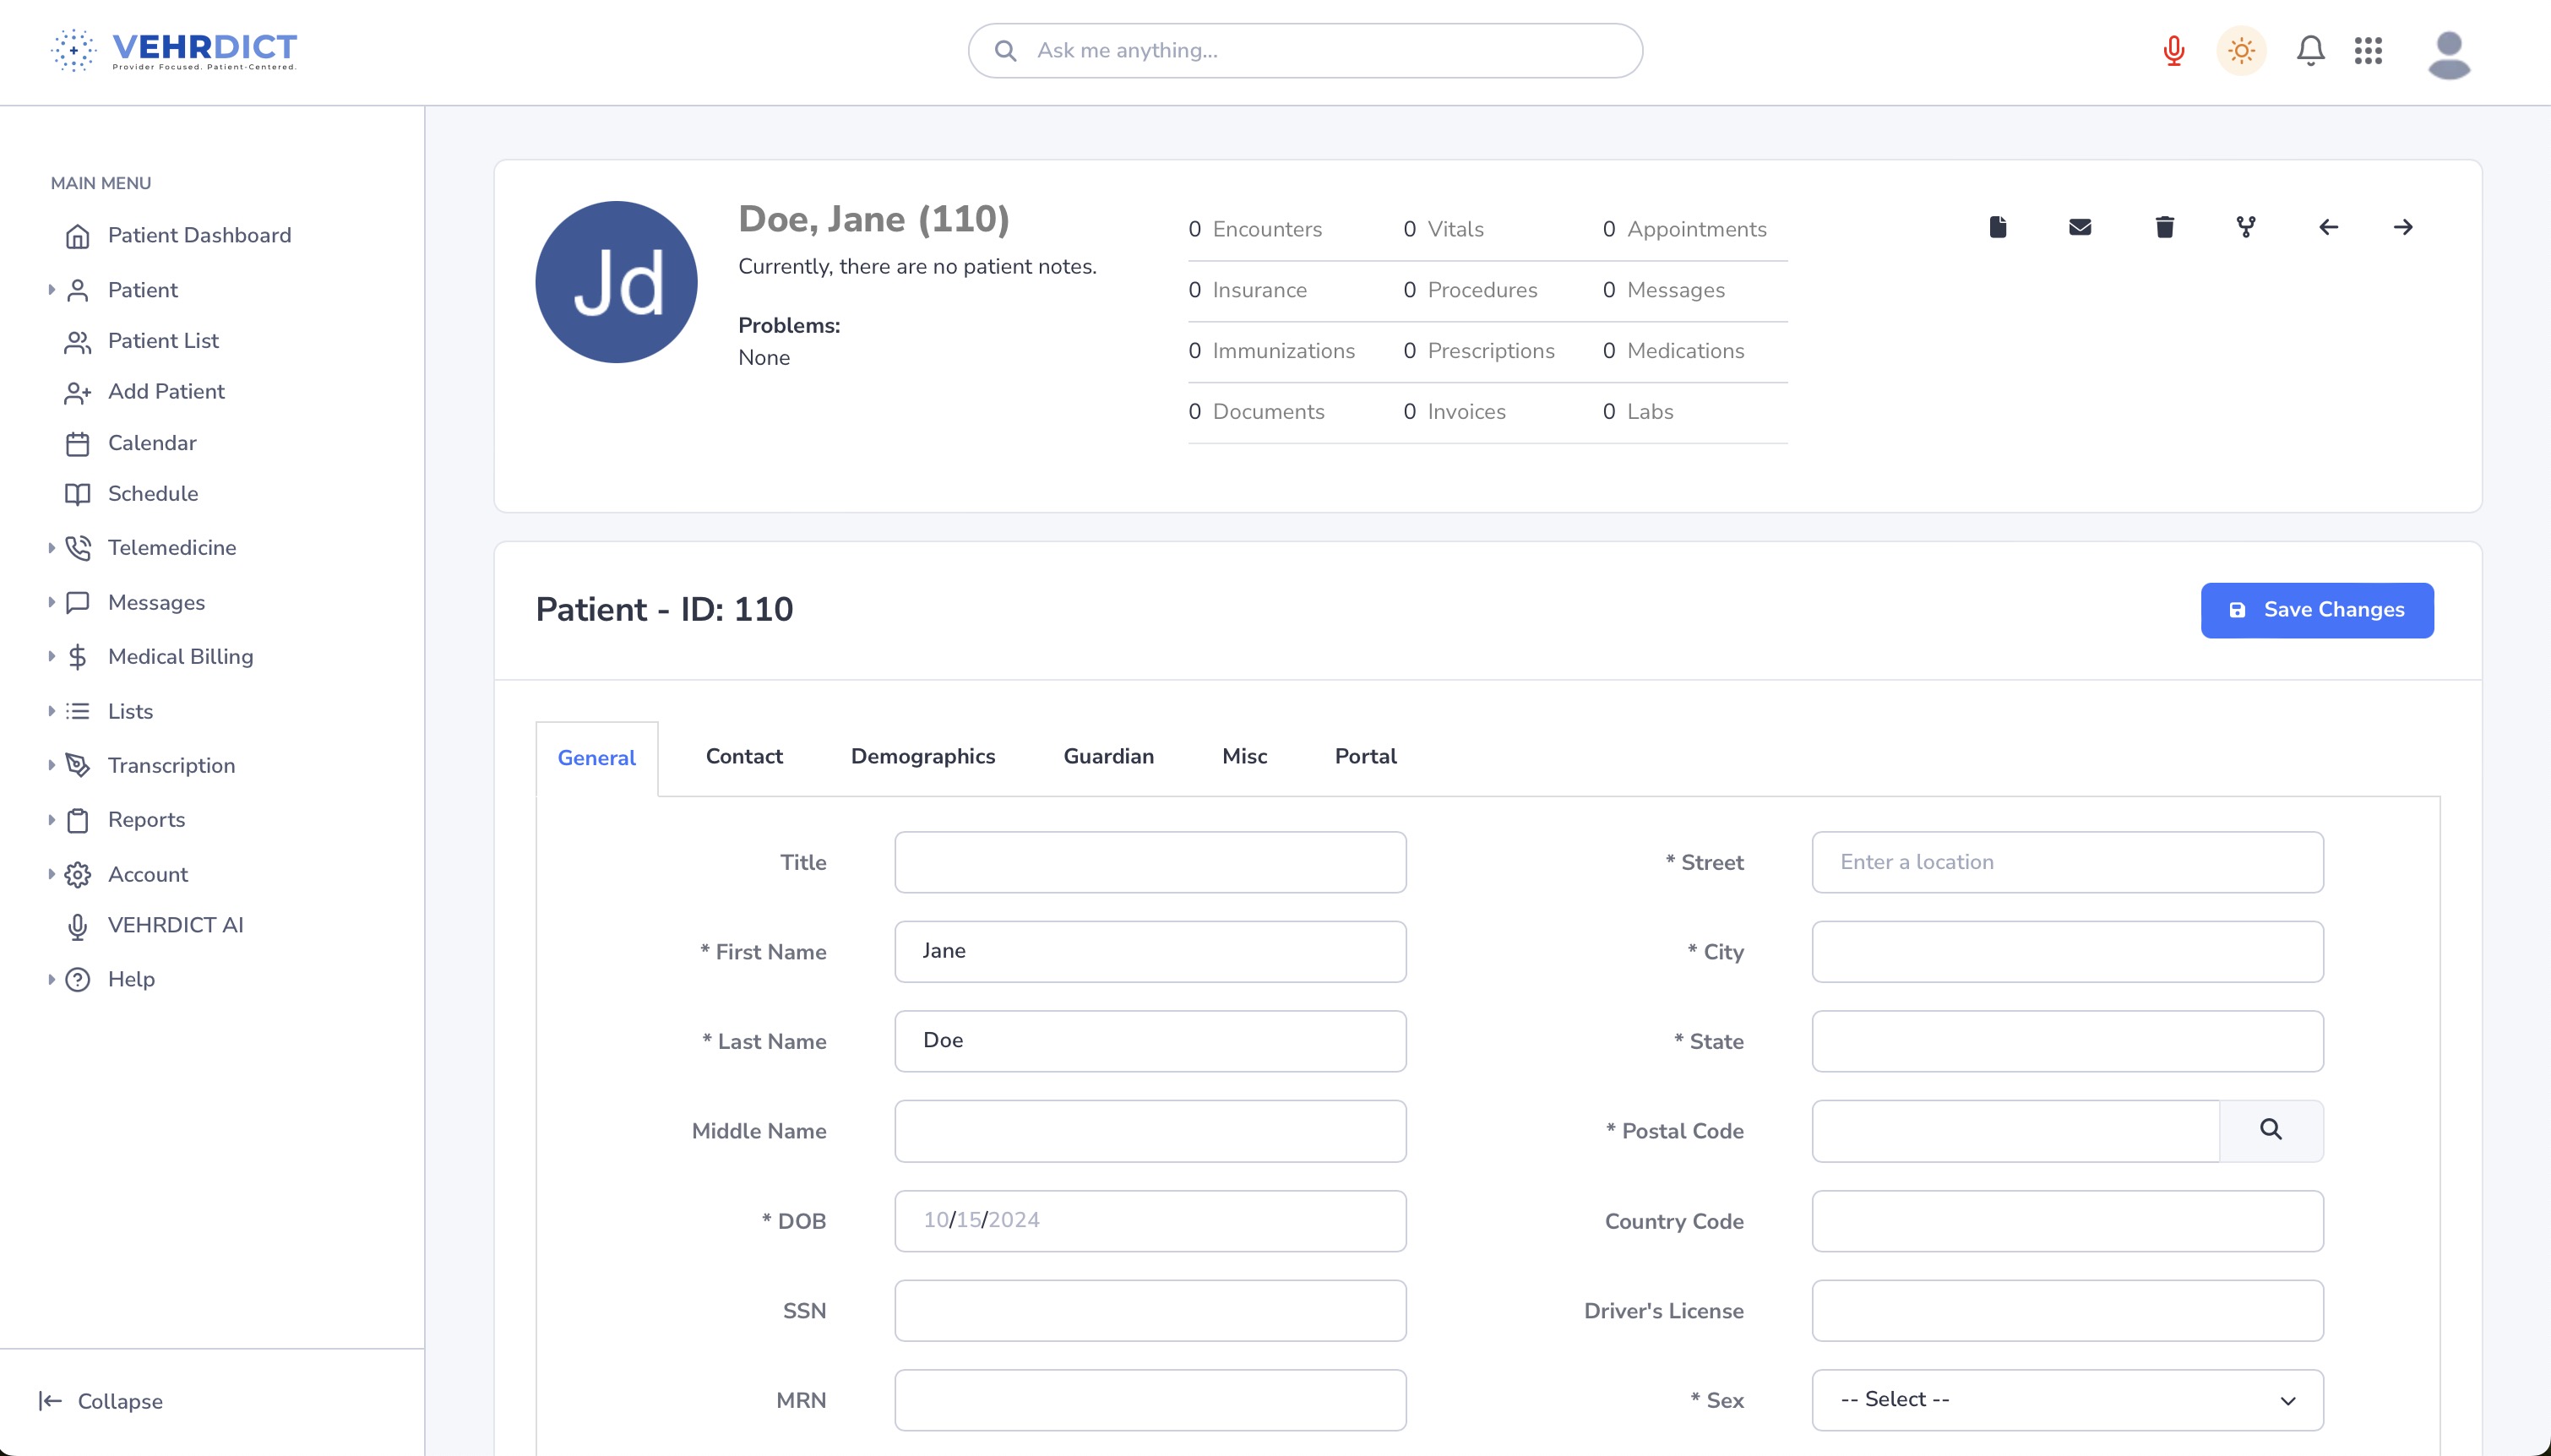
[[File:edit_patient_nx.jpg|800px|'''General Info Tab''' – Foundational patient information and demographics.]] | |||
=== Contact Tab === | === Contact Tab === | ||
| Line 72: | Line 72: | ||
* Additional contact preferences | * Additional contact preferences | ||
[[File:Contacttab.jpg| | |||
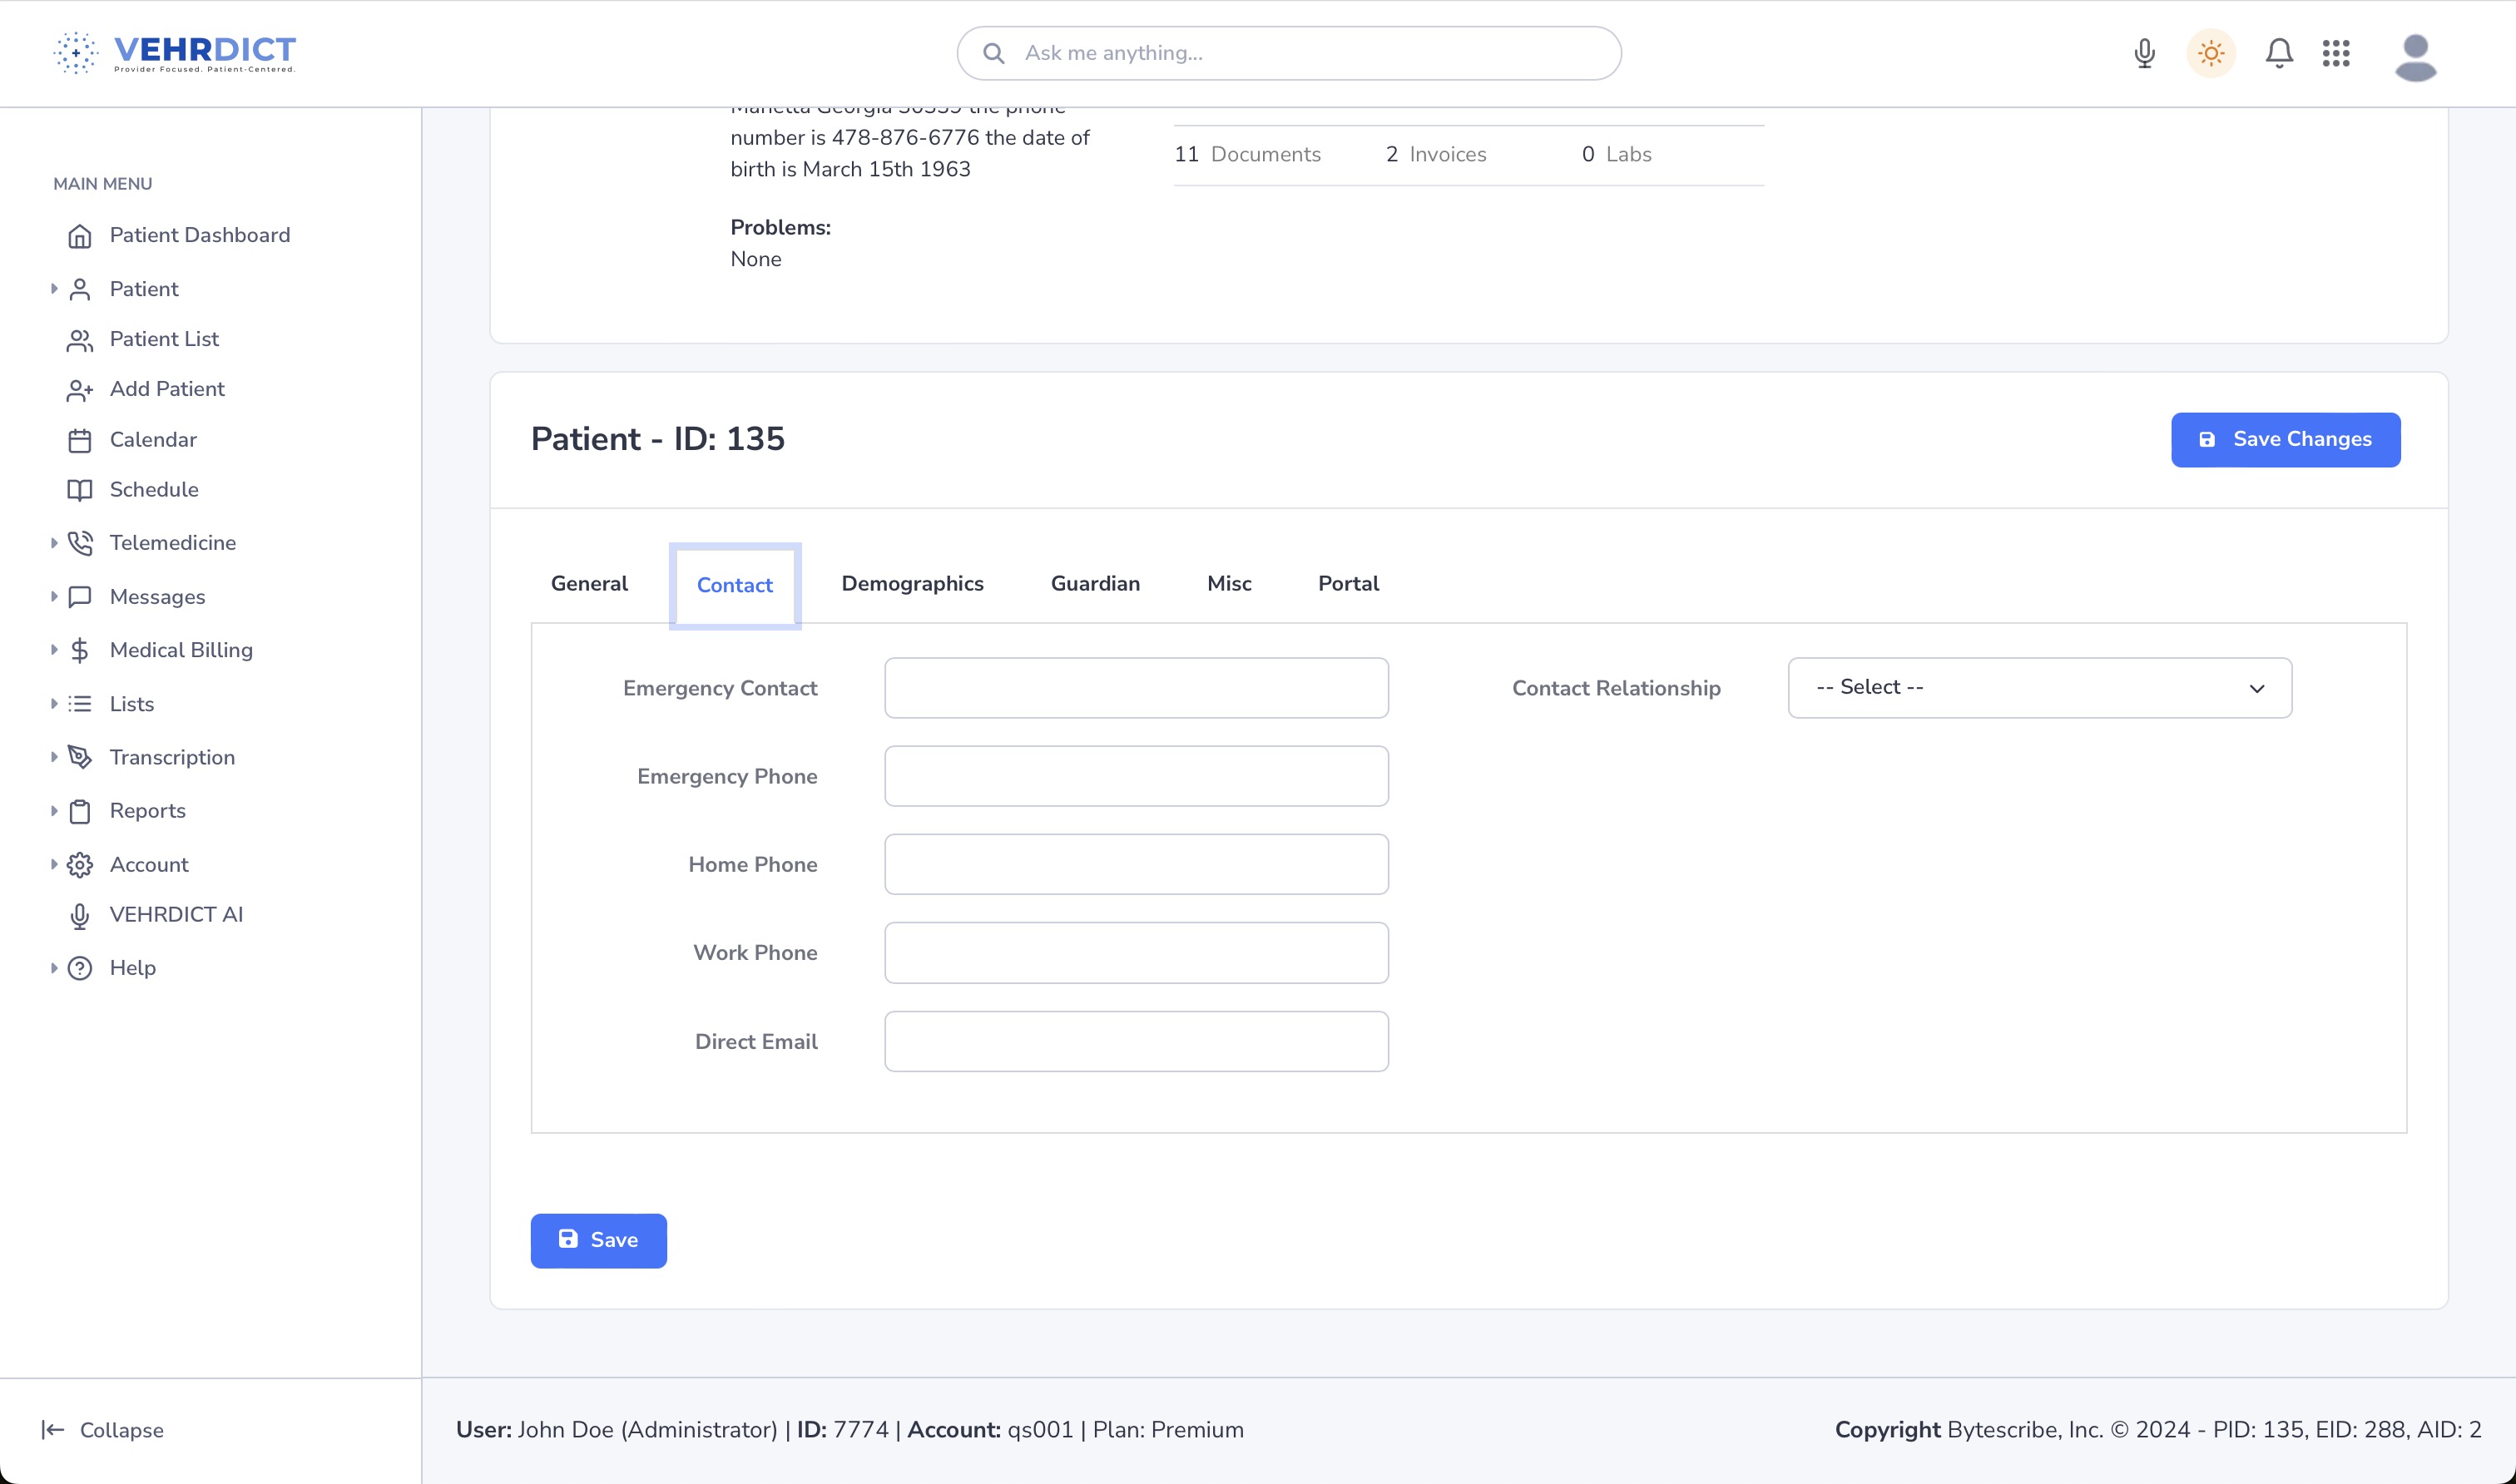
[[File:Contacttab.jpg|800px|'''Emergency Contact Info''' – Ensure a point of contact is recorded.]] | |||
| Line 87: | Line 89: | ||
This information helps personalize care and improve documentation compliance. | This information helps personalize care and improve documentation compliance. | ||
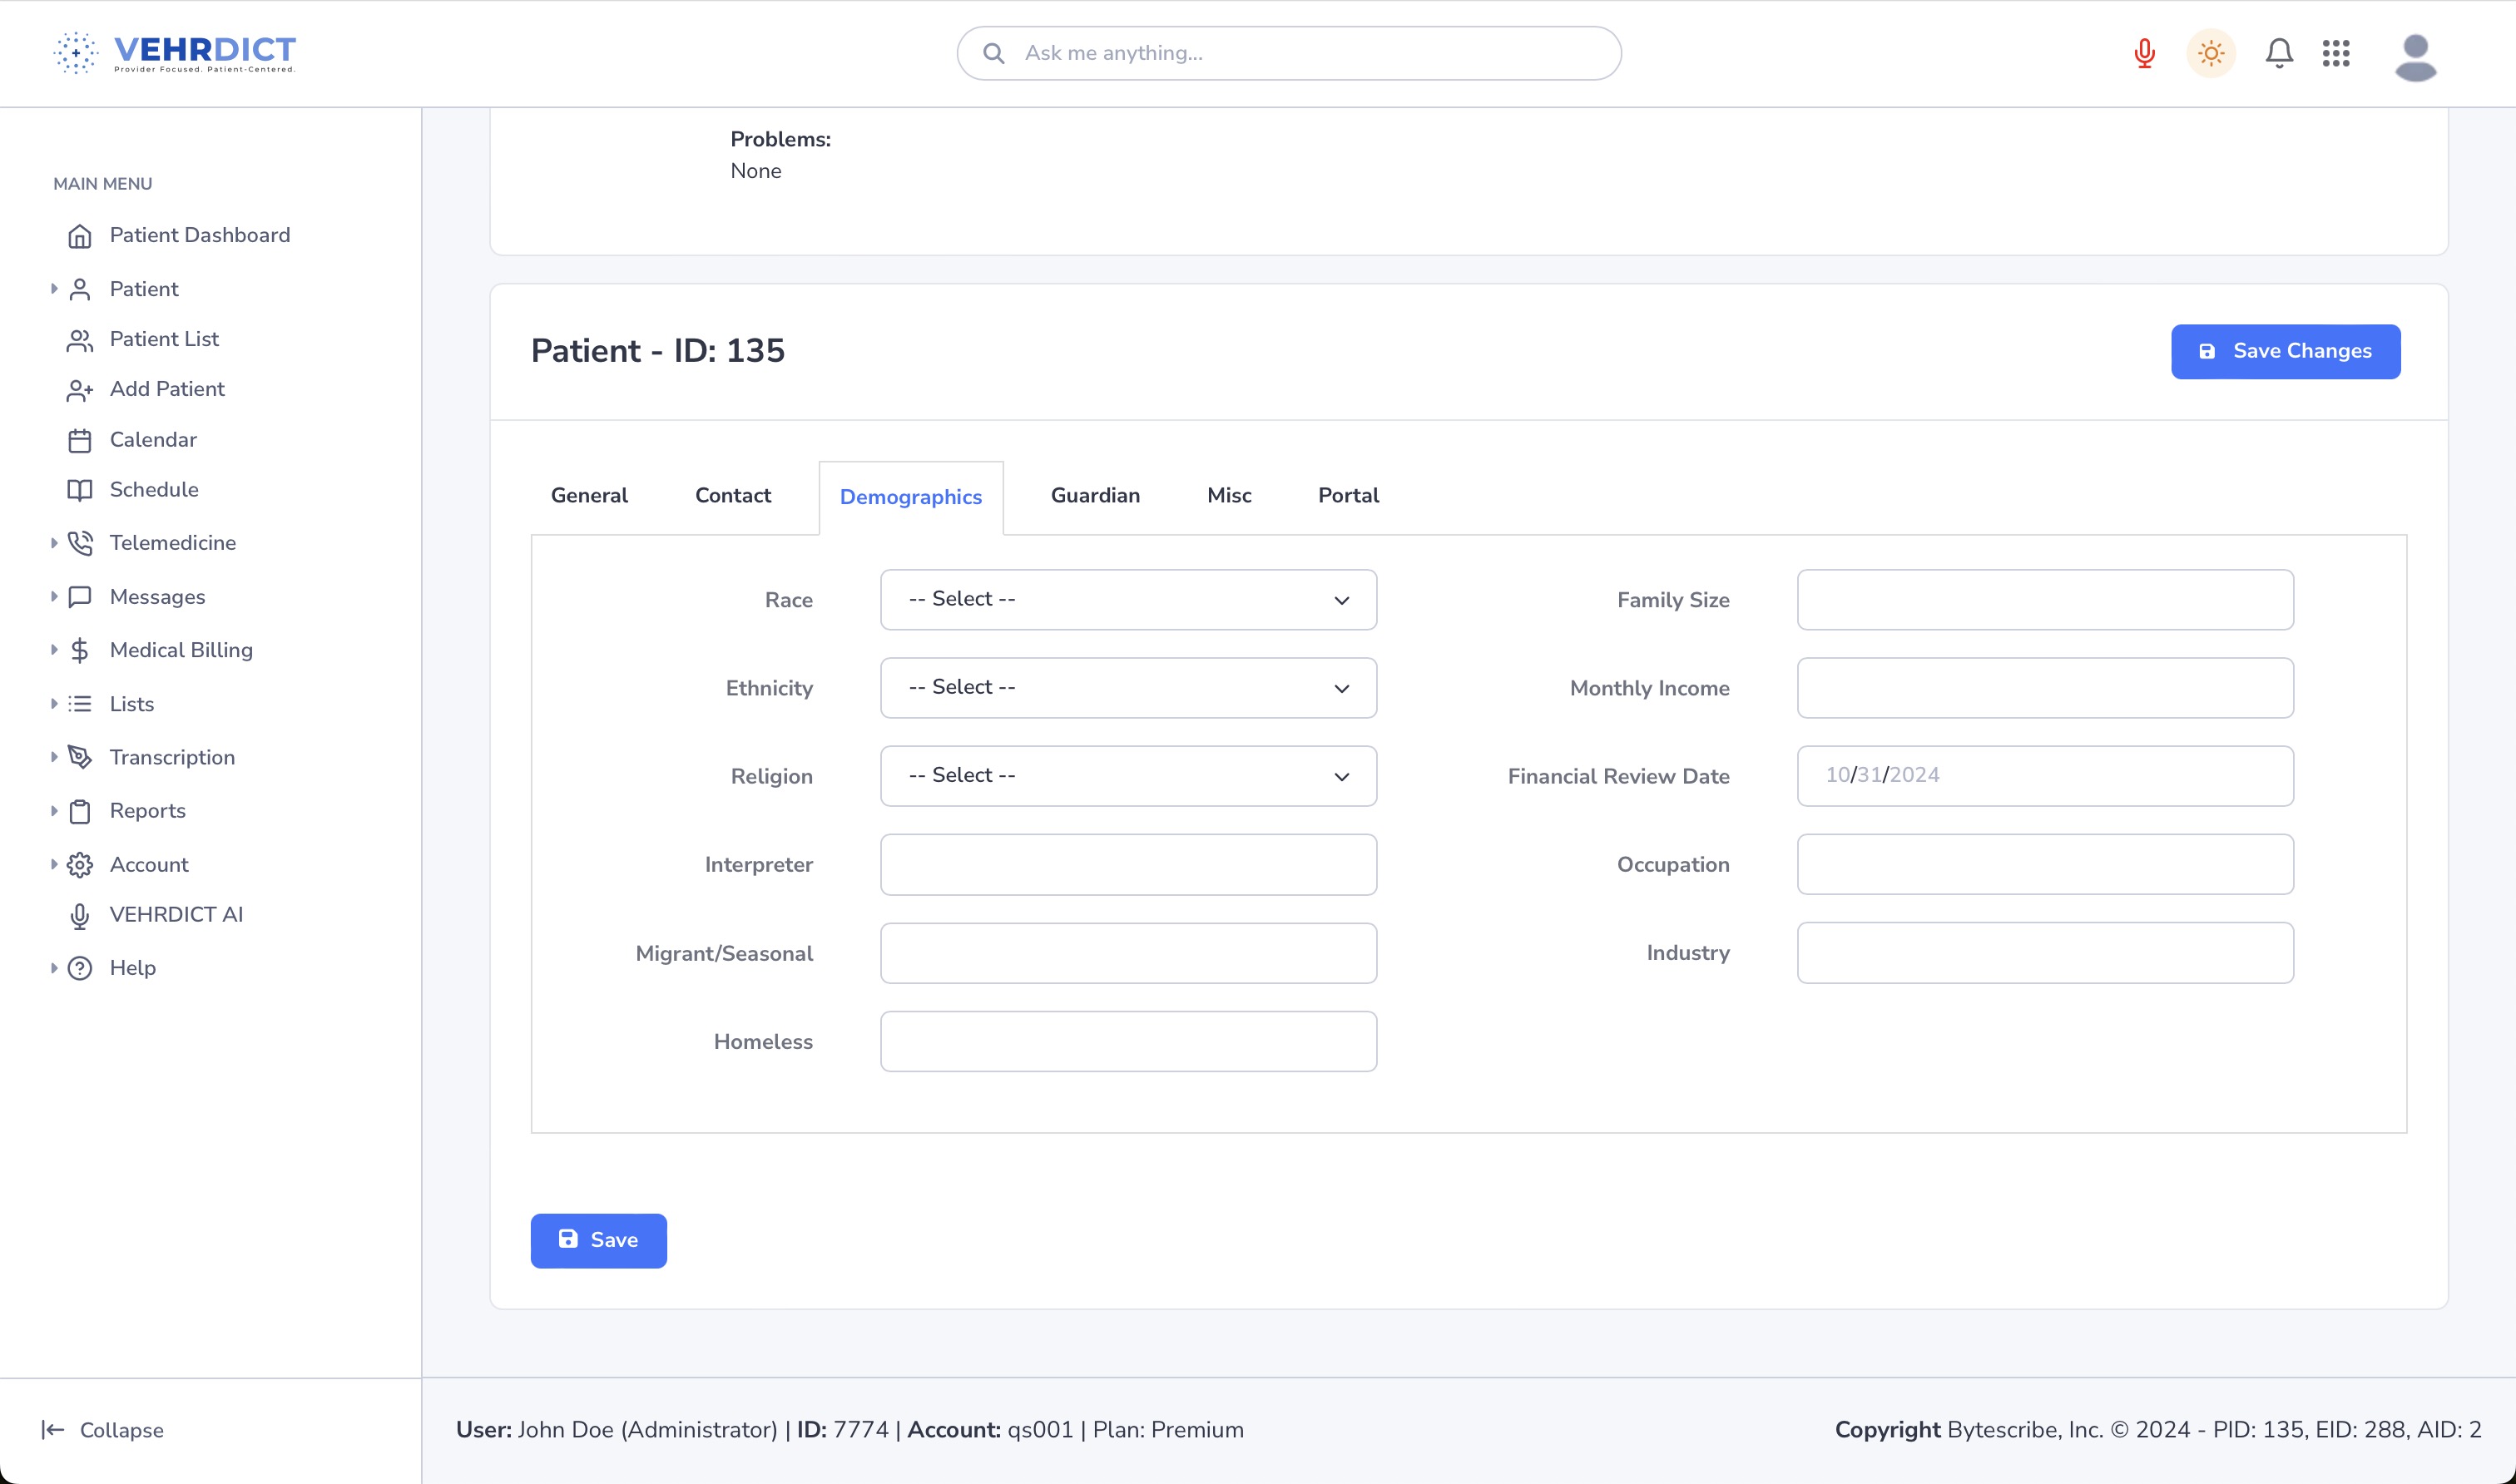
[[File:Demographicstab.jpg|thumb|center|600px|'''Demographics Tab''' – Required for care personalization and reporting.]] | [[File:Demographicstab.jpg|thumb|center|600px|'''Demographics Tab''' – Required for care personalization and reporting.]] | ||
| Line 99: | Line 102: | ||
* Select '''Self''' if the patient is their own guardian | * Select '''Self''' if the patient is their own guardian | ||
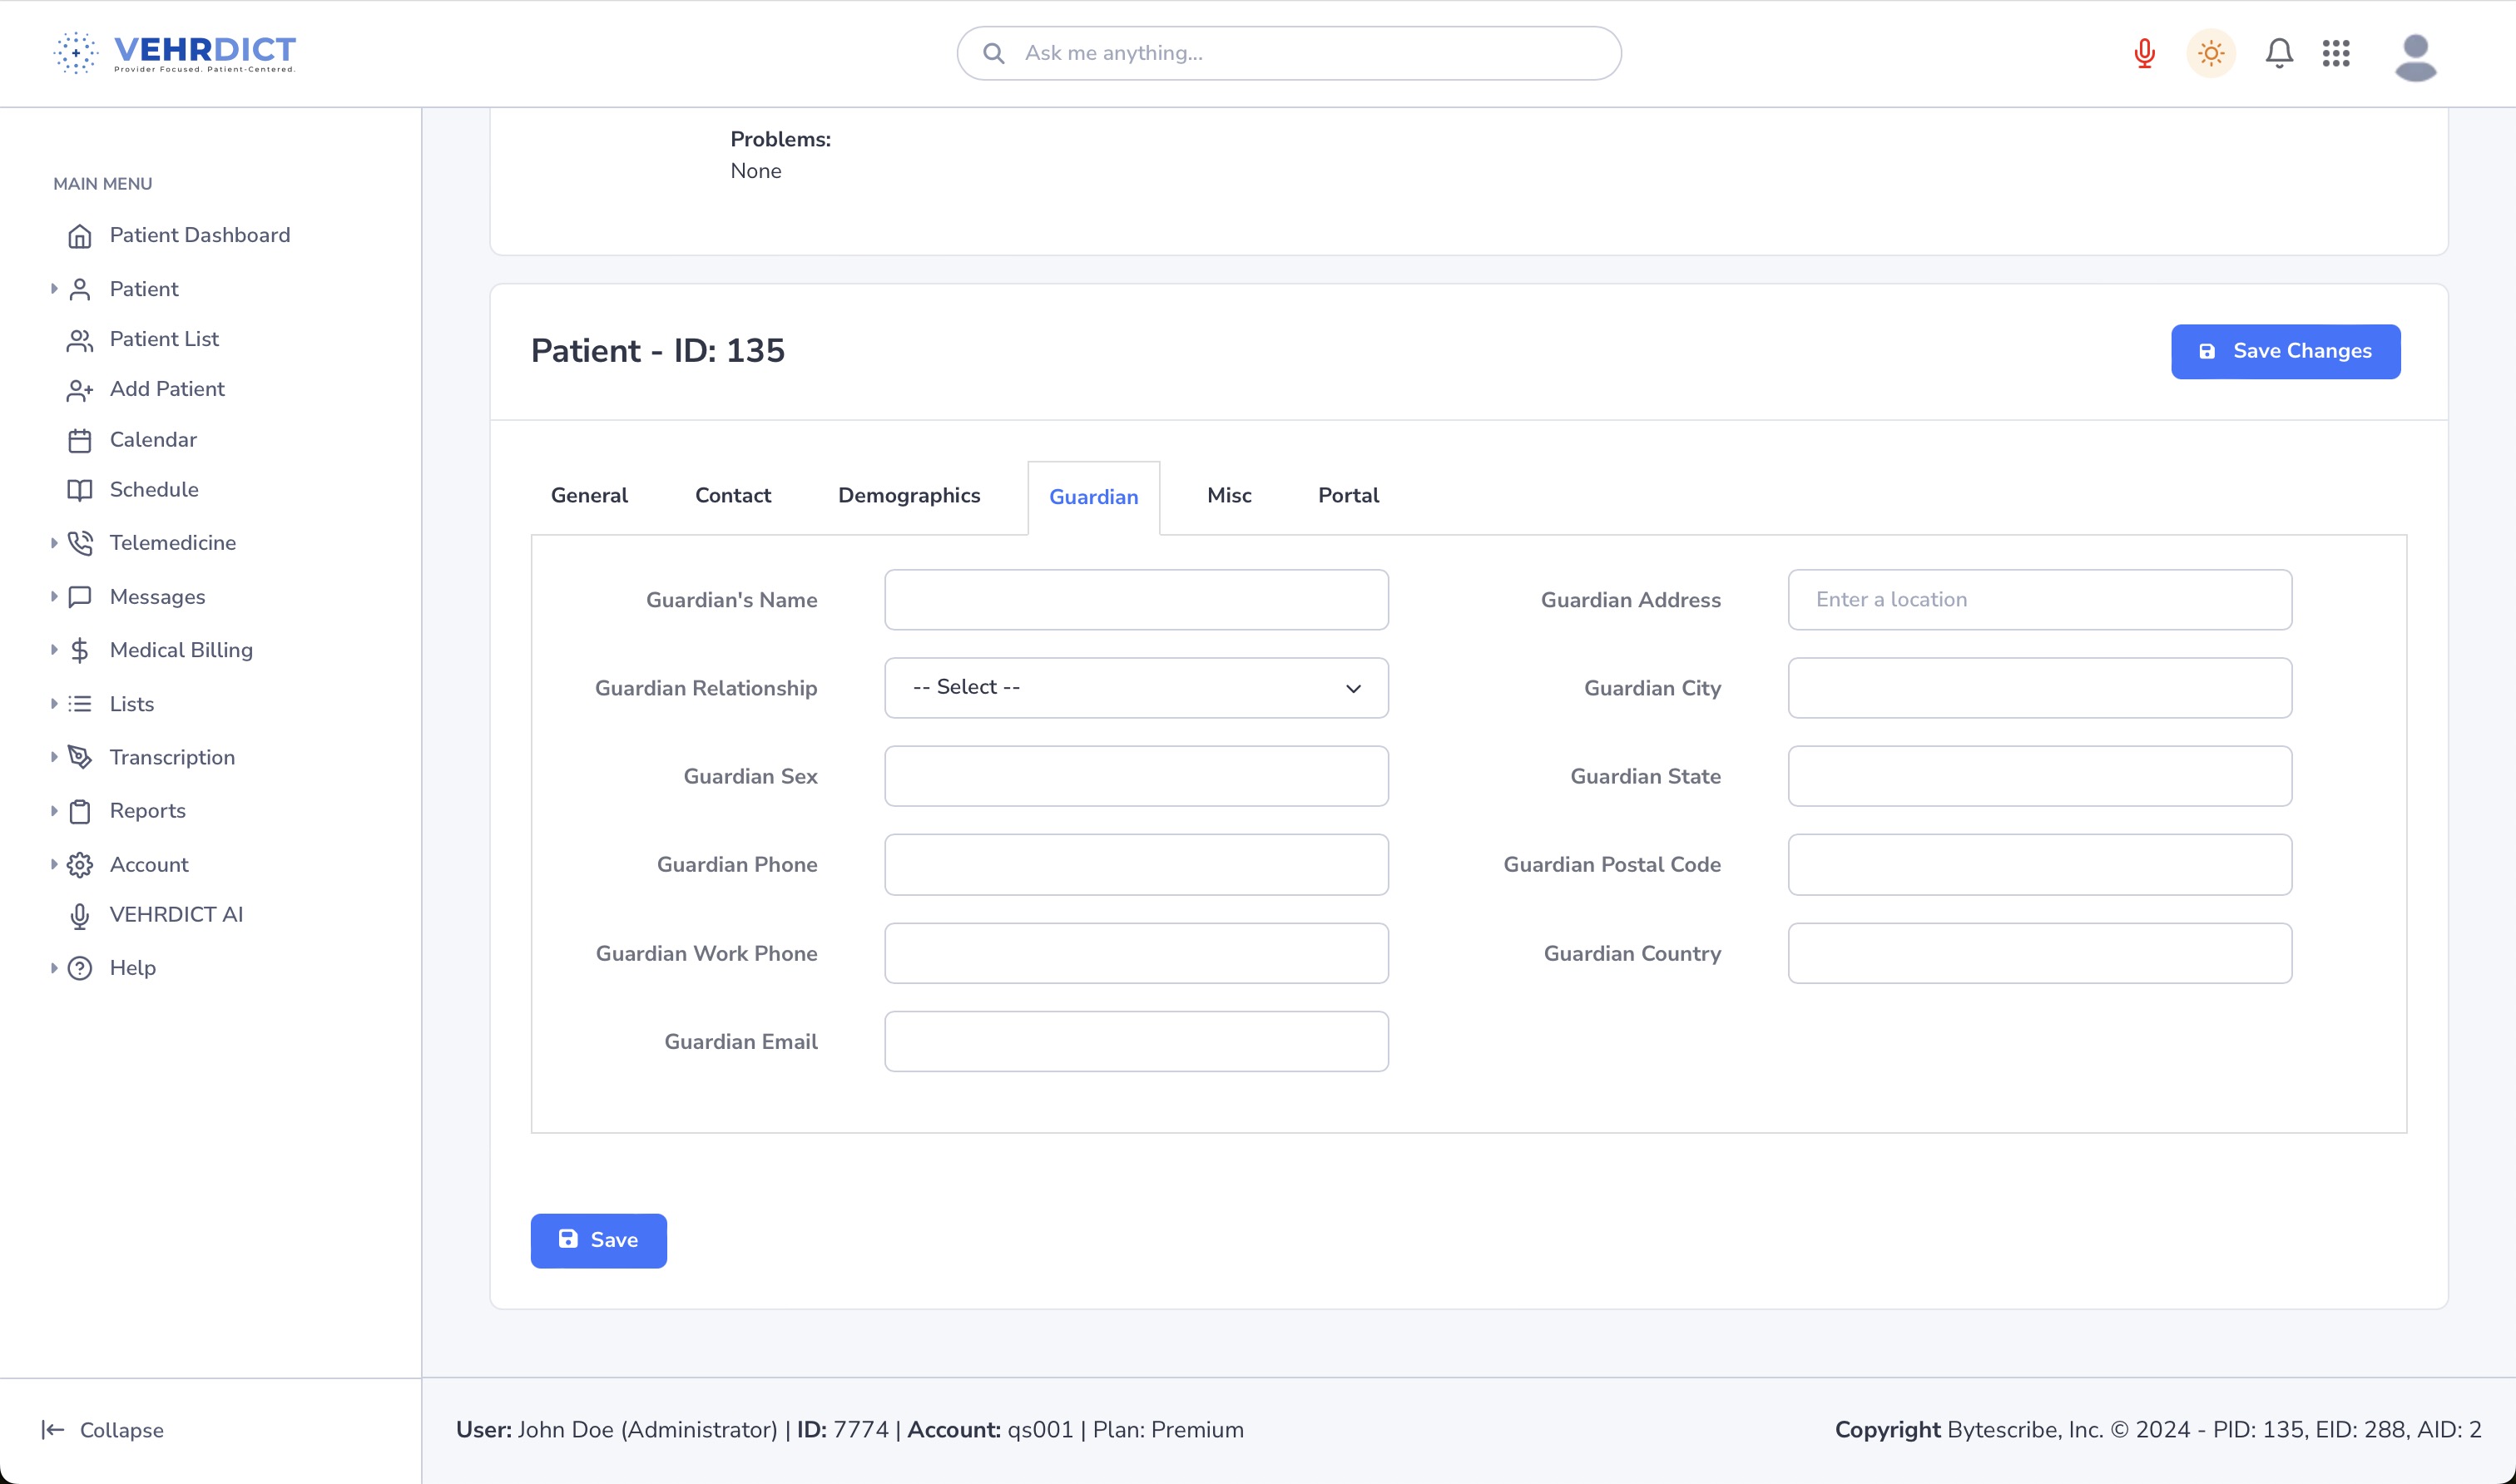
[[File:Guardiantab.jpg|thumb|center|600px|'''Guardian Information''' – Critical for dependent or pediatric records.]] | [[File:Guardiantab.jpg|thumb|center|600px|'''Guardian Information''' – Critical for dependent or pediatric records.]] | ||
| Line 115: | Line 118: | ||
* Notes and tags | * Notes and tags | ||
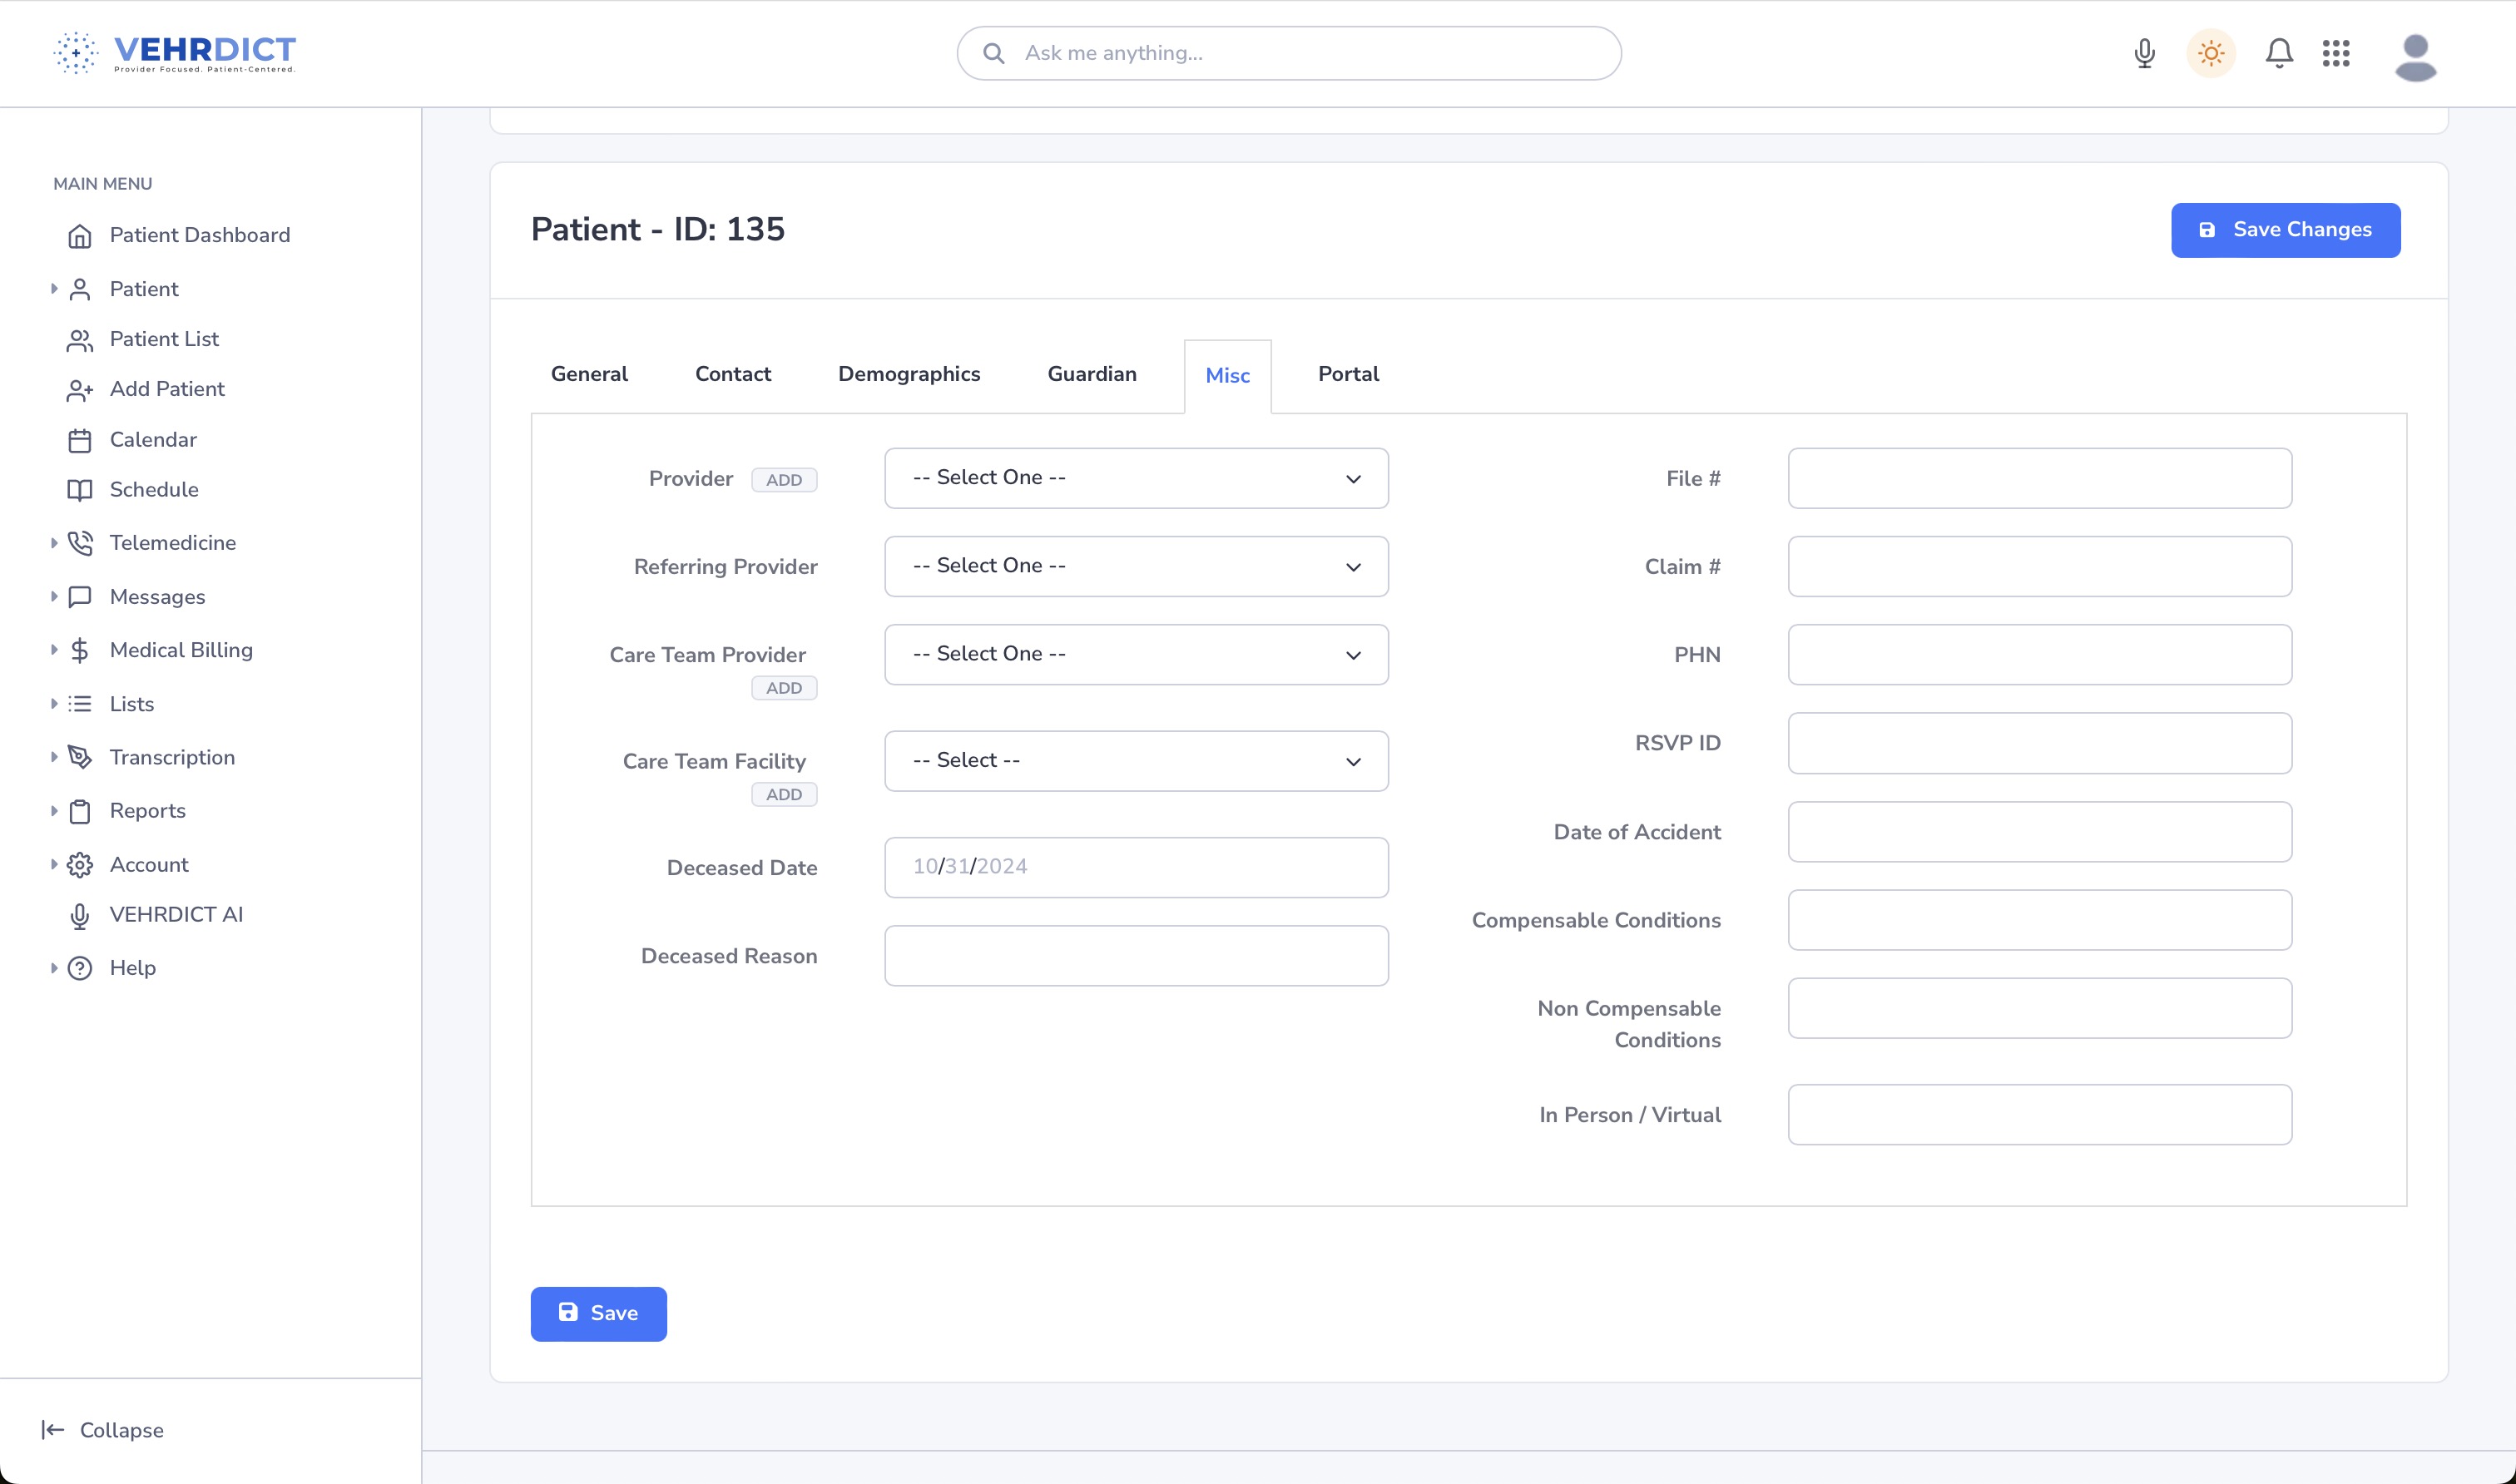
[[File:Misctab.jpg|thumb|center|600px|'''Misc Tab''' – Upload photo, assign provider, or record status changes.]] | [[File:Misctab.jpg|thumb|center|600px|'''Misc Tab''' – Upload photo, assign provider, or record status changes.]] | ||
| Line 129: | Line 132: | ||
* View current portal access status | * View current portal access status | ||
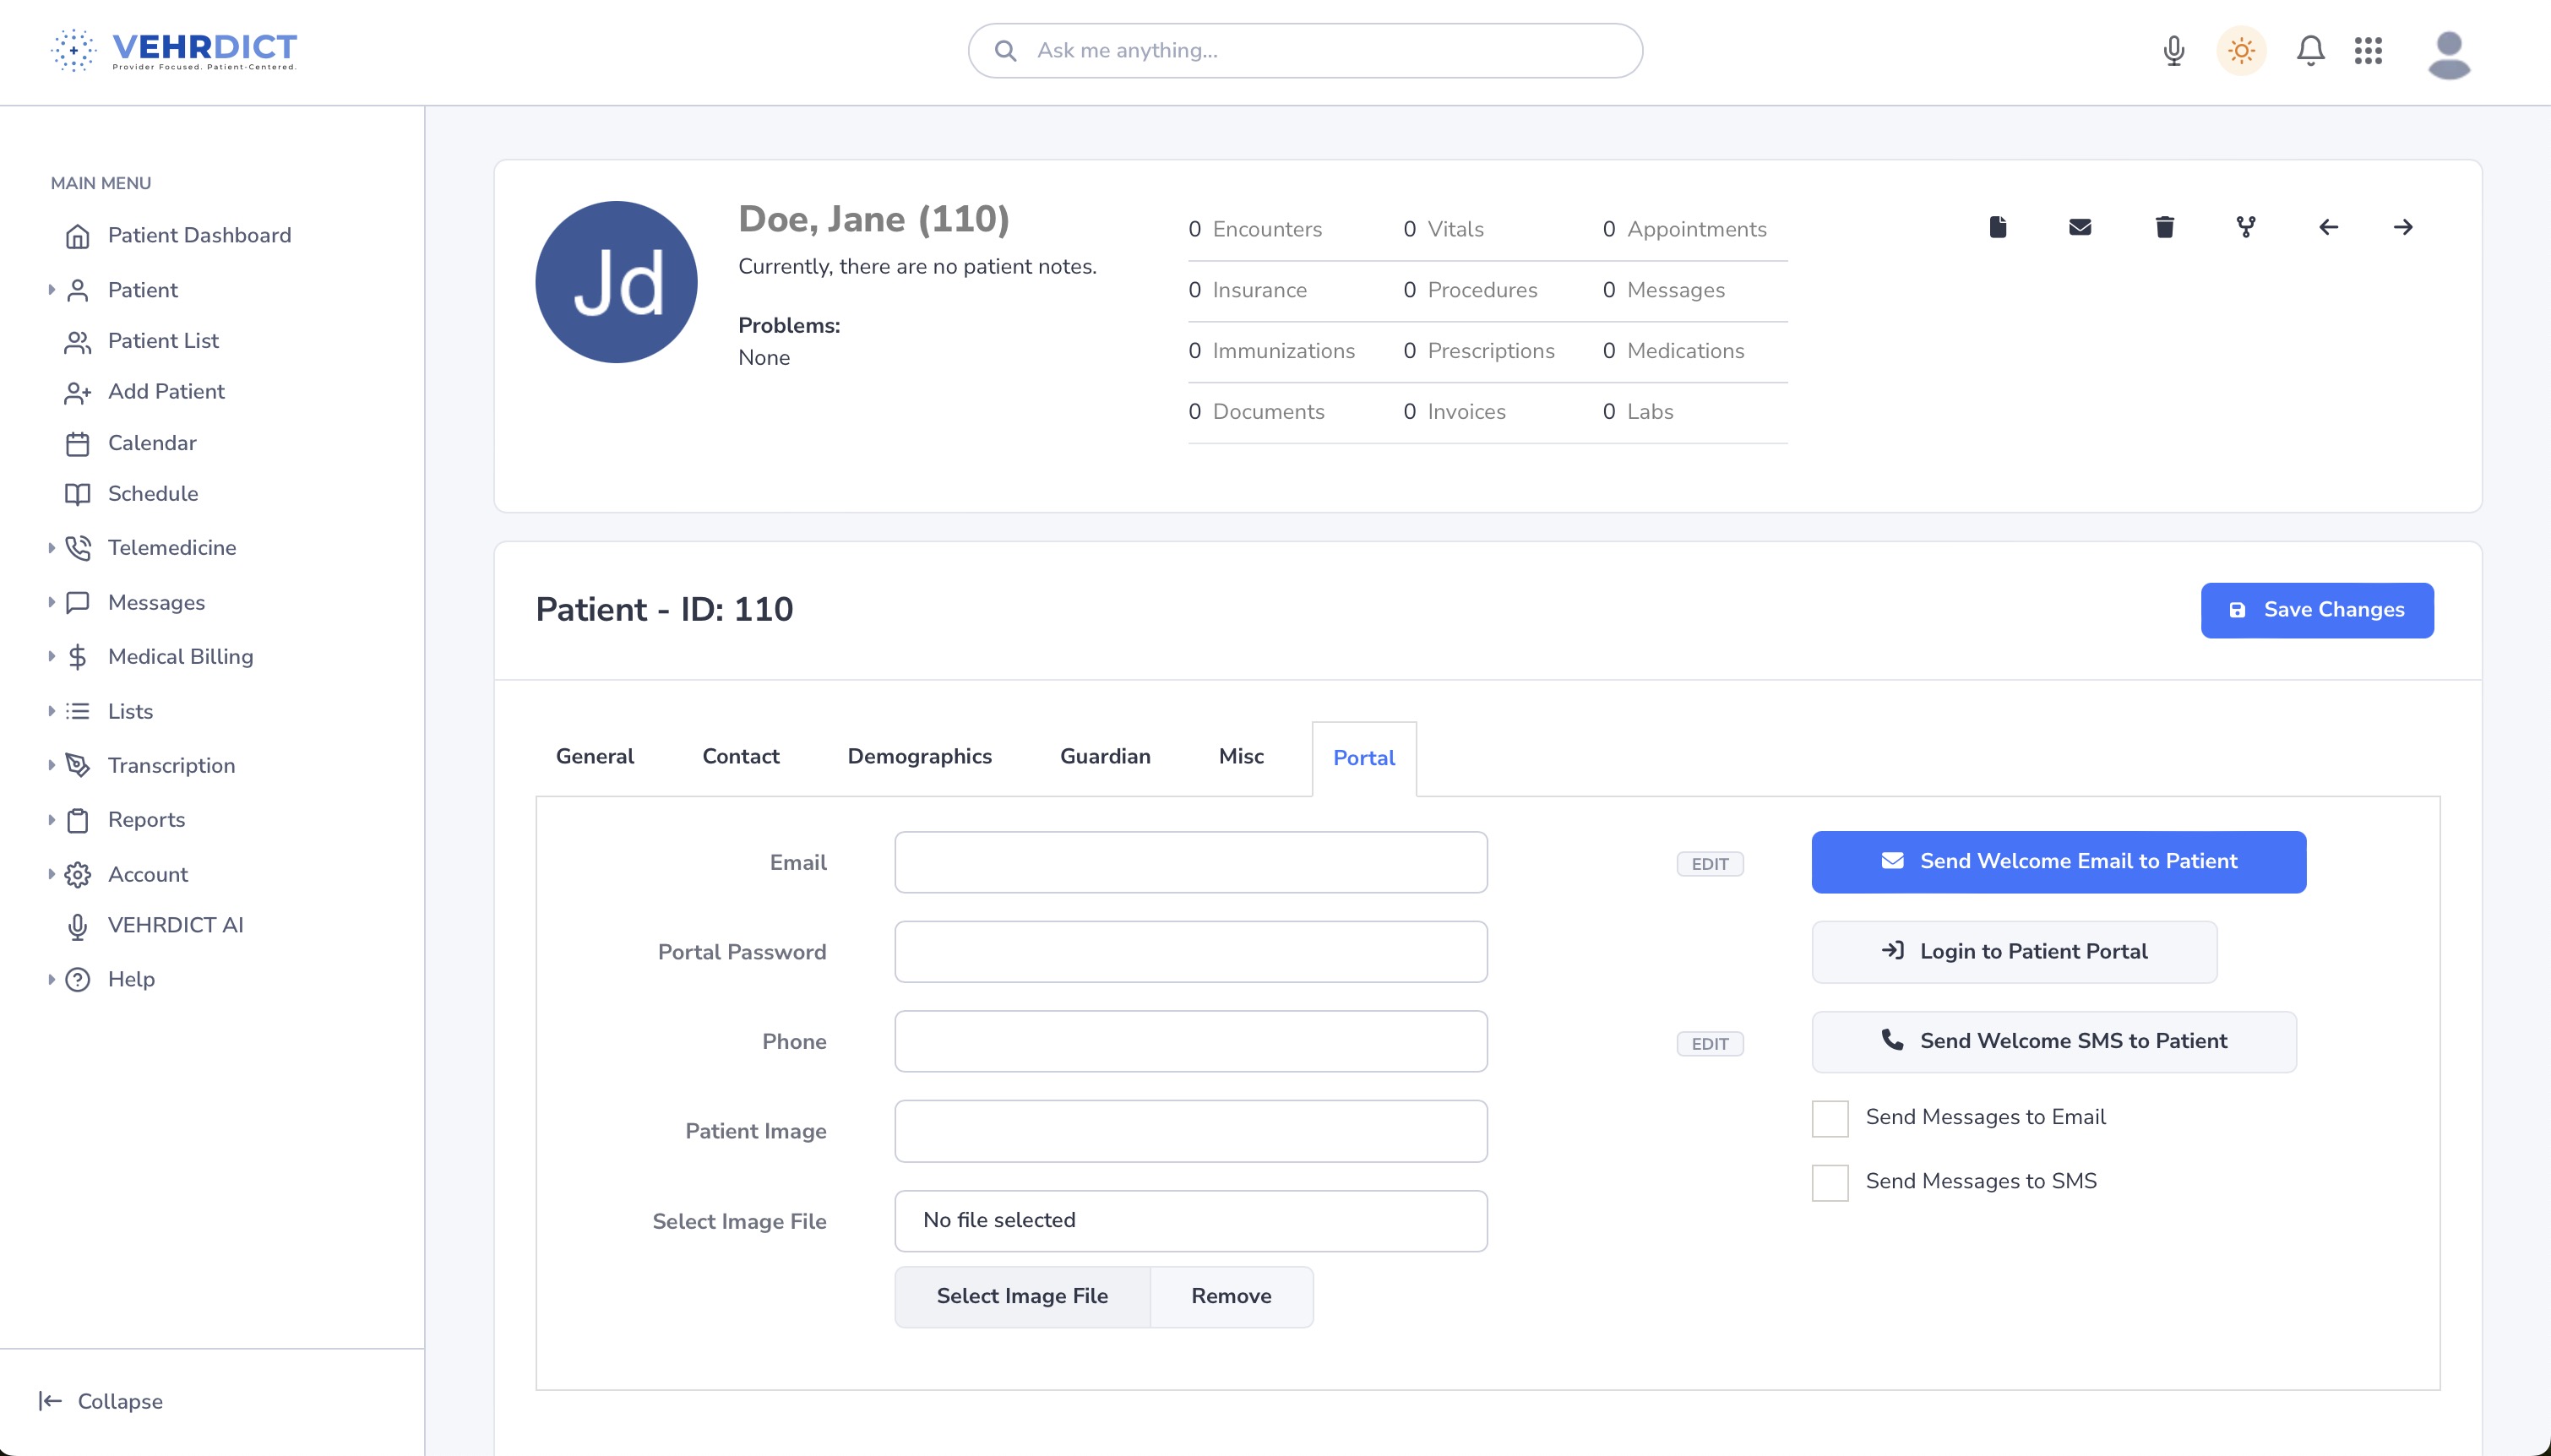
[[File:patient_portal_tab_nx.jpg|thumb|center|600px|'''Patient Portal Tab''' – Manage access credentials and welcome messages.]] | [[File:patient_portal_tab_nx.jpg|thumb|center|600px|'''Patient Portal Tab''' – Manage access credentials and welcome messages.]] | ||
Once all required fields are filled and tabs completed, the patient record becomes active in the system and accessible for appointments, documentation, billing, and portal communication. | Once all required fields are filled and tabs completed, the patient record becomes active in the system and accessible for appointments, documentation, billing, and portal communication. | ||
Revision as of 14:26, 4 July 2025
The electronic healthcare record process begins by entering patient data. VEHRDICT provides both voice-driven AI entry and manual form-based entry to make this process fast, intuitive, and accurate.
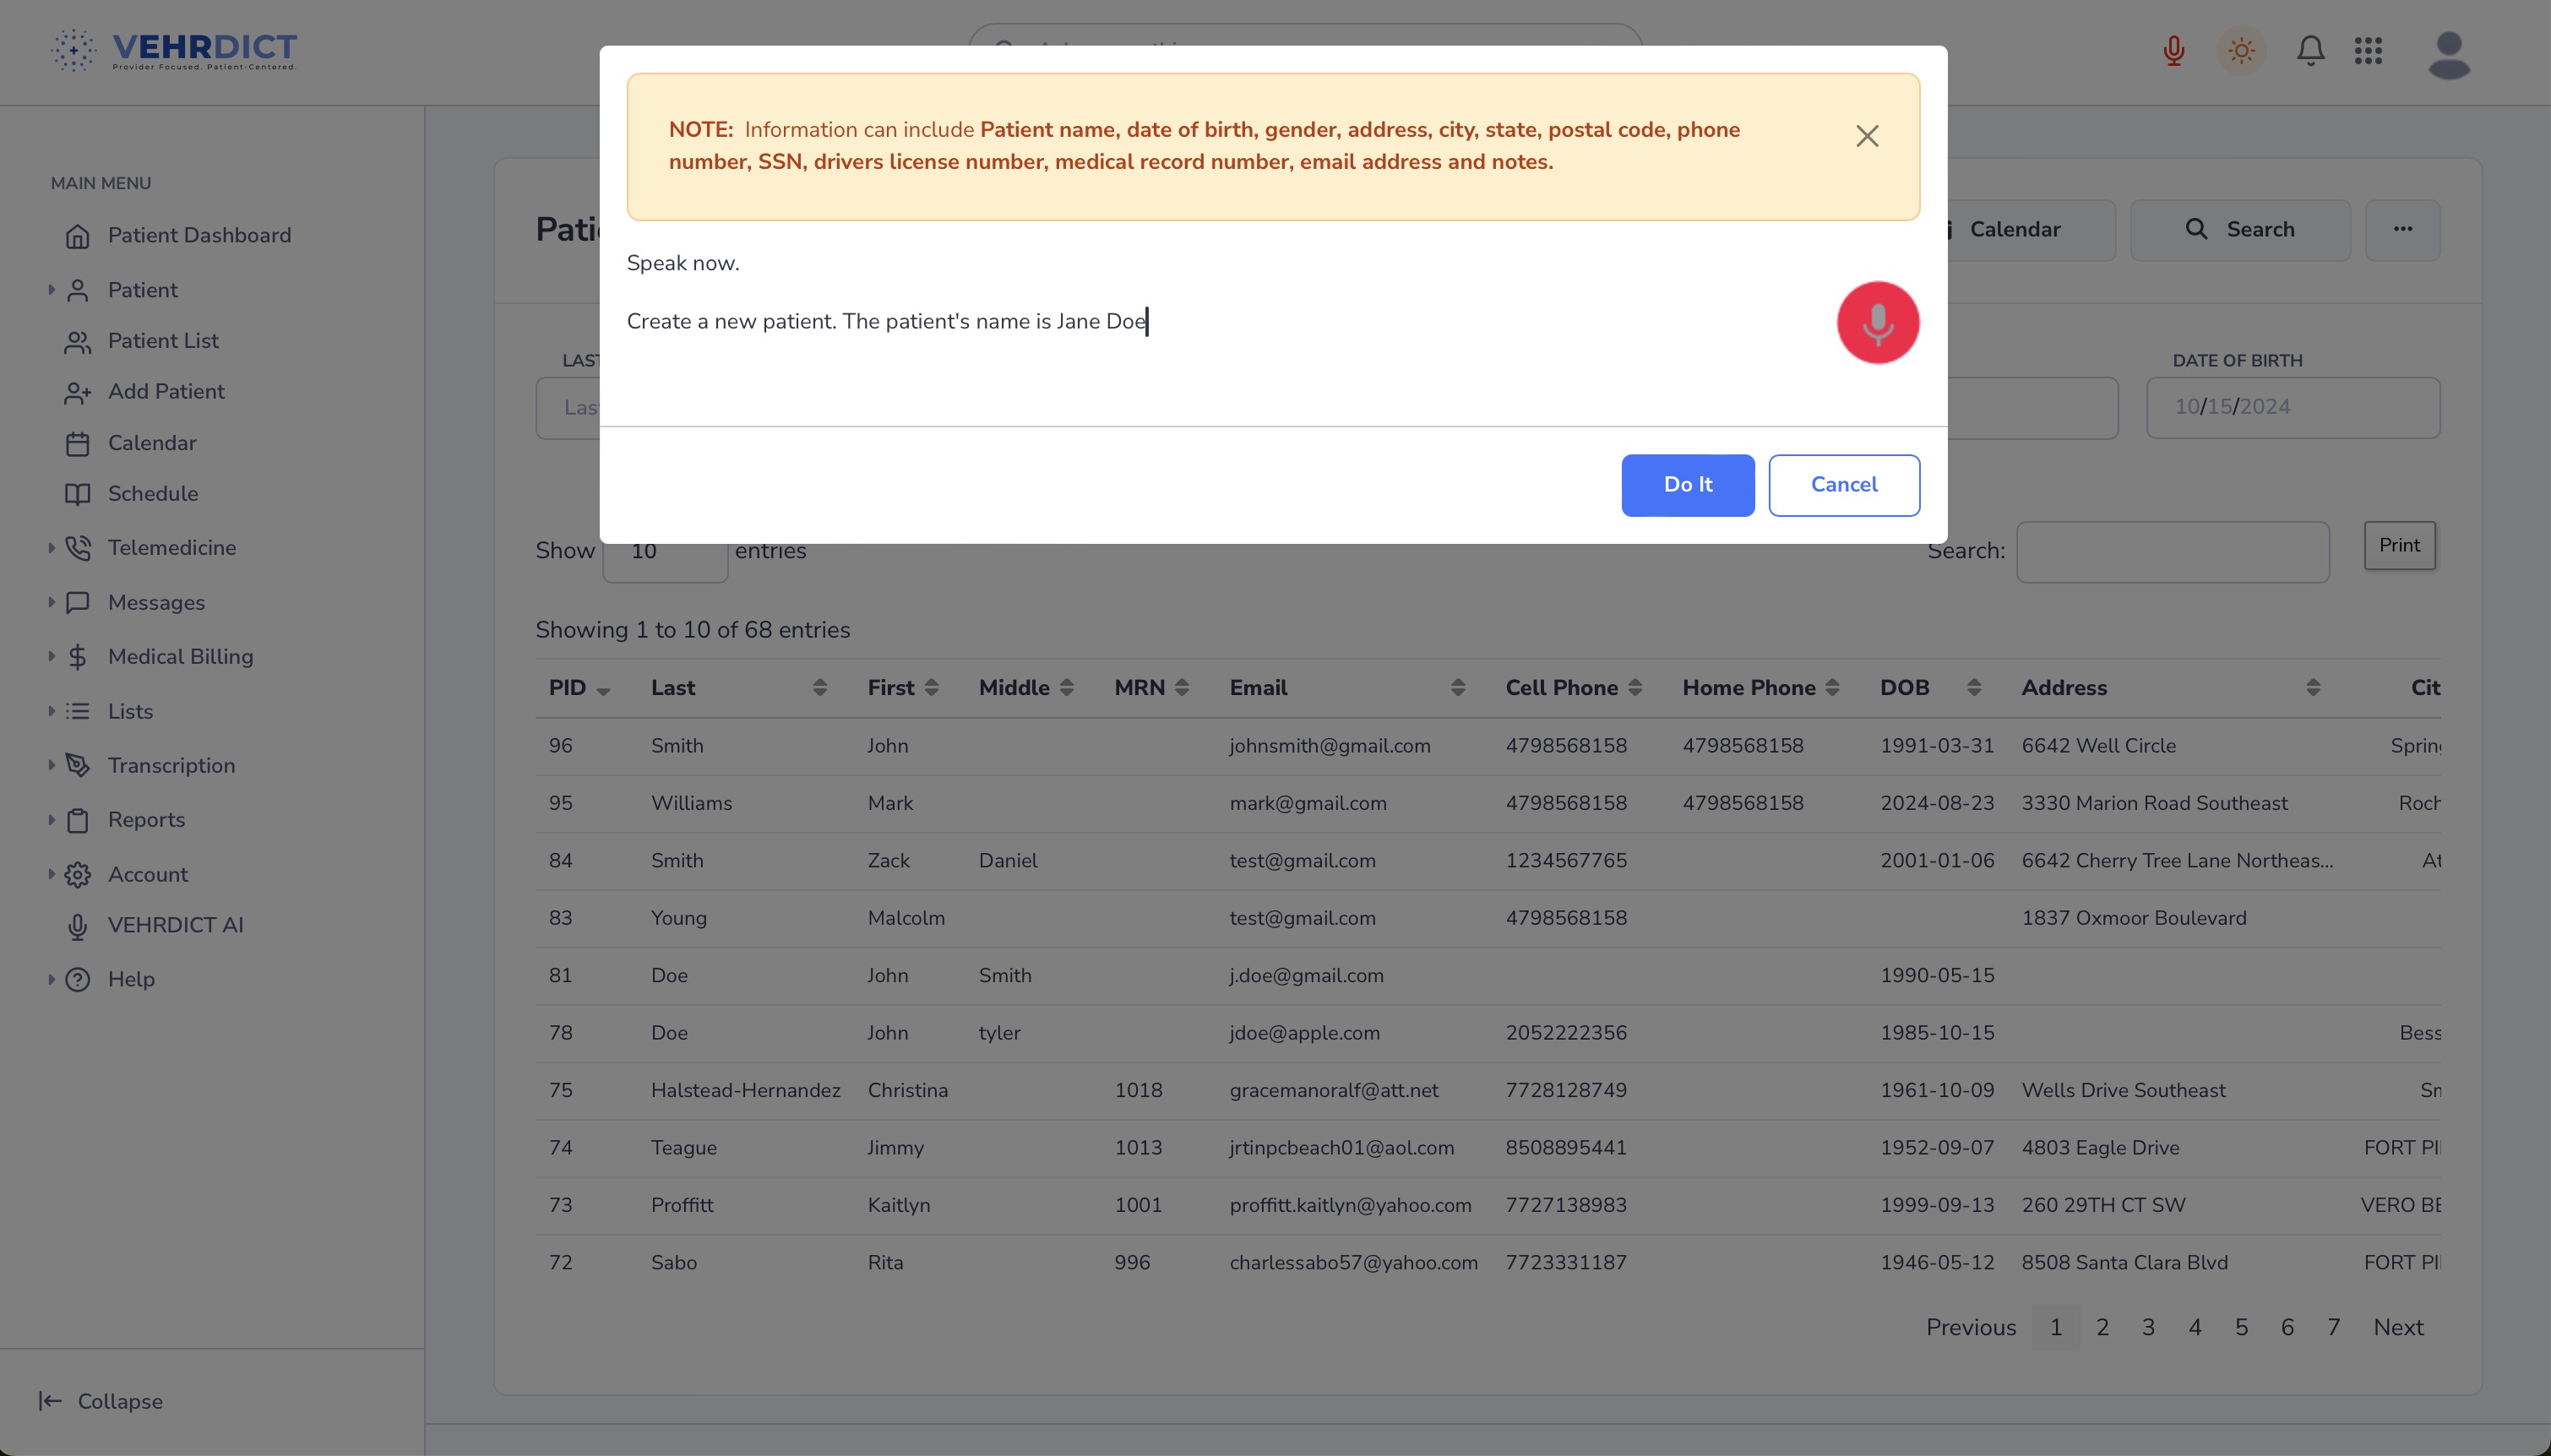
Adding a Patient Using AI
To create a new patient record using voice commands:
- Click the microphone icon at the top toolbar.
- Say: "Create a new patient record for..." and begin speaking naturally.
* Example: “Address is 123 Main Street”, “Phone number is 404-555-2323”, “Email is emily.j@example.com”
- When finished, say: "Do it" or click the Do it button to create the record.
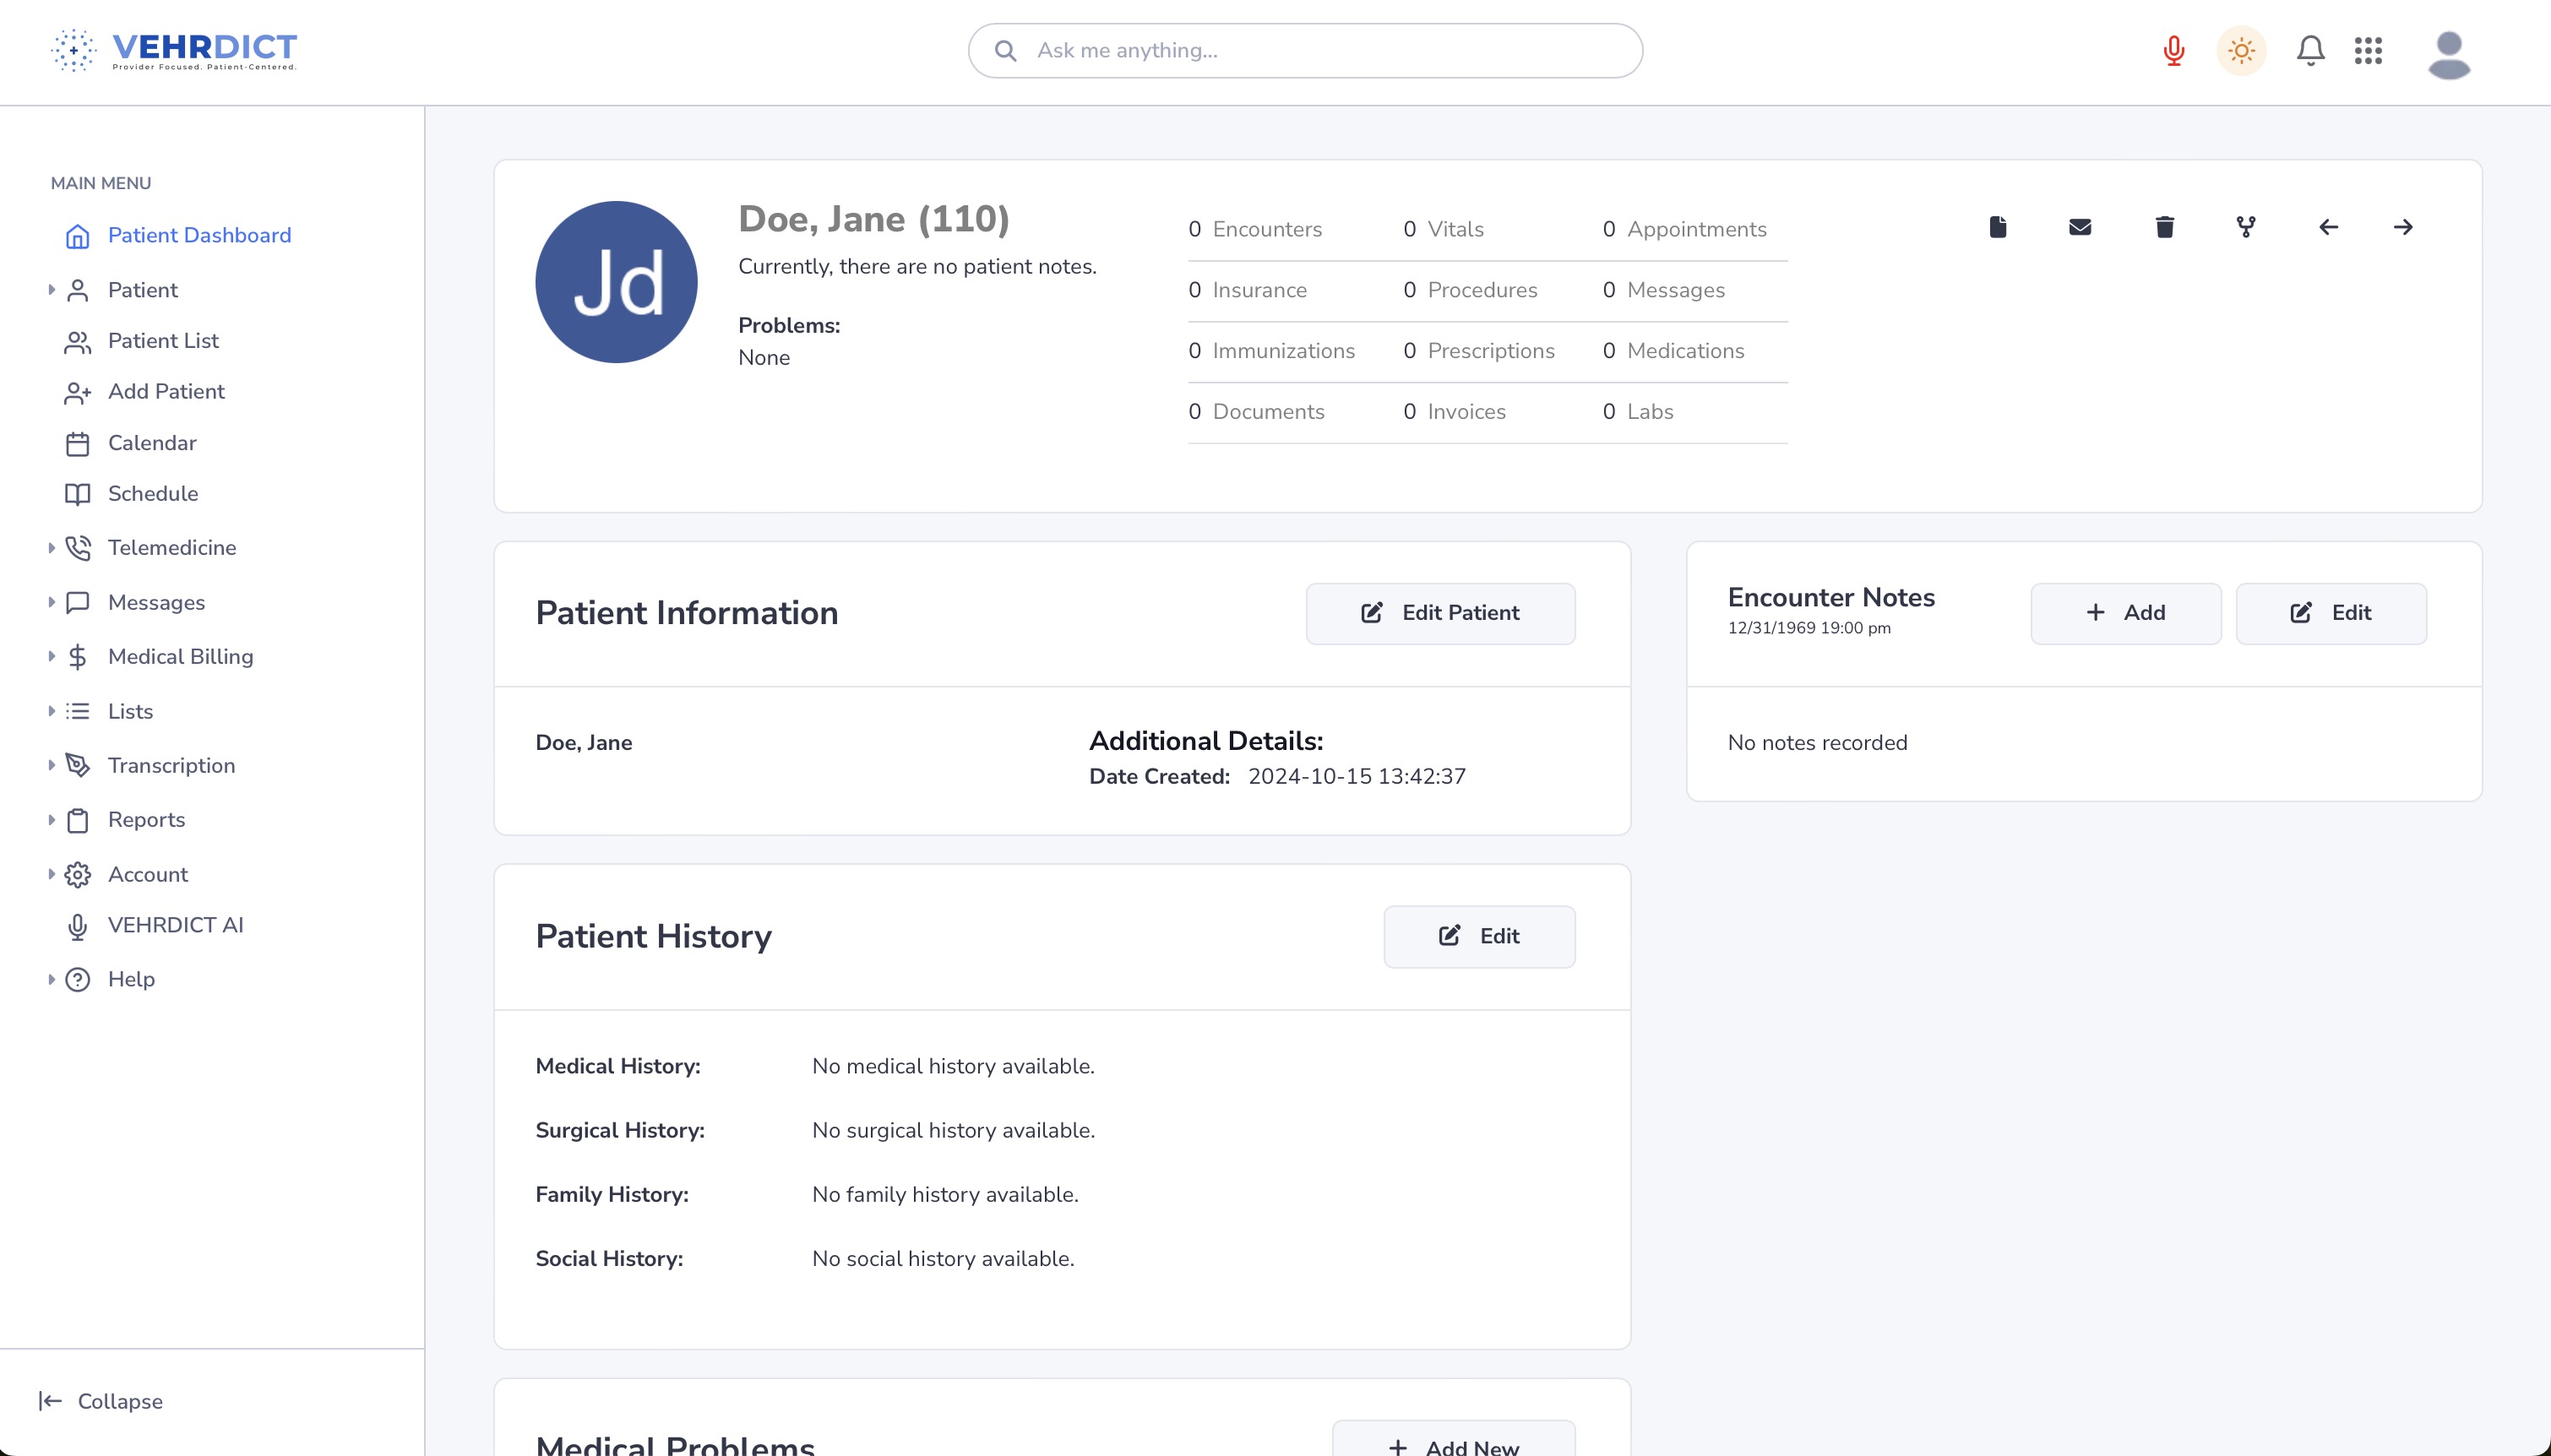
Once the record is created:
- Review the auto-filled fields.
- Click the Edit Patient button to modify or complete missing information.
Adding a Patient Manually
To add a patient manually:
- Navigate to the main menu.
- Click Add Patient.
- Complete each section across the following tabs:
  * General
  * Contact
  * Demographics
  * Guardian
  * Misc
  * Portal
Each tab captures specific data essential for a complete patient profile.
General Tab
The General tab captures:
- Full name
- Date of birth
- SSN
- Gender
- Basic identity information
Contact Tab
The Contact tab includes:
- Emergency contact name and relationship
- Phone numbers and email
- Additional contact preferences
Demographics Tab
Here, you'll record:
- Race
- Ethnicity
- Religion
- Language preferences
This information helps personalize care and improve documentation compliance.
Guardian Tab
Use this section for minor patients or those with appointed guardians.
- Enter guardian name and relationship
- Select Self if the patient is their own guardian
Misc Tab
This flexible tab allows you to:
- Upload a photo
- Add provider assignments
- Record sensitive status info such as:
 * Deceased status
 * Notes and tags
Portal Tab
Here you enable and manage patient portal access:
- Set up login credentials
- Send a welcome email
- View current portal access status
Once all required fields are filled and tabs completed, the patient record becomes active in the system and accessible for appointments, documentation, billing, and portal communication.
