Electronic Signature Process
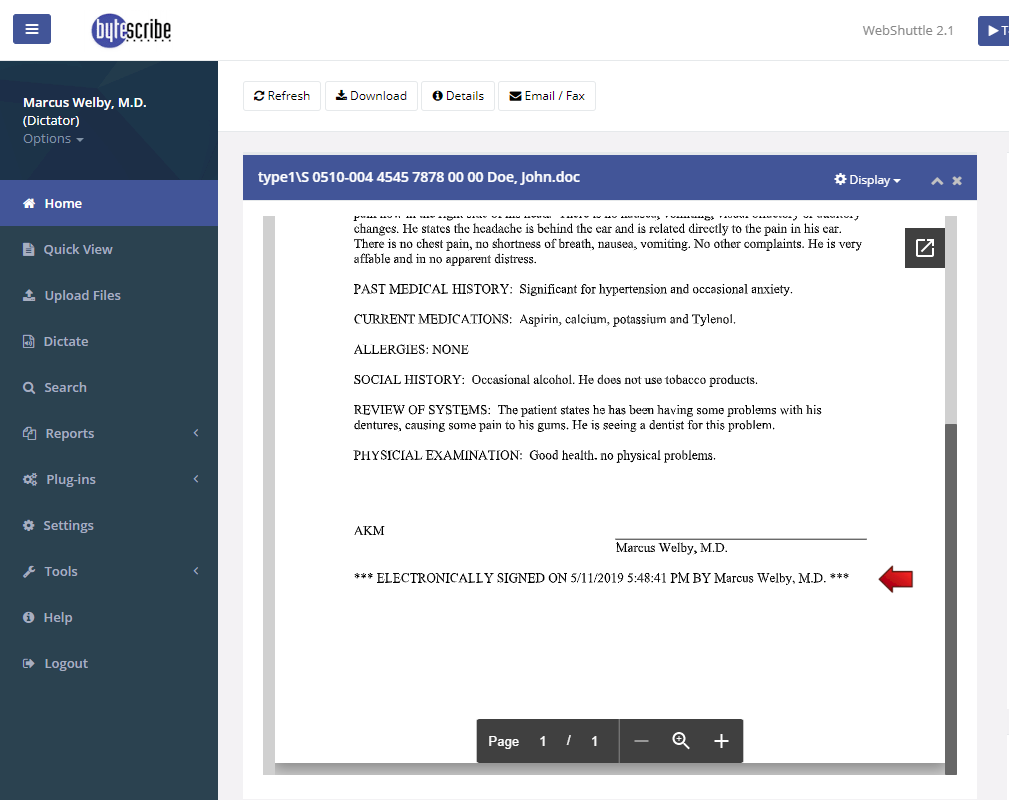
WebShuttle includes a feature that allows users to review and electronically sign Microsoft Word documents. The basic steps for this process is outlined below. Electronically signing a document locks the file from any further editing and inserts a signature line at the end of the document containing the signing user's name and the date and time of signature.
Permissions
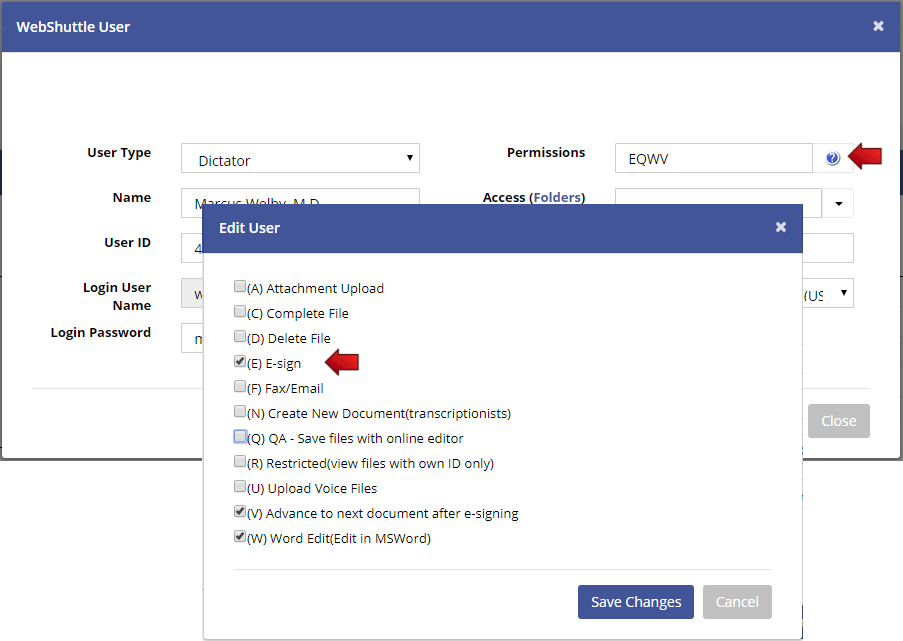
Before a user can electronically sign documents, the user must be set up as a "Dictator" user and must be given "eSignature" permissions by the administrator. If the proper permissions are not set for the user, the eSign button will not appear when viewing documents. The WebShuttle Administrator will need to set the user permissions as shown below.
When setting the user permissions, there is also an option to "Advance to next document after e-signing". Selecting this option will allow the next unsigned document to automatically appear after clicking the "eSign" button.
Viewing and Editing a Document
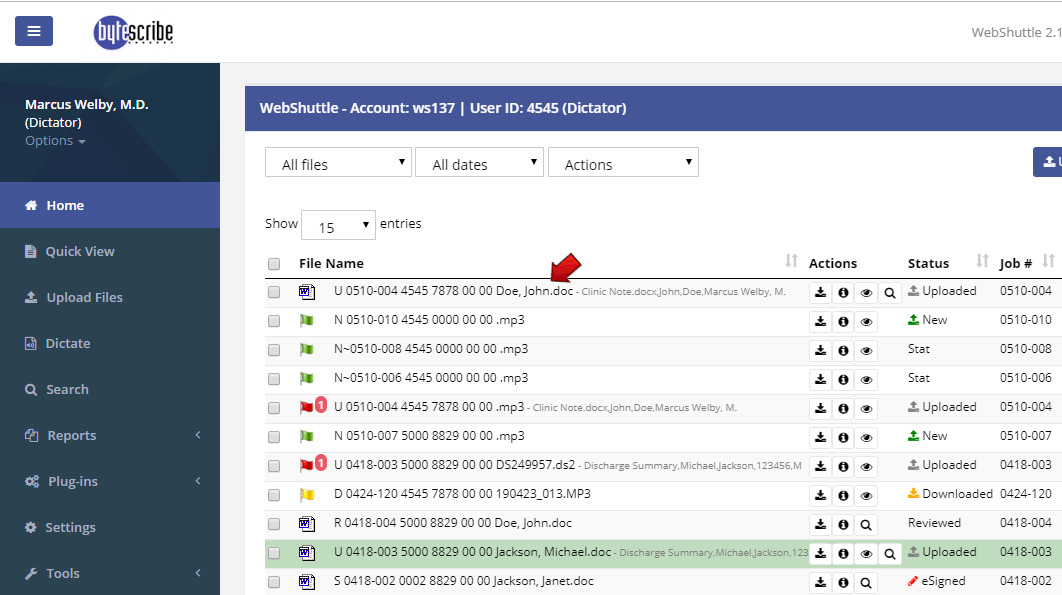
To view a document in WebShuttle, click on the file name of the document as shown below.
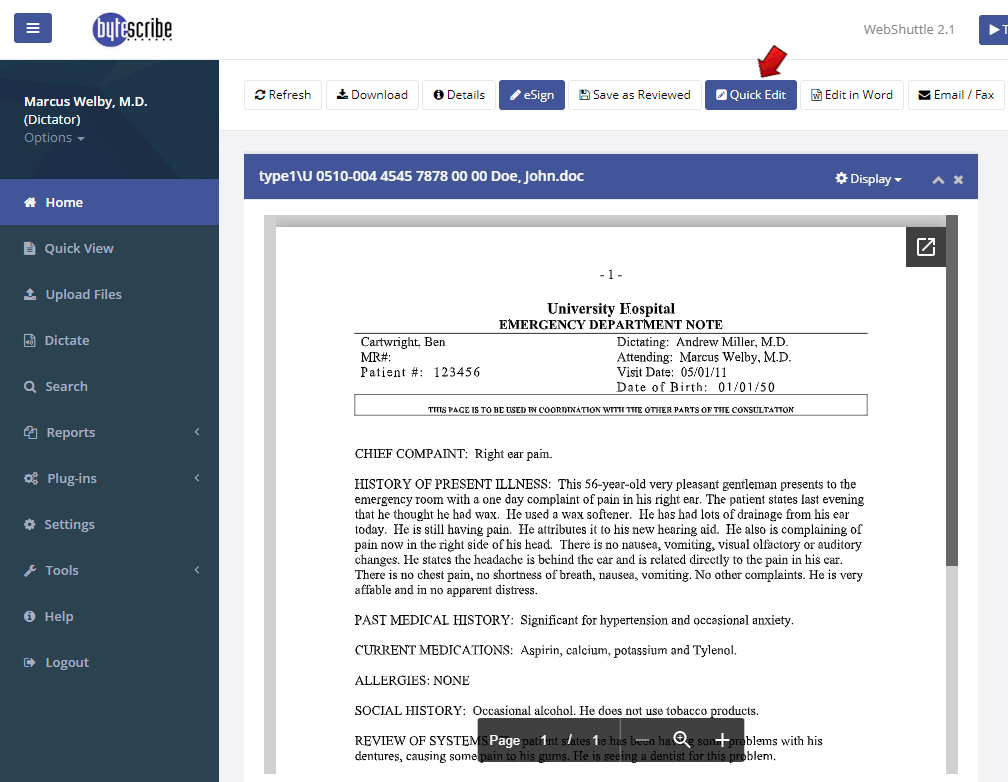
A preview of the document will appear as shown below. If there are changes that need to be made to the document before e-signing, click the "Quick Edit" button.
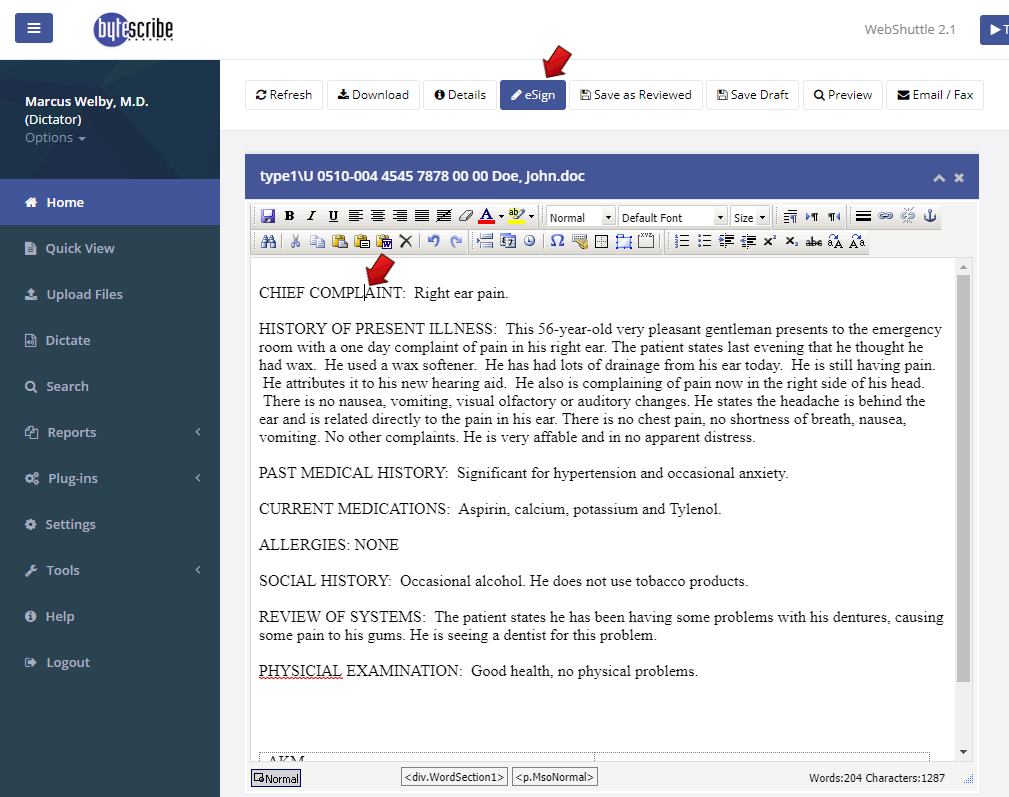
The document will appear in the online editor. You can make any necessary changes before e-signing the document. If extensive changes to the document are needed, use the "Edit in Word" button to open the document in Microsoft Word.
Electronically Signing a Document
Once all corrections have been made click the "eSign" button to electronically sign the document.
After clicking the "eSign" button, a preview of the signed document will appear with the signature line at the bottom of the document as shown below.
