Express Dictate
Bytescribe recommends Express Dictate as a voice recorder app for Android mobile devices. Pocket Dictate is a third party app that works well with WebShuttle transcription platform. Below are the features that allow it to be compatible with WebShuttle.
- Allows user to assign a 4-digit ID (Initials field) that is used by WebShuttle.
For Express Dictate to work with WebShuttle, each user must have a WebShuttle user account with a 4-digit ID. Bytescribe will provide the FTP server name, FTP user name and password and user 4-digit ID.
Express Dictate is created by NCH, a company that is not affiliated with Bytescribe.
Setup and Configuration
Below are the configurations settings necessary to allow Express Dictate to upload dictation files to your WebShuttle account.
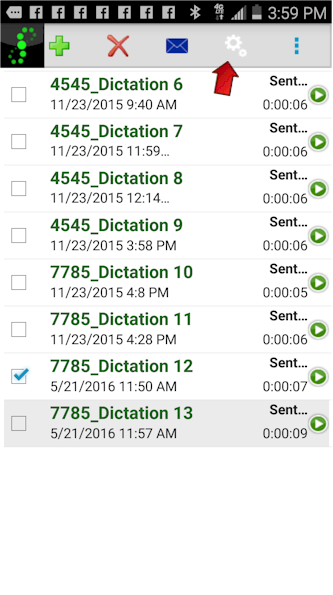
Step 1. Click the “Settings” icon as shown below.
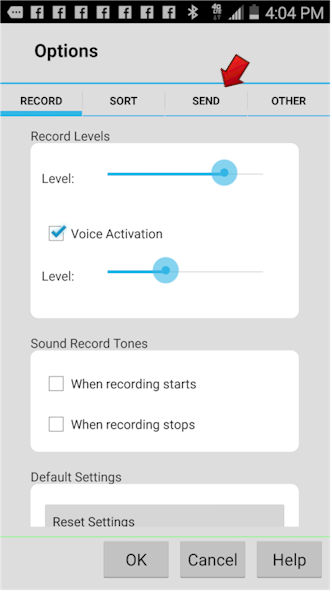
Step 2. Click the “Send” tab from the Settings screen as shown.
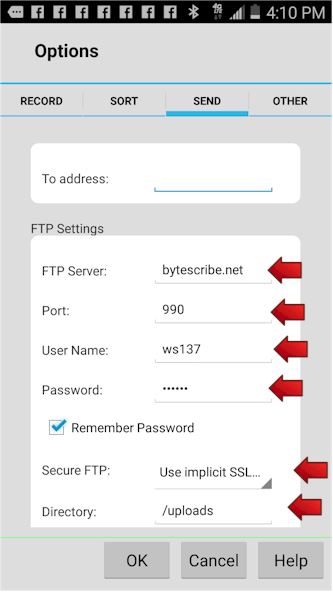
Step 3. Go to the FTP Settings section under the Send tab. Enter the FTP Server, Port, User Name and Password fields for your account. Also, select "Use Implicit SSL" for the Secure FTP setting and make sure that you use Port 990. Set the Directory field to "/uploads" as shown below.
FTP Server: bytescribe.net (or cs1.bytescribe.net - check your account settings)
Port: 990 (for Implicit SSL or 2500 for Explicit SSL or 21 for standard FTP)
User Name: (your account number)
Password: (your FTP password - not the WebShuttle user password:
Secure FTP: Use implicit SSL (if using port 990)
Directory: /uploads (must be set to "/uploads")
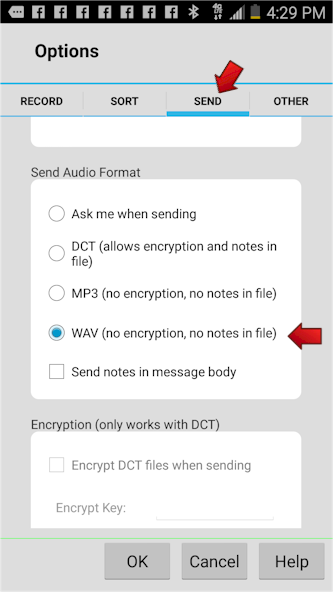
Step 4. Select the WAV option under the Send Audio Format section. Click the OK button.
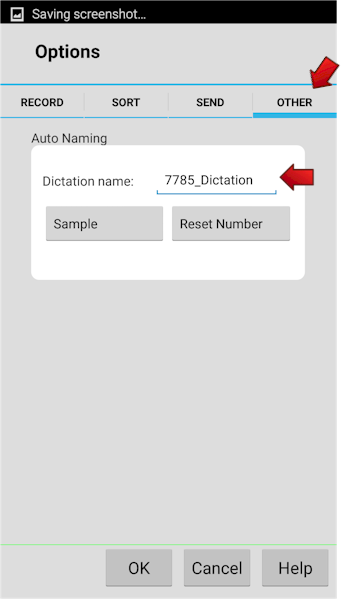
Step 5. *** Important **** Click on the "Other" tab of the Settings window. You will need to set the "Auto Naming" field to start with the WebShuttle user's 4-digit ID followed by an underscore as shown below. The rest of the field can include the dictator's name or something like "Dictation" as shown below.
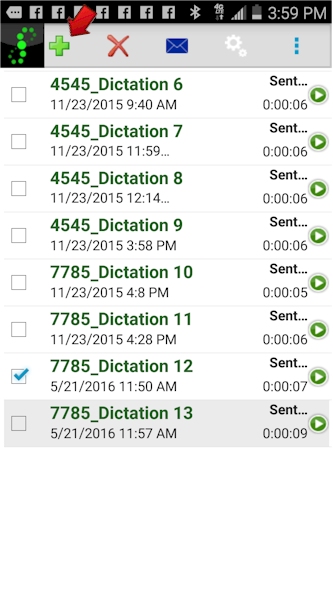
Step 6. Now you are ready to start recording dictation. From the main list screen, click the plus ( + ) icon to start recording.
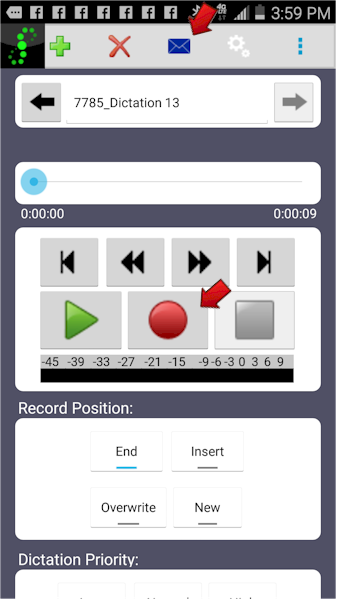
Step 7. Click the Record button as shown below. When finished with the dictation, click the Send icon at the top of the screen.


