Patient Documents: Difference between revisions
(Created page with "The 'Documents' tab serves as a repository for the patient's important documents. This can include signed consent forms, treatment plans, and other relevant medical records. It provides a secure and organized space to store and retrieve documents as needed for ongoing patient care and administrative purposes. 800px The user is able to upload a relevant document using the '''Upload Files''' button in the top right corner of the page. When select...") |
No edit summary |
||
| (27 intermediate revisions by 2 users not shown) | |||
| Line 1: | Line 1: | ||
== Managing Patient Documents == | |||
The '''Documents''' tab serves as a secure, centralized repository for storing patient-related files, such as signed consent forms, treatment plans, and scanned records. It allows clinicians and administrative staff to upload, view, manage, and associate documents with specific patient records. | |||
[[File:Documents. | <div style="text-align:center; margin: 1.5em 0;"> | ||
[[File:howto_documents.mov|thumb|center|600px|'''Tutorial – Managing Patient Documents''' – Learn how to upload, assign, and organize patient files.]] | |||
</div> | |||
--- | |||
=== How to Upload a Document === | |||
==== Step 1: Navigate to the Documents Tab ==== | |||
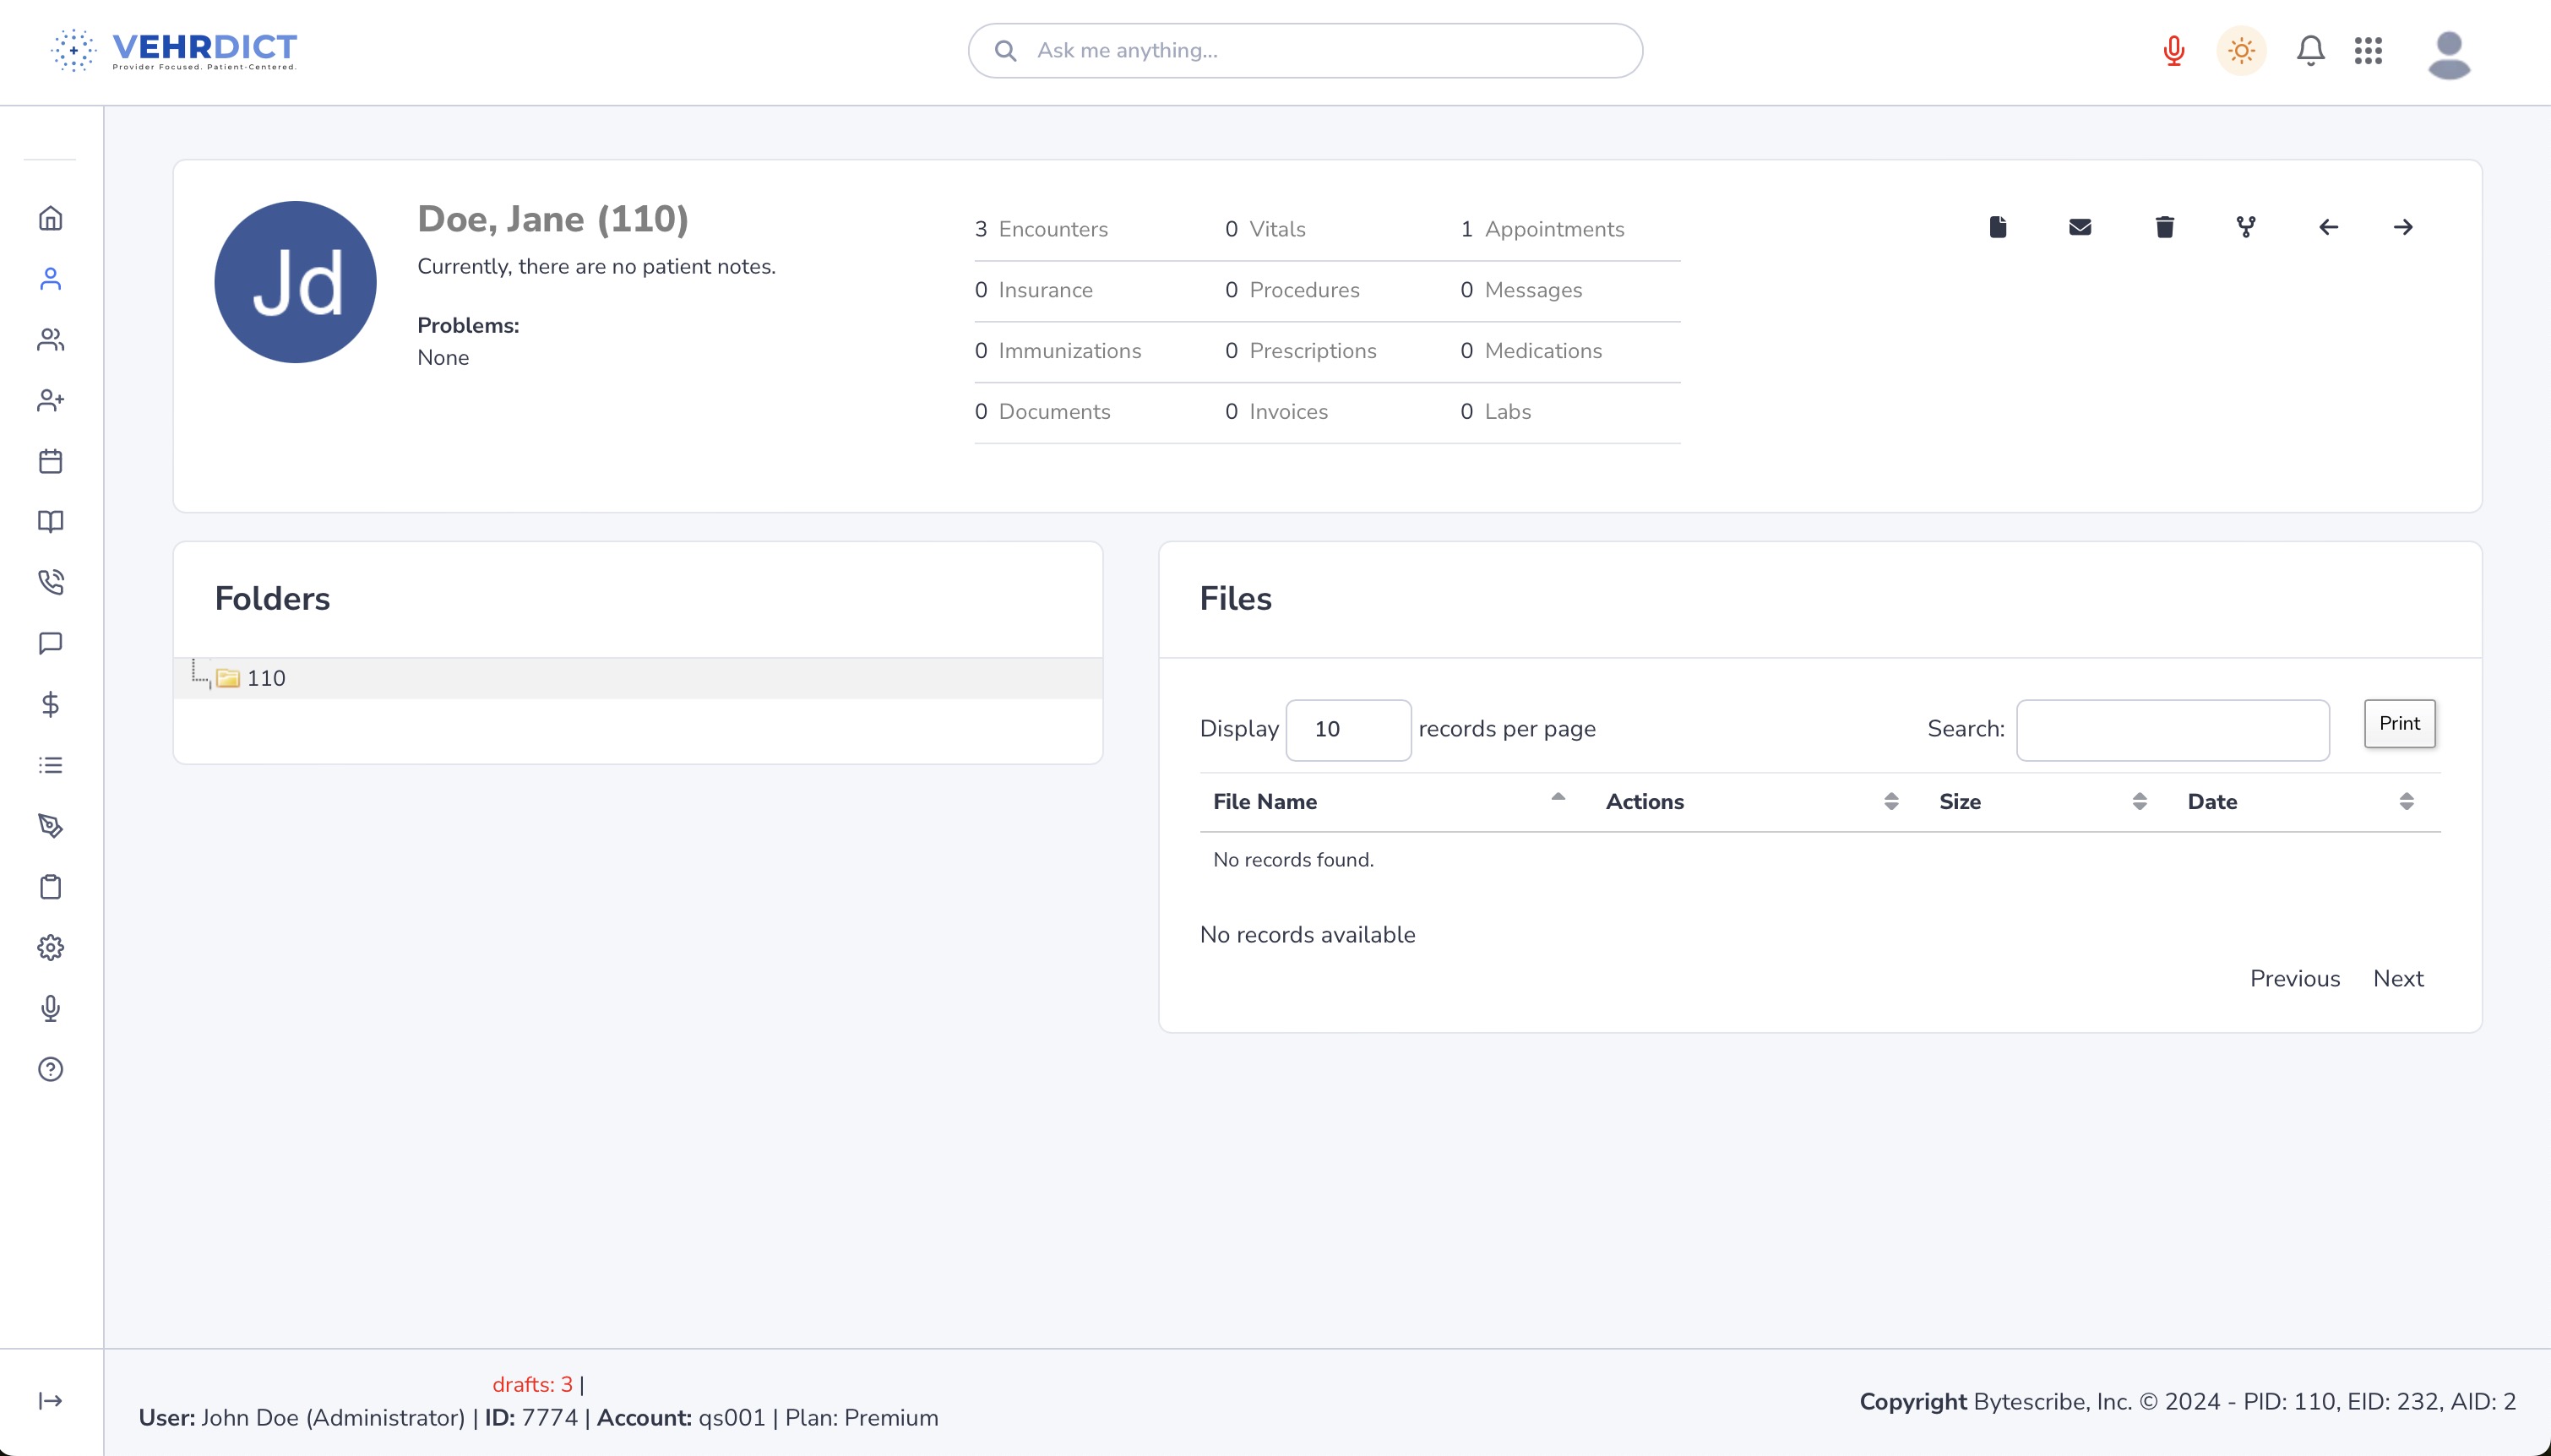
# From the patient dashboard, click on the '''Documents''' tab in the left-hand sidebar. | |||
# This section displays all files currently associated with the selected patient. | |||
<div style="text-align:center; margin: 1em 0;"> | |||
[[File:patient_file_none_nx.jpg|thumb|center|600px|'''Documents Tab''' – View all patient-associated files in one place.]] | |||
</div> | |||
---- | |||
==== Step 2: Upload Files ==== | |||
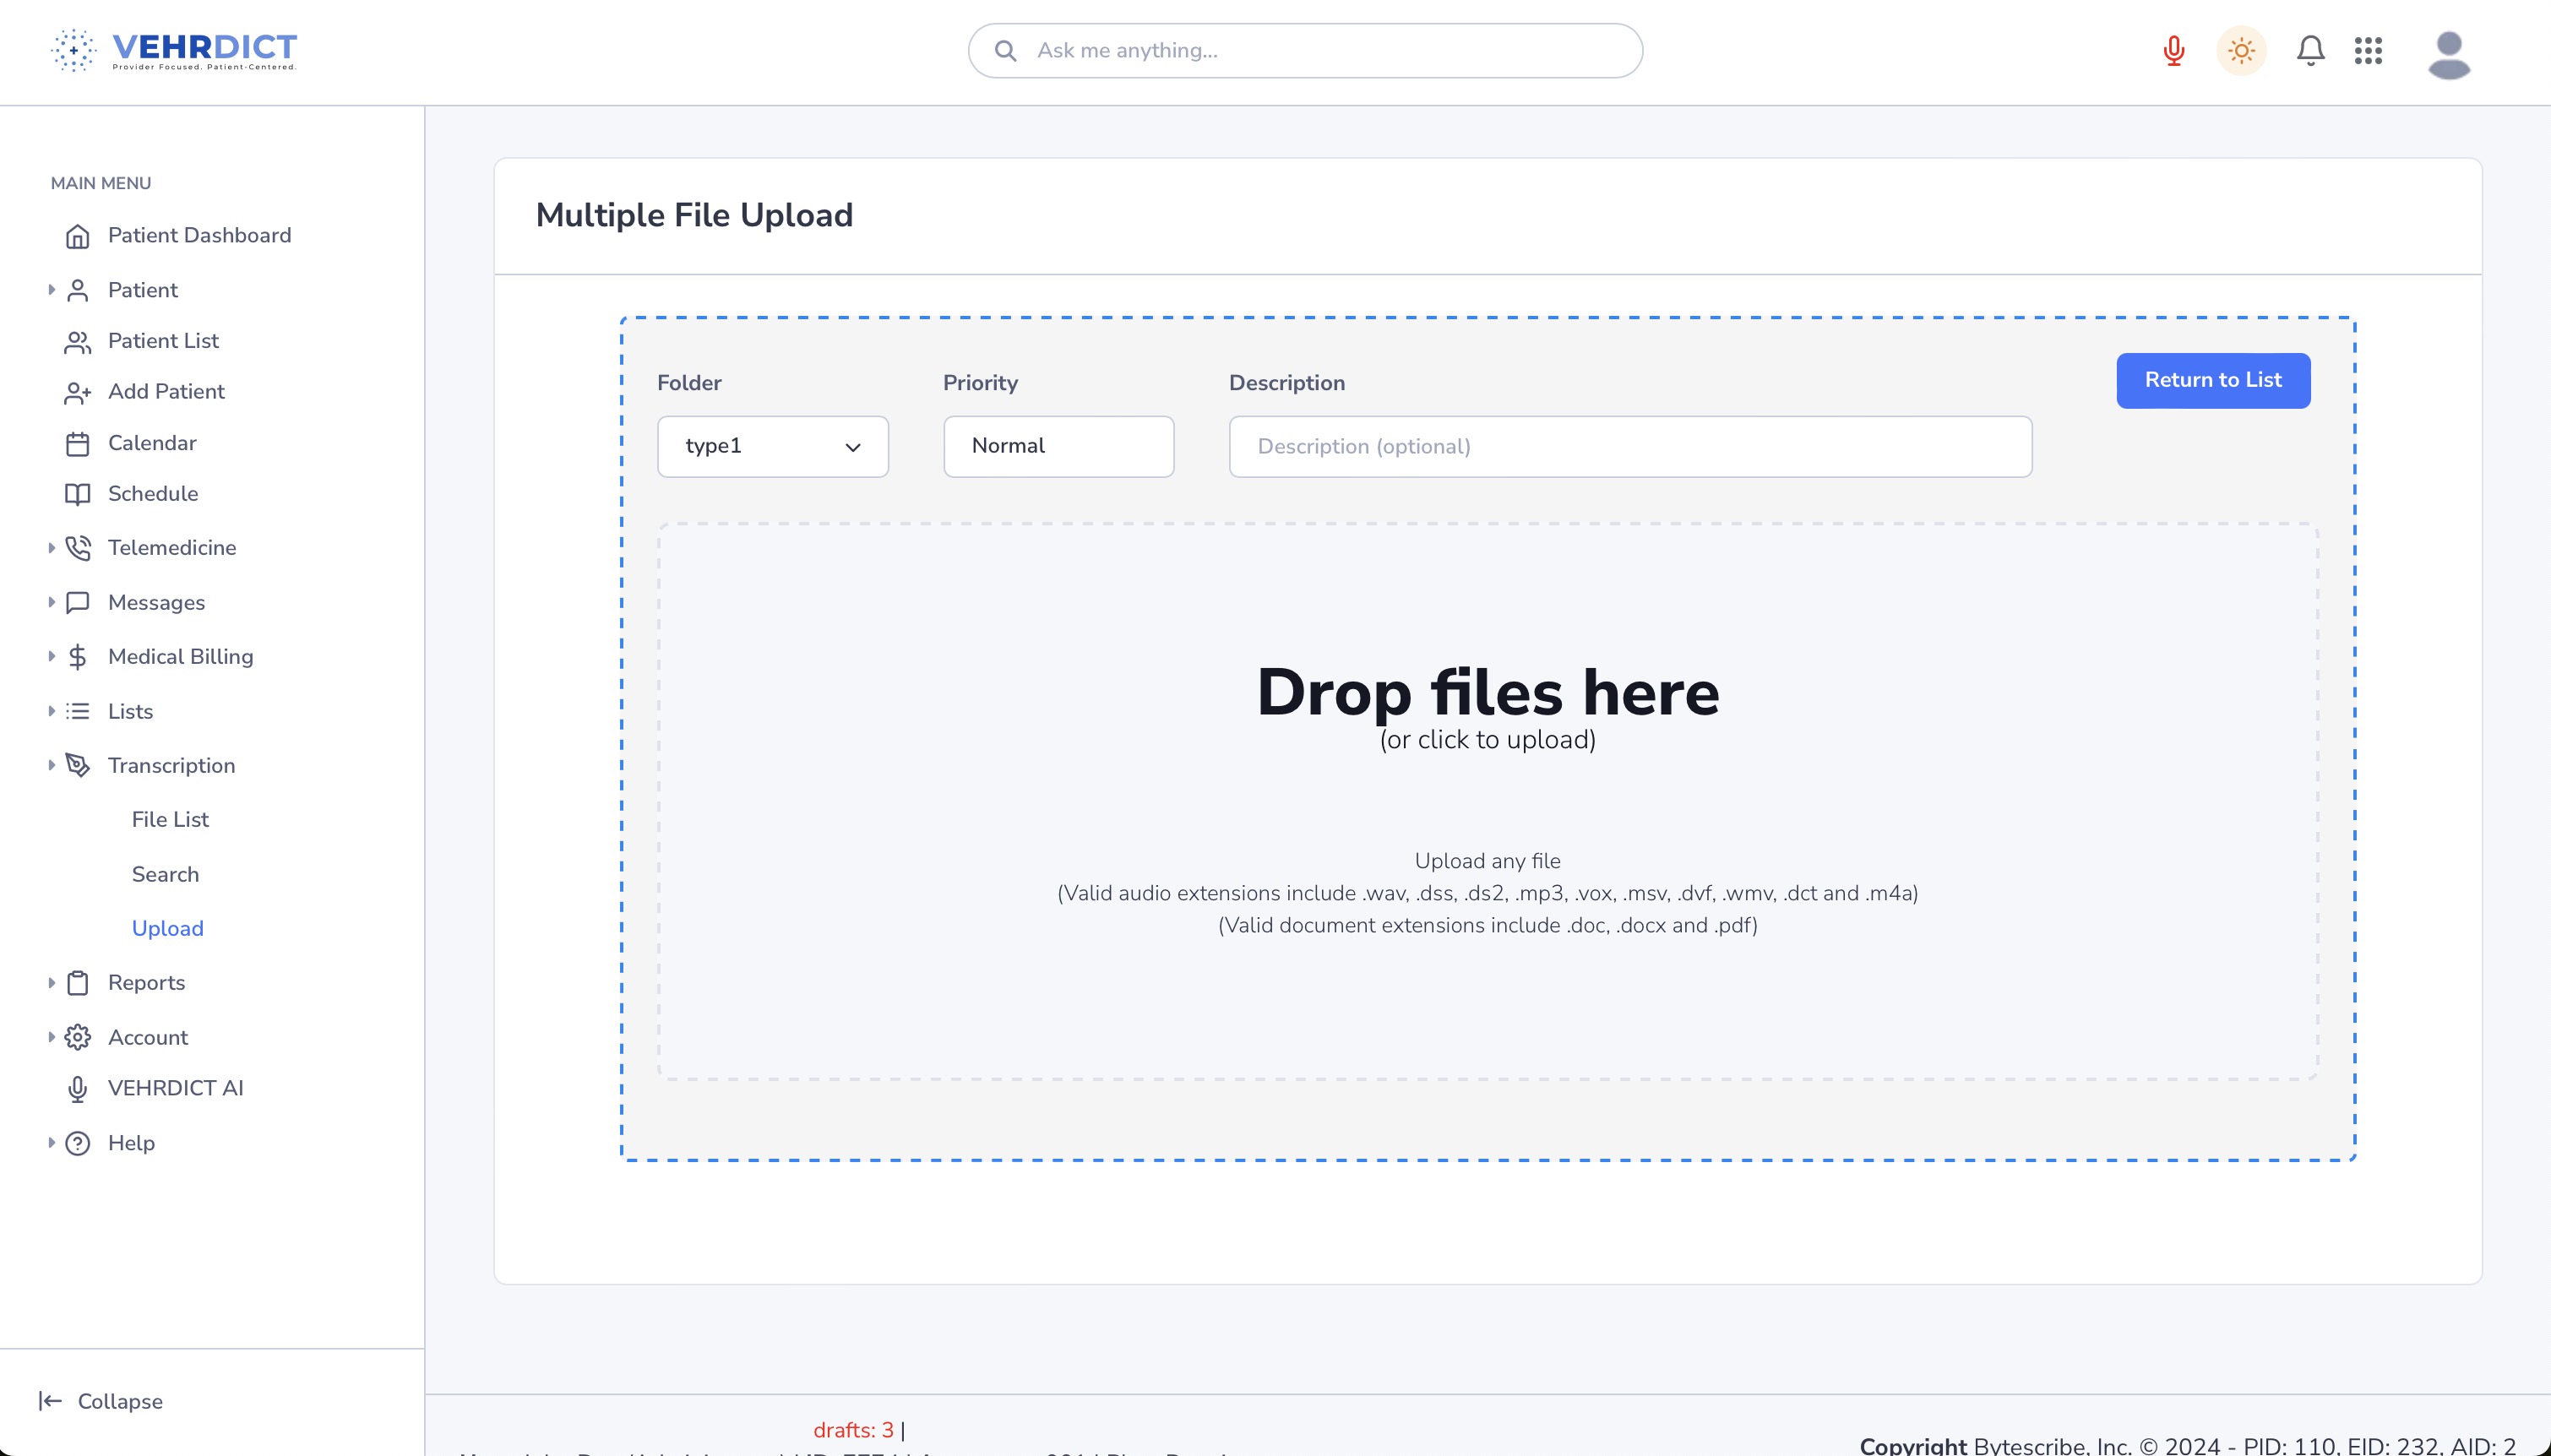
[[File: | # To begin uploading, navigate to the '''Transcription''' tab in the sidebar and click '''Upload'''. | ||
# Alternatively, use the search bar at the top of the page and type '''Upload''' to access the file uploader. | |||
# Drag your file(s) into the designated dropzone area, or click to manually select files from your device. | |||
# (Optional) Add a description, assign a folder, and set a priority level for organizational purposes. | |||
<div style="text-align:center; margin: 1em 0;"> | |||
[[File:upload_nx.jpg|thumb|center|600px|'''File Upload Interface''' – Drag and drop or select files for upload.]] | |||
</div> | |||
---- | |||
==== Step 3: Return to Documents List ==== | |||
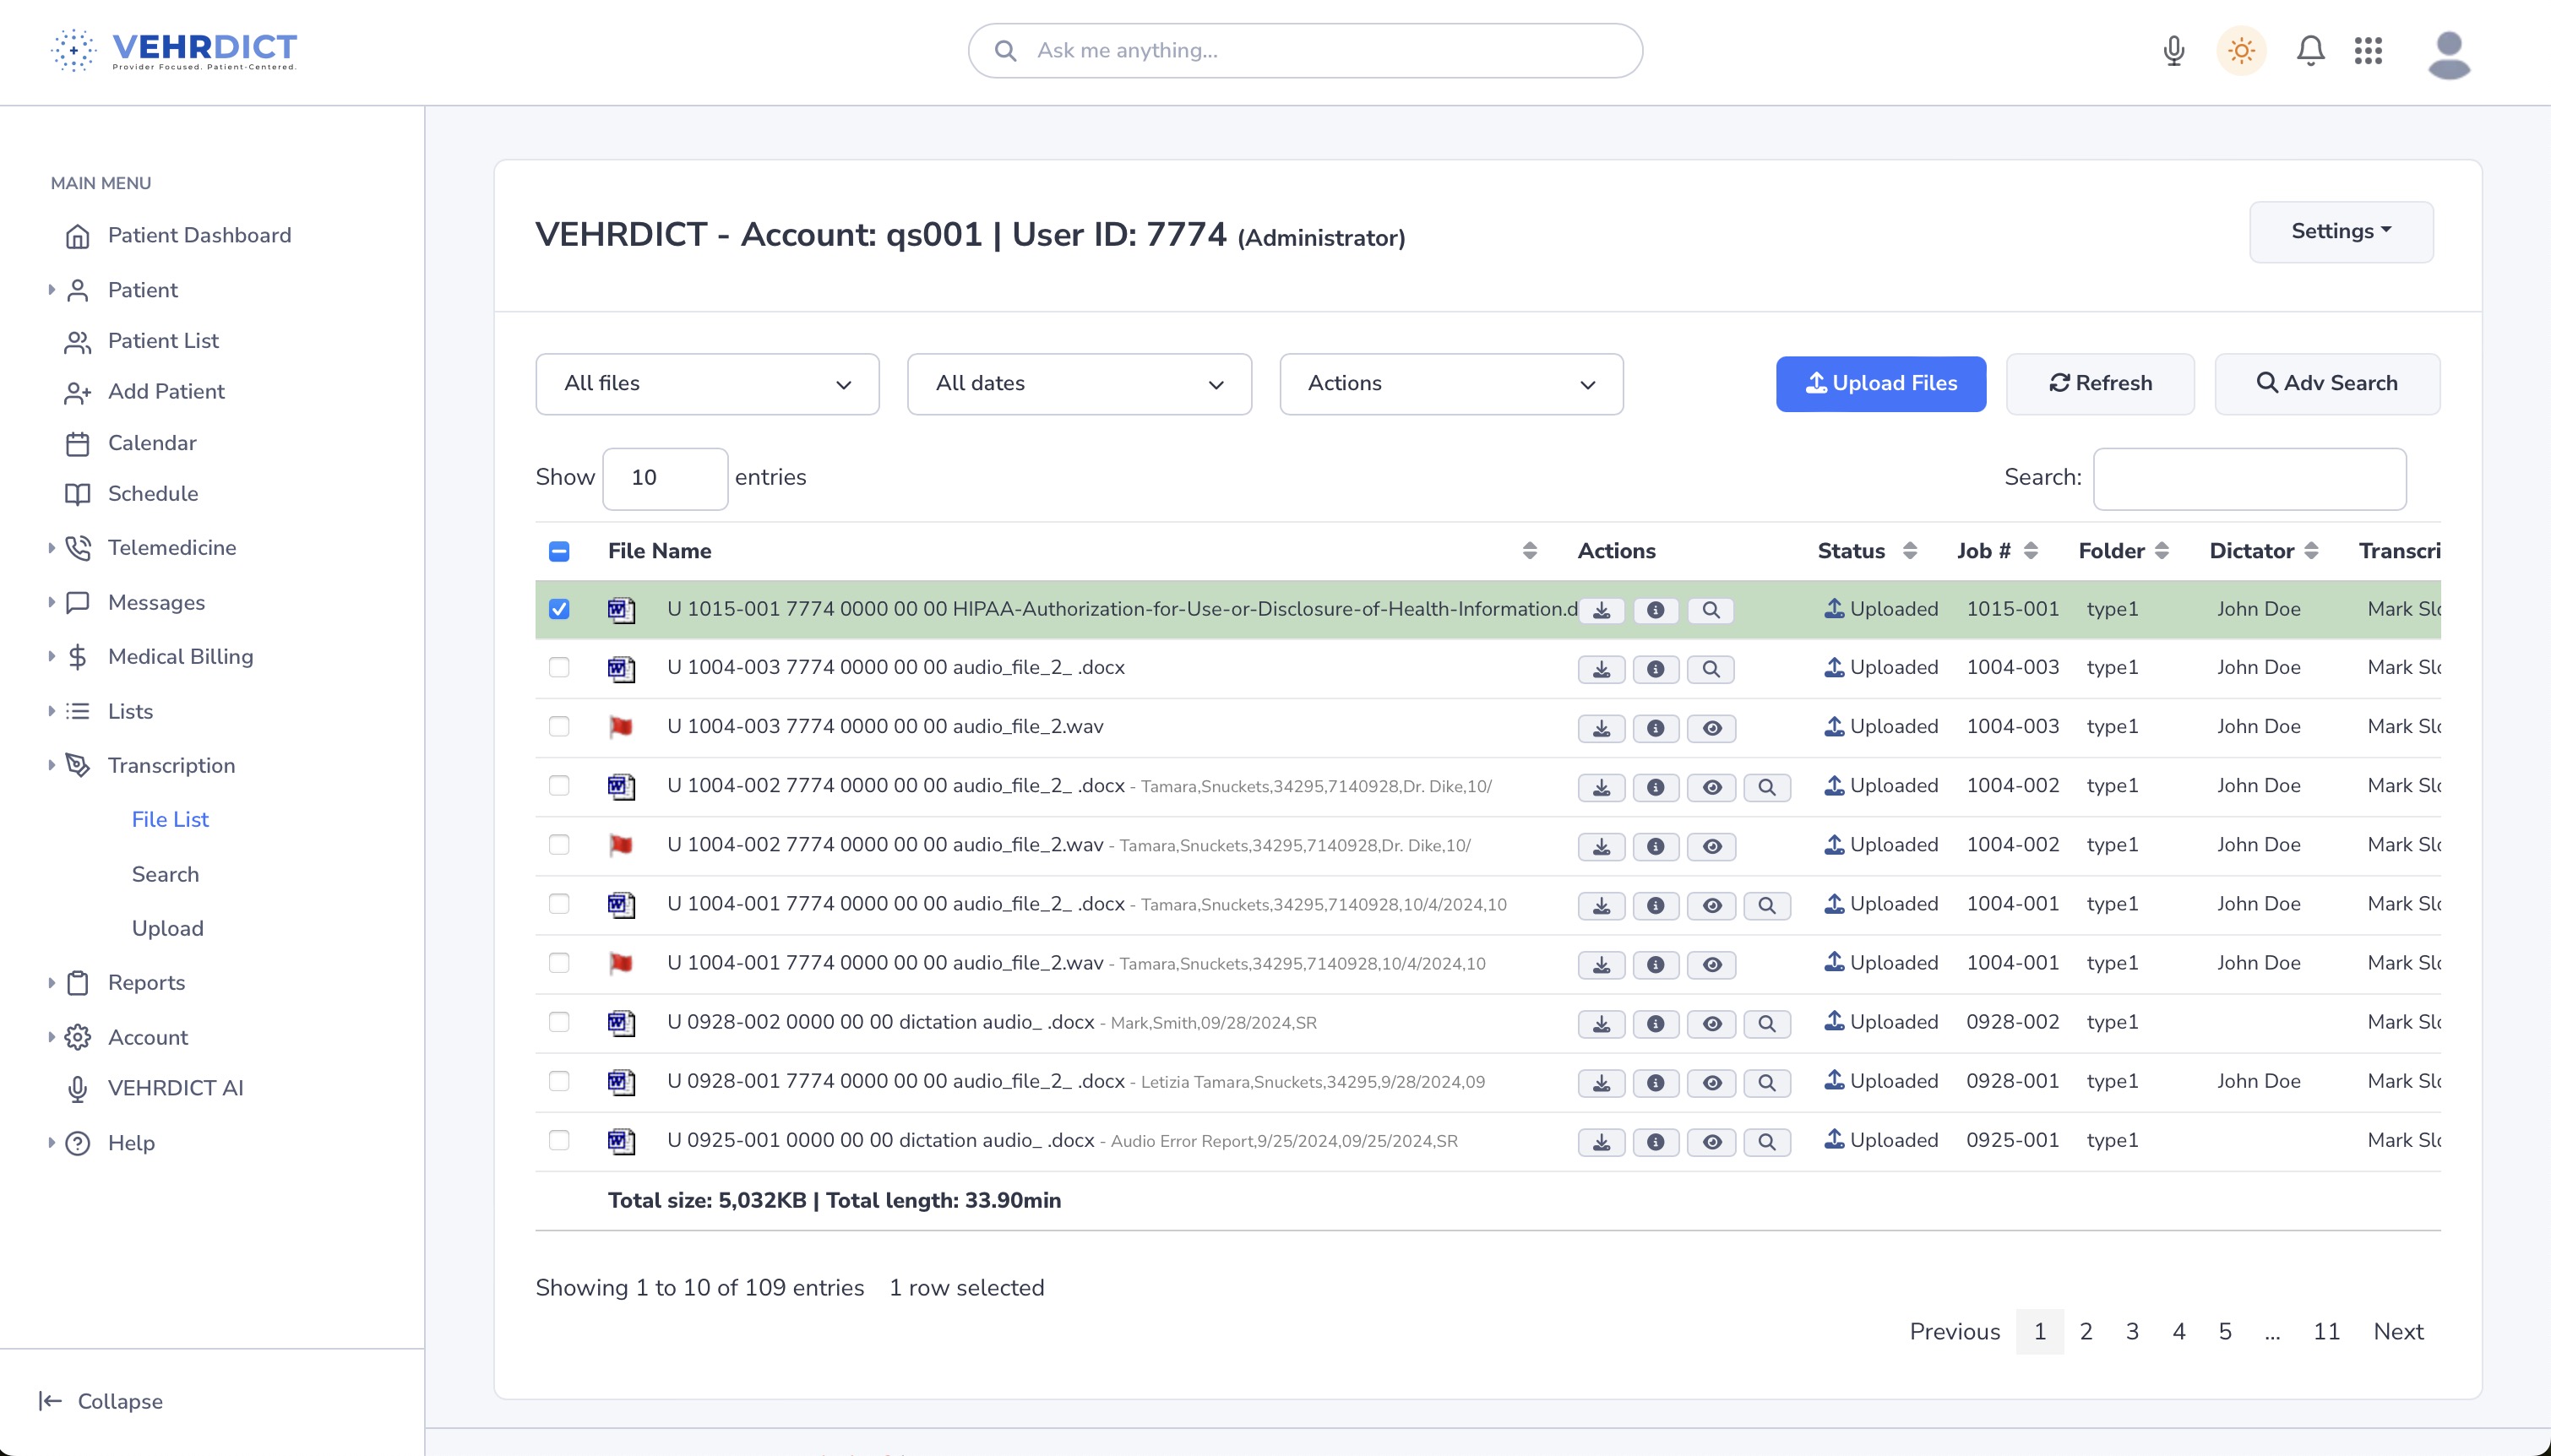
# After uploading, click '''Return to List''' to go back to the documents view. | |||
# Select the newly uploaded file from the list to preview or manage it. | |||
<div style="text-align:center; margin: 1em 0;"> | |||
[[File:file_list_nx.jpg|thumb|center|600px|'''Documents List''' – Manage newly uploaded files.]] | |||
</div> | |||
---- | |||
==== Step 4: Assign File to Patient Chart ==== | |||
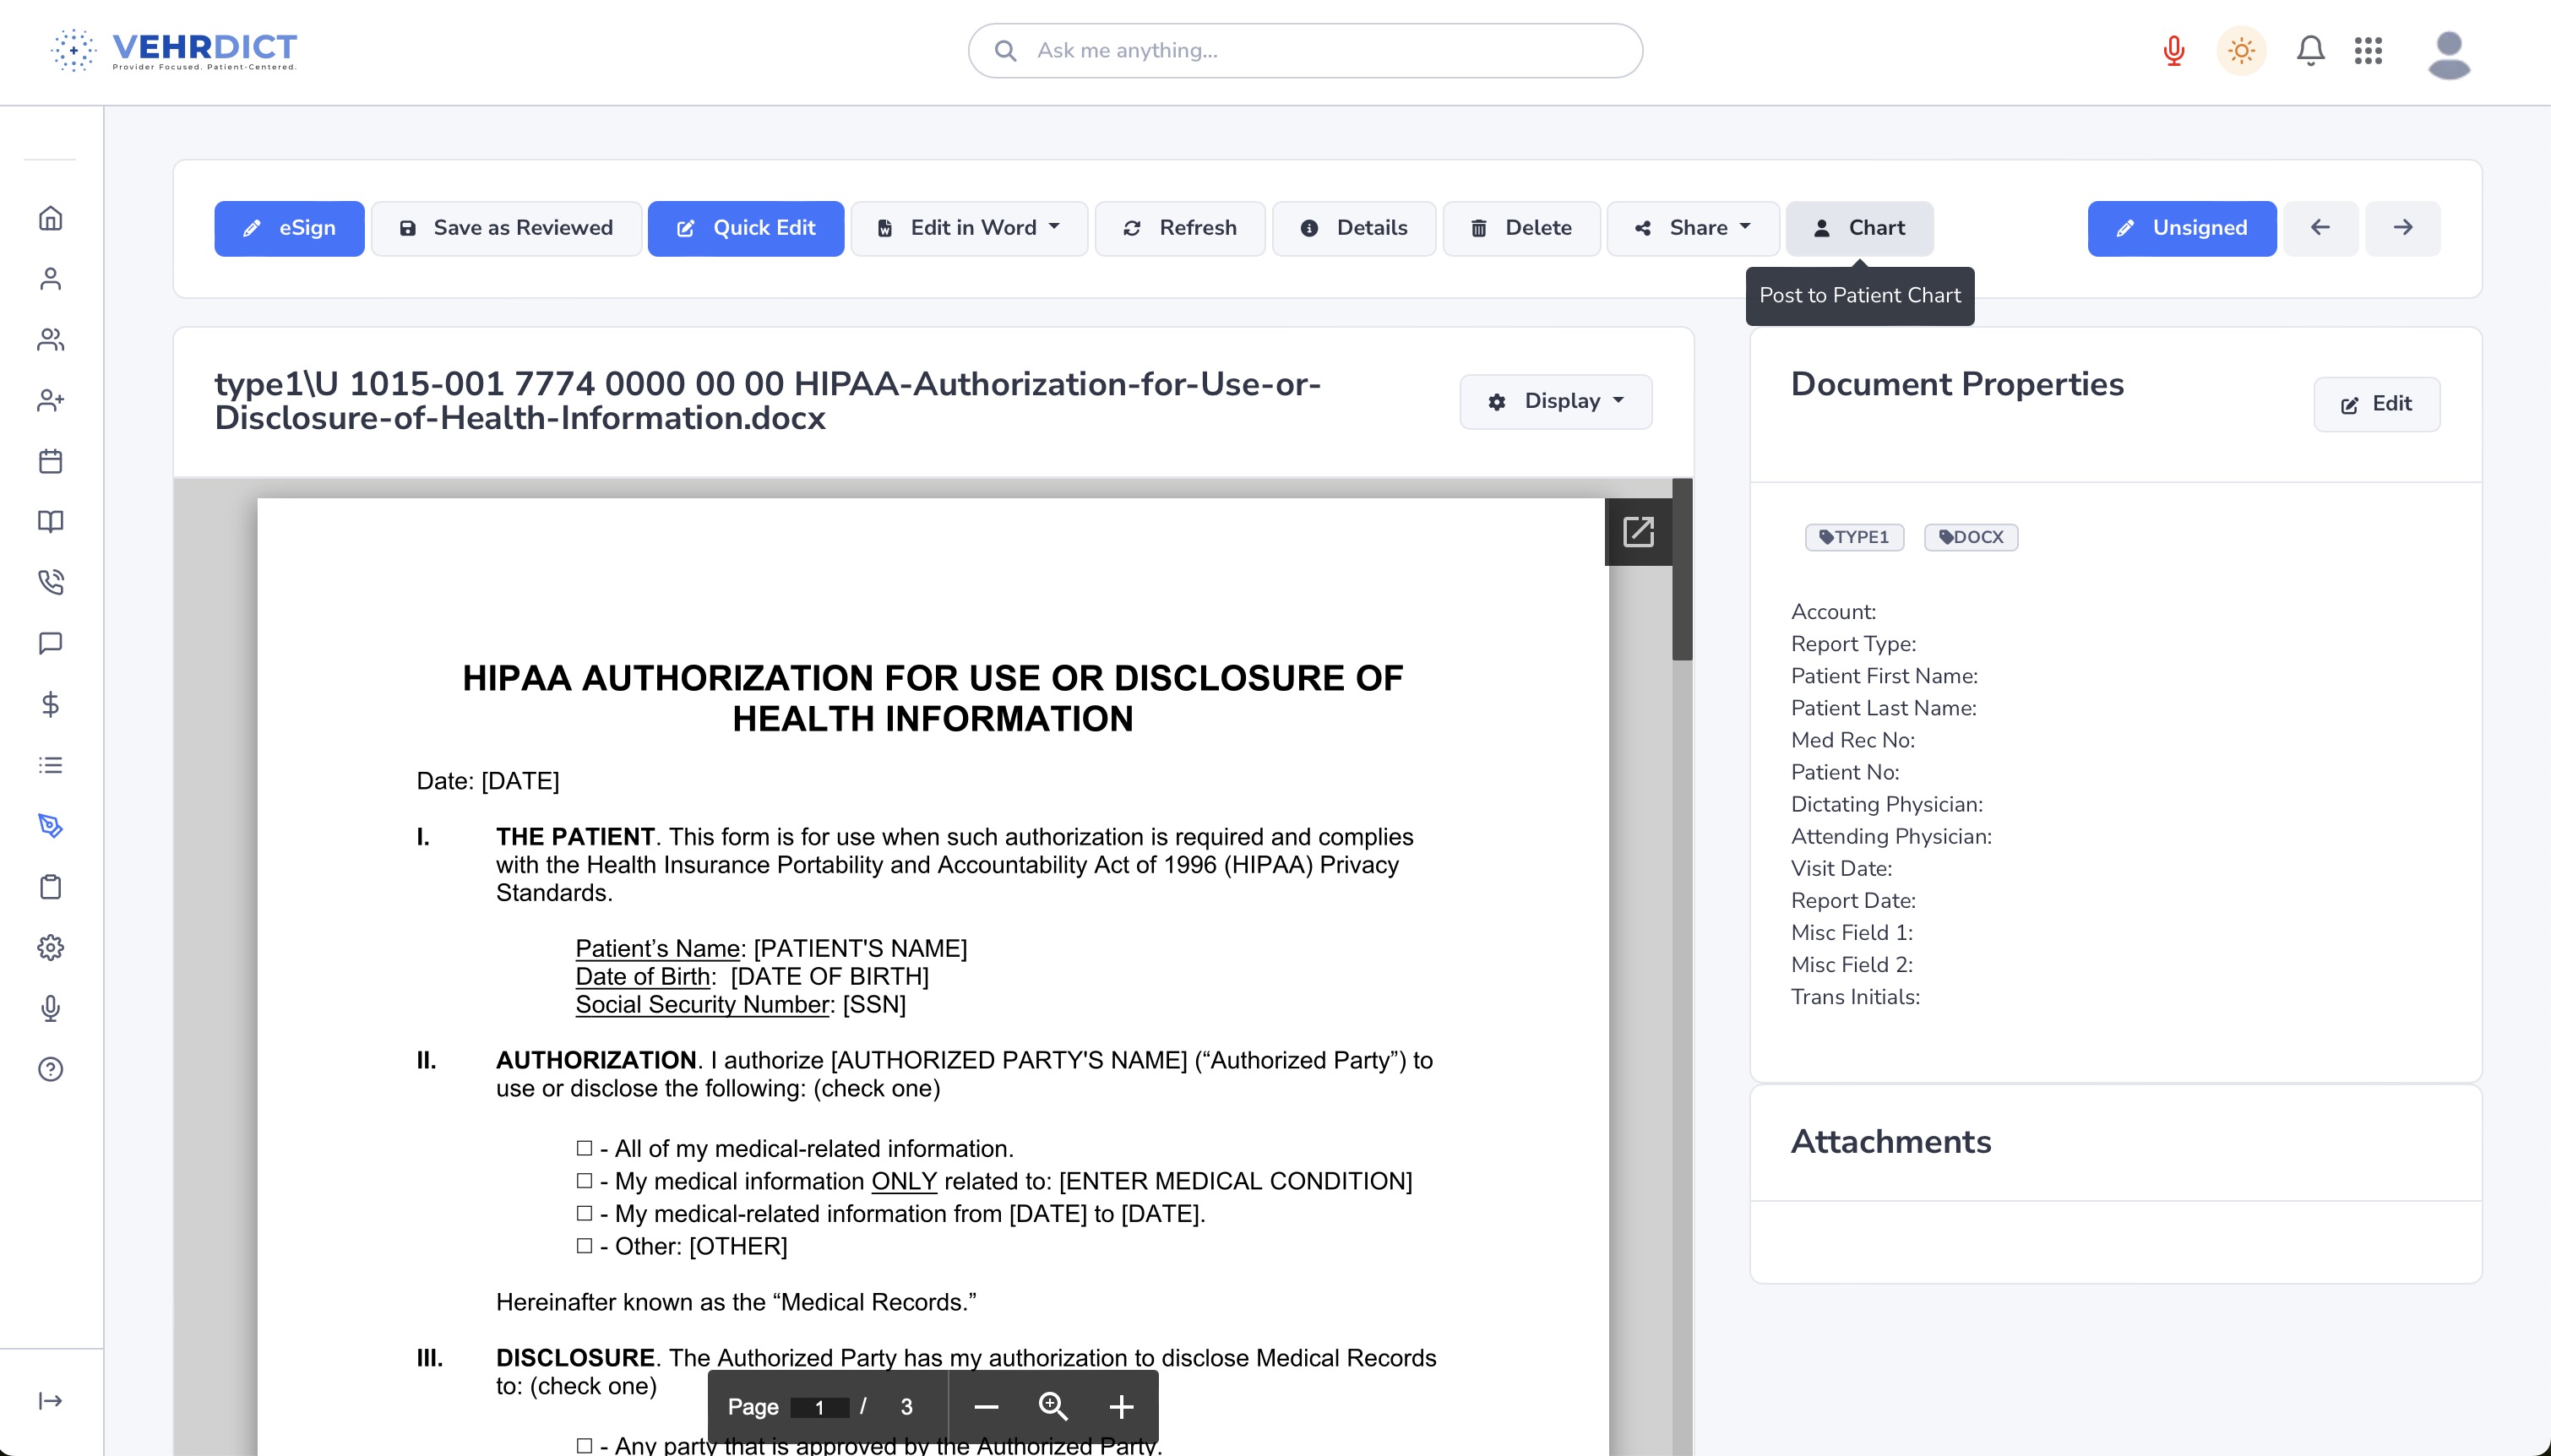
# To attach a file to a patient record, click the '''Chart''' button in the top toolbar. | |||
# Select the appropriate patient from the list. | |||
<div style="text-align:center; margin: 1em 0;"> | |||
[[File:file_list_chart_nx.jpg|thumb|center|600px|'''Chart Tool''' – Choose the patient to assign the file to.]] | |||
</div> | |||
# The document will now appear in the selected patient’s document folder under their chart. | |||
<div style="text-align:center; margin: 1em 0;"> | |||
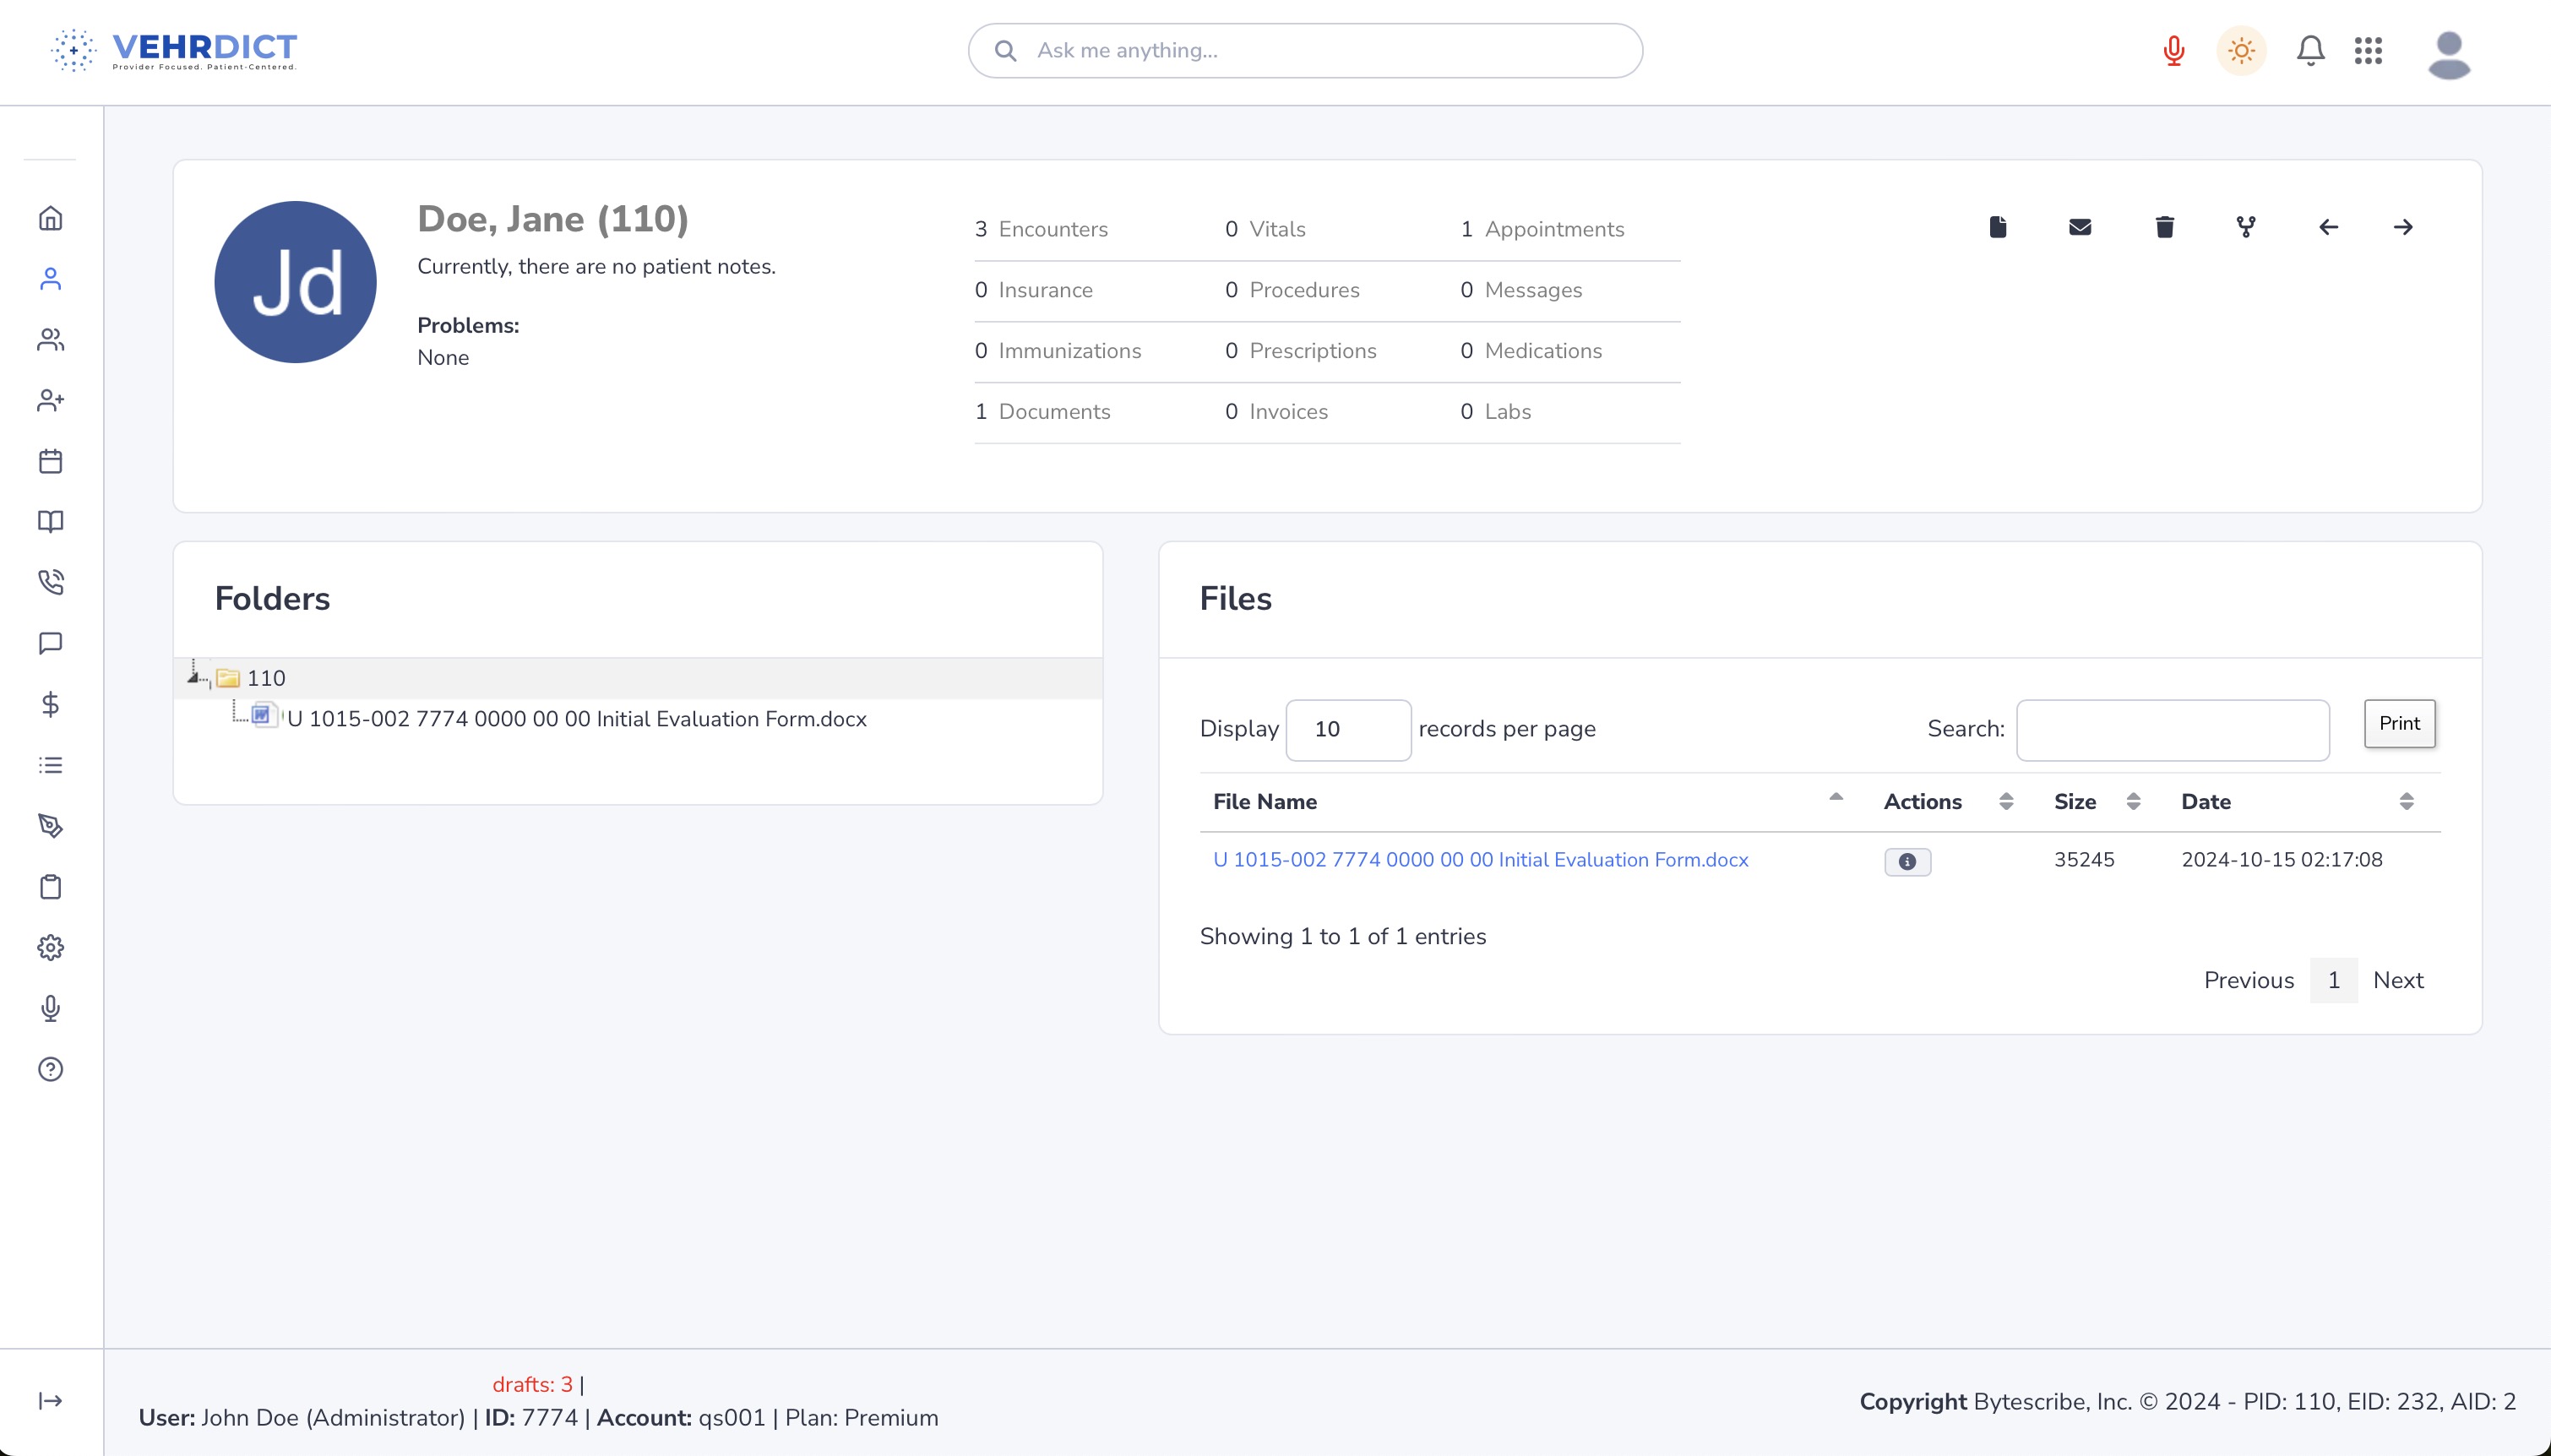
[[File:patient_file_nx.jpg|thumb|center|600px|'''Document Added''' – File now visible under patient’s Documents tab.]] | |||
</div> | |||
--- | |||
=== Key Features === | |||
* '''Secure Storage''' – All documents are encrypted and stored in compliance with data protection and healthcare regulations. | |||
* '''Easy Access''' – Search and filter tools help you locate files quickly within a patient’s chart. | |||
* '''Organized Structure''' – Files are organized by type, date, and folder for efficient retrieval and record-keeping. | |||
--- | |||
For best results, ensure that uploaded files follow naming conventions and are categorized appropriately for reporting and audits. | |||
Latest revision as of 15:58, 20 June 2025
Managing Patient Documents
The Documents tab serves as a secure, centralized repository for storing patient-related files, such as signed consent forms, treatment plans, and scanned records. It allows clinicians and administrative staff to upload, view, manage, and associate documents with specific patient records.
---
How to Upload a Document
- From the patient dashboard, click on the Documents tab in the left-hand sidebar.
- This section displays all files currently associated with the selected patient.
Step 2: Upload Files
- To begin uploading, navigate to the Transcription tab in the sidebar and click Upload.
- Alternatively, use the search bar at the top of the page and type Upload to access the file uploader.
- Drag your file(s) into the designated dropzone area, or click to manually select files from your device.
- (Optional) Add a description, assign a folder, and set a priority level for organizational purposes.
Step 3: Return to Documents List
- After uploading, click Return to List to go back to the documents view.
- Select the newly uploaded file from the list to preview or manage it.
Step 4: Assign File to Patient Chart
- To attach a file to a patient record, click the Chart button in the top toolbar.
- Select the appropriate patient from the list.
- The document will now appear in the selected patient’s document folder under their chart.
---
Key Features
- Secure Storage – All documents are encrypted and stored in compliance with data protection and healthcare regulations.
- Easy Access – Search and filter tools help you locate files quickly within a patient’s chart.
- Organized Structure – Files are organized by type, date, and folder for efficient retrieval and record-keeping.
---
For best results, ensure that uploaded files follow naming conventions and are categorized appropriately for reporting and audits.

