Add Patient: Difference between revisions
No edit summary |
No edit summary |
||
| (26 intermediate revisions by the same user not shown) | |||
| Line 1: | Line 1: | ||
== Adding a Patient Record == | |||
The electronic healthcare record process | The electronic healthcare record process begins by entering patient data. '''VEHRDICT''' provides both voice-driven AI entry and manual form-based entry to make this process fast, intuitive, and accurate. | ||
= | <div style="text-align:center; margin: 1.5em 0;"> | ||
[[File:Vehrdict_HowTo_AiPatientRecord_-_4K.mp4|thumb|center|600px|'''Tutorial Video''' – Learn how to add patients using VEHRDICT’s AI dictation workflow.]] | |||
</div> | |||
--- | |||
== Adding a Patient Using AI == | |||
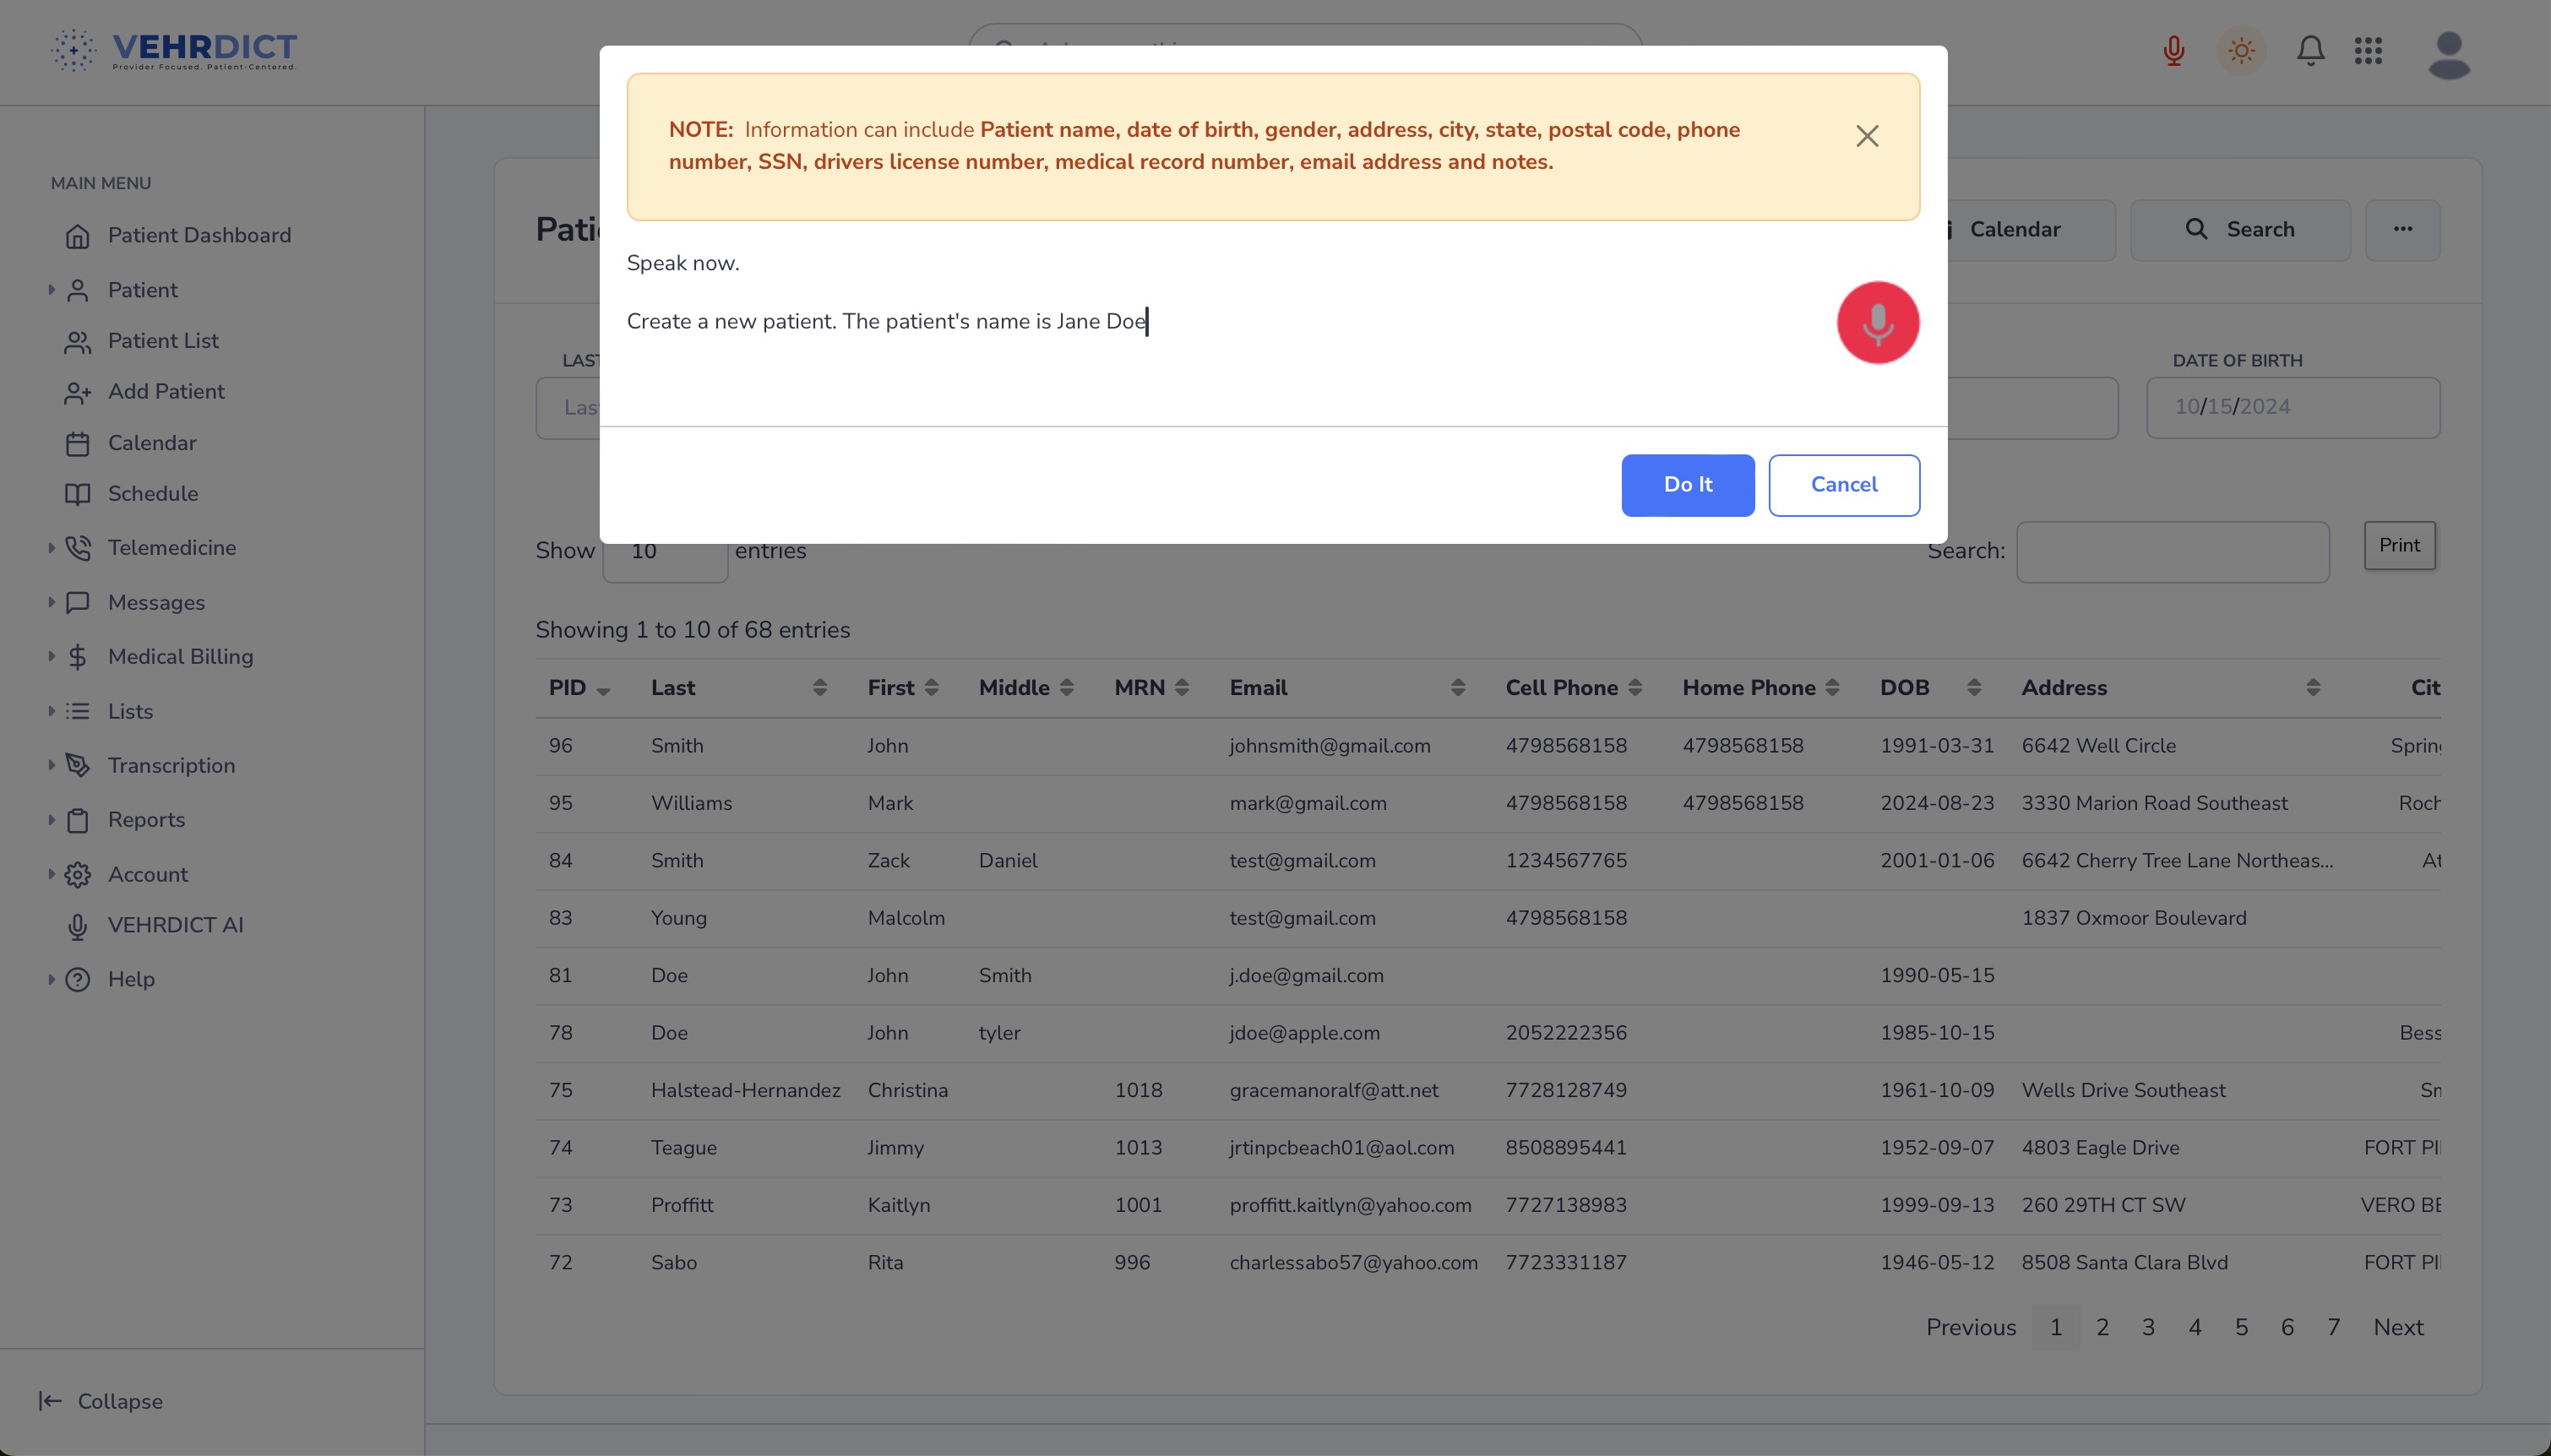
To create a new patient record using voice commands: | |||
# Click the microphone icon at the top toolbar. | |||
# Say: '''"Create a new patient record for..."''' and begin speaking naturally. | |||
* Example: “Address is 123 Main Street”, “Phone number is 404-555-2323”, “Email is emily.j@example.com” | |||
# When finished, say: '''"Do it"''' or click the '''Do it''' button to create the record. | |||
<div style="text-align:center; margin: 1em 0;"> | |||
[[File:add_patient_ai_2_nx.jpg|thumb|center|600px|'''Voice Command Entry''' – Speak patient data, and VEHRDICT fills the record automatically.]] | |||
</div> | |||
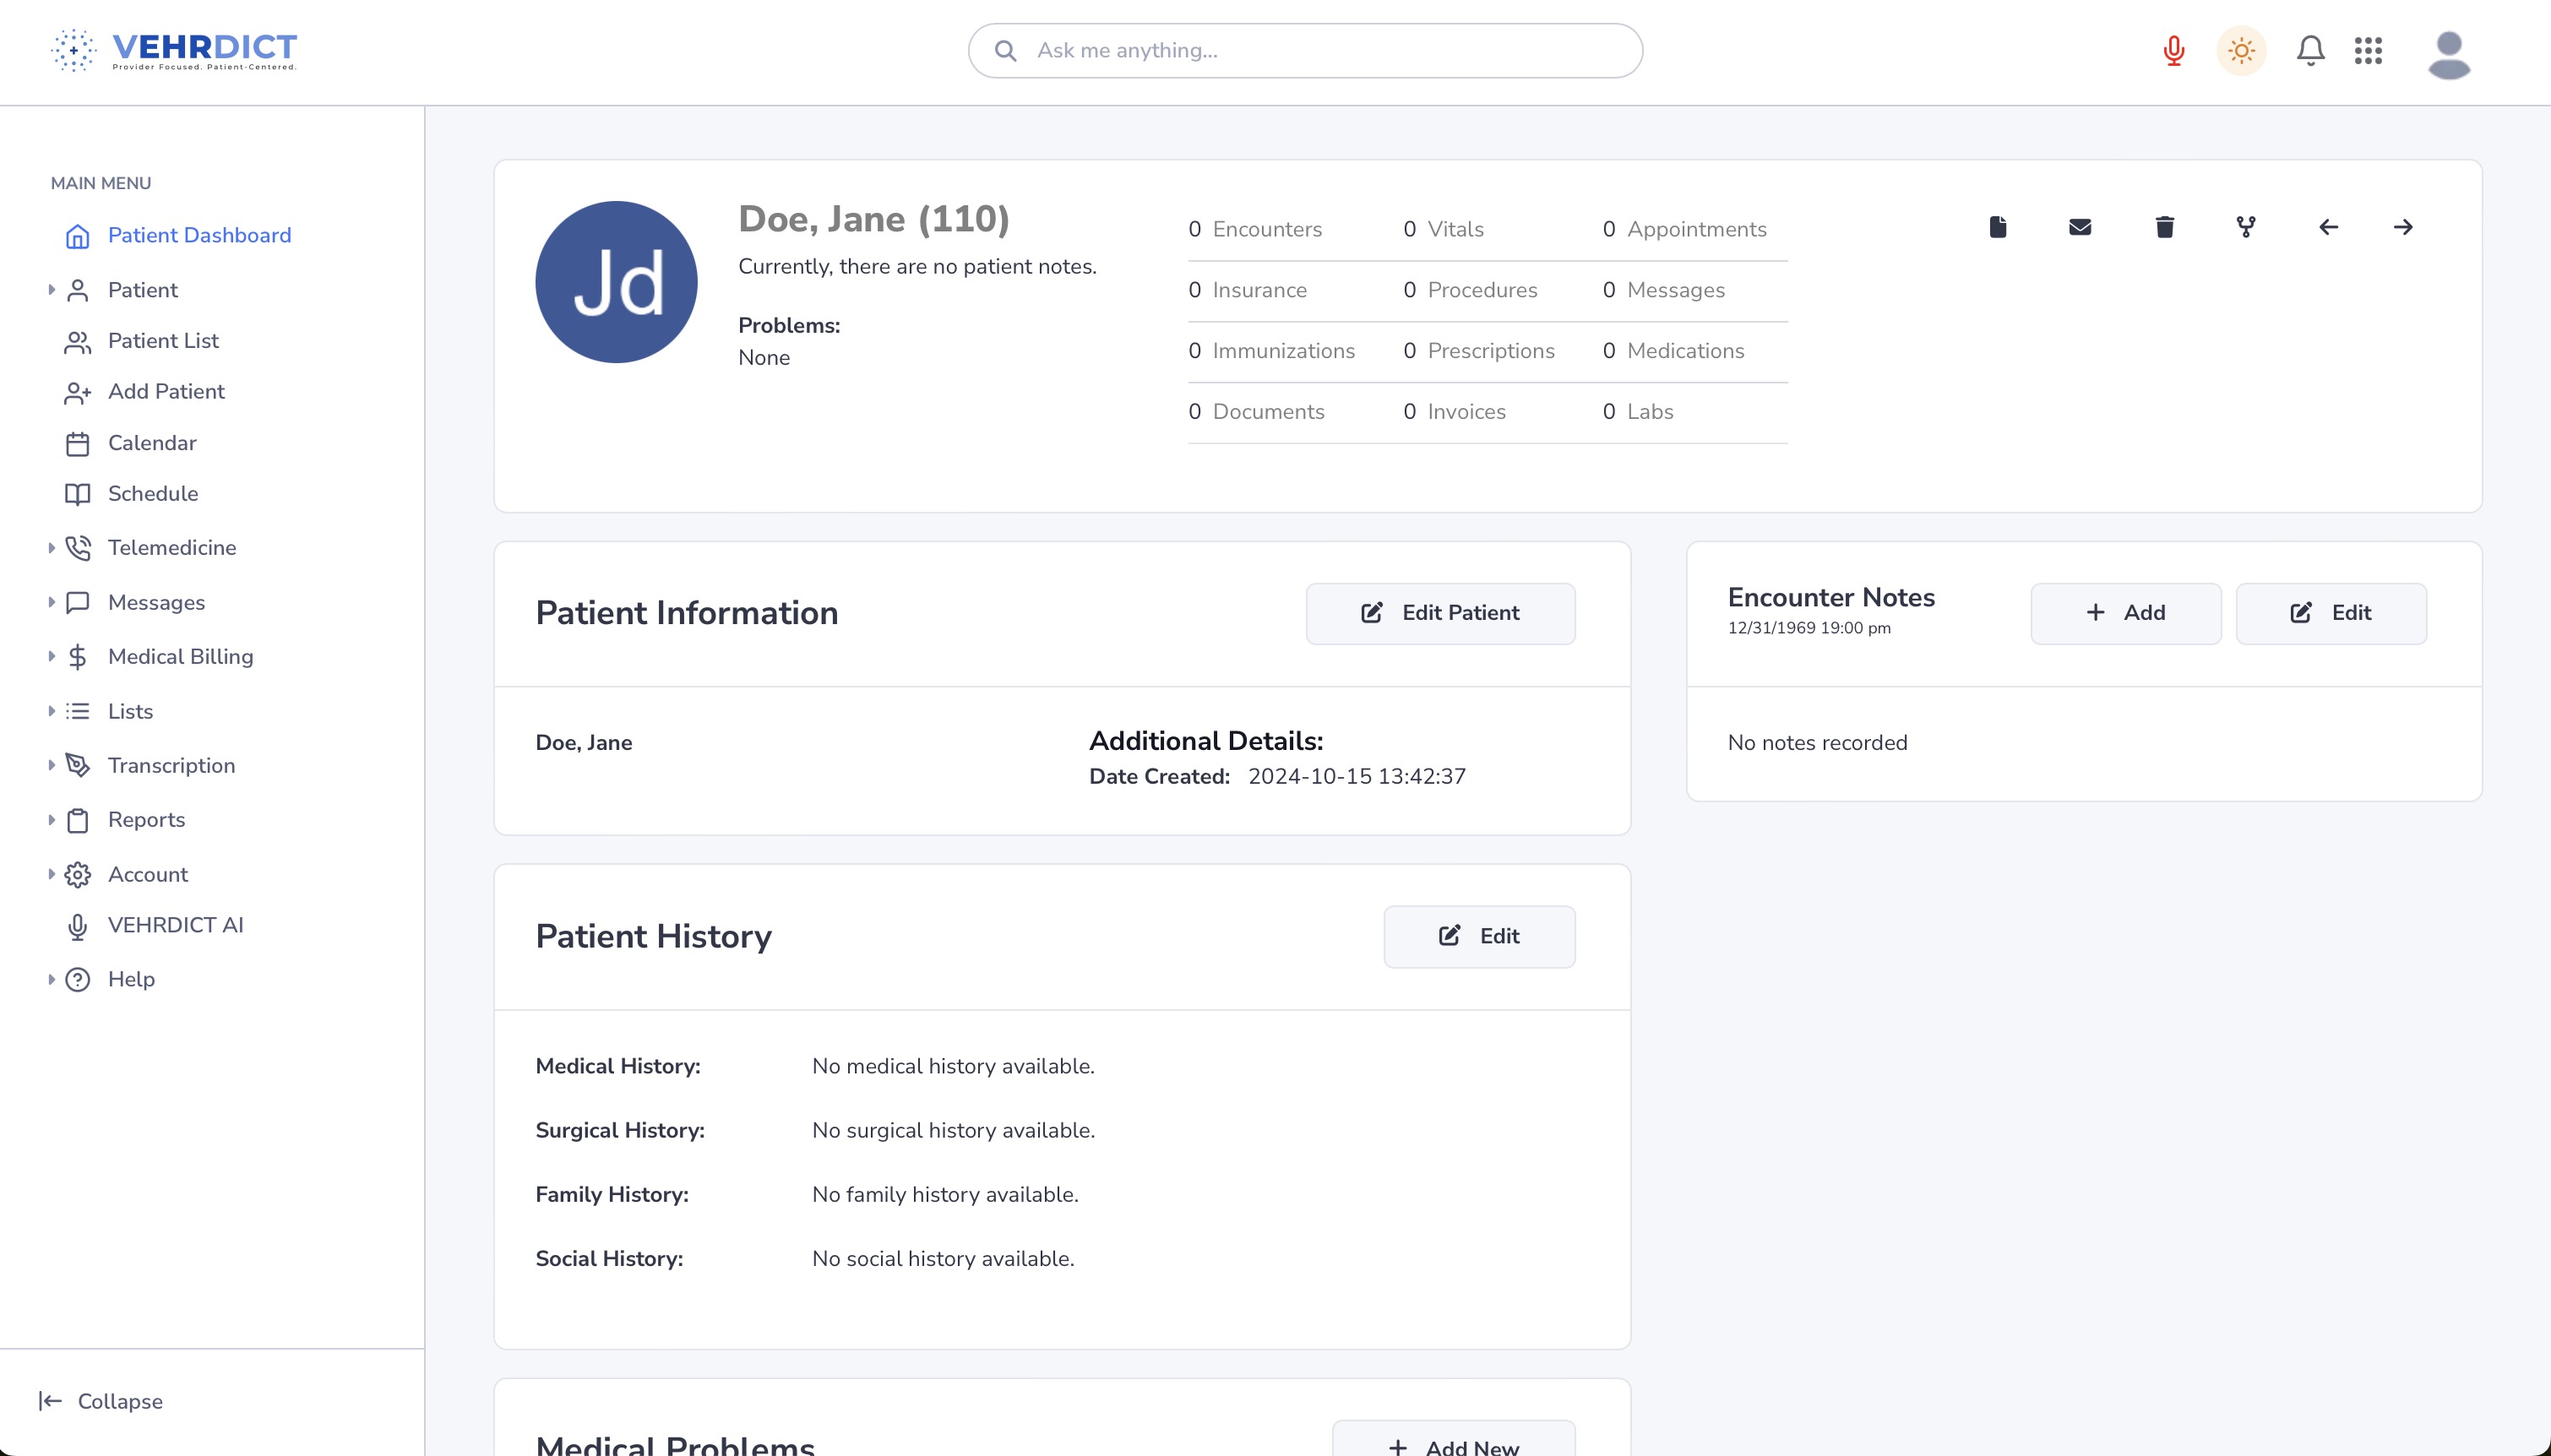
Once the record is created: | |||
* Review the auto-filled fields. | |||
* Click the '''Edit Patient''' button to modify or complete missing information. | |||
[[File: | <div style="text-align:center; margin: 1em 0;"> | ||
[[File:patient_screen_nx.jpg|thumb|center|600px|'''Generated Patient Record''' – Fields are editable after voice entry.]] | |||
</div> | |||
--- | |||
== Adding a Patient Manually == | |||
To add a patient manually: | |||
To add a patient | |||
# Navigate to the main menu. | |||
# Click '''Add Patient'''. | |||
# Complete each section across the following tabs: | |||
* General | |||
* Contact | |||
* Demographics | |||
* Guardian | |||
* Misc | |||
* Portal | |||
Each tab captures specific data essential for a complete patient profile. | |||
--- | |||
=== General Tab === | |||
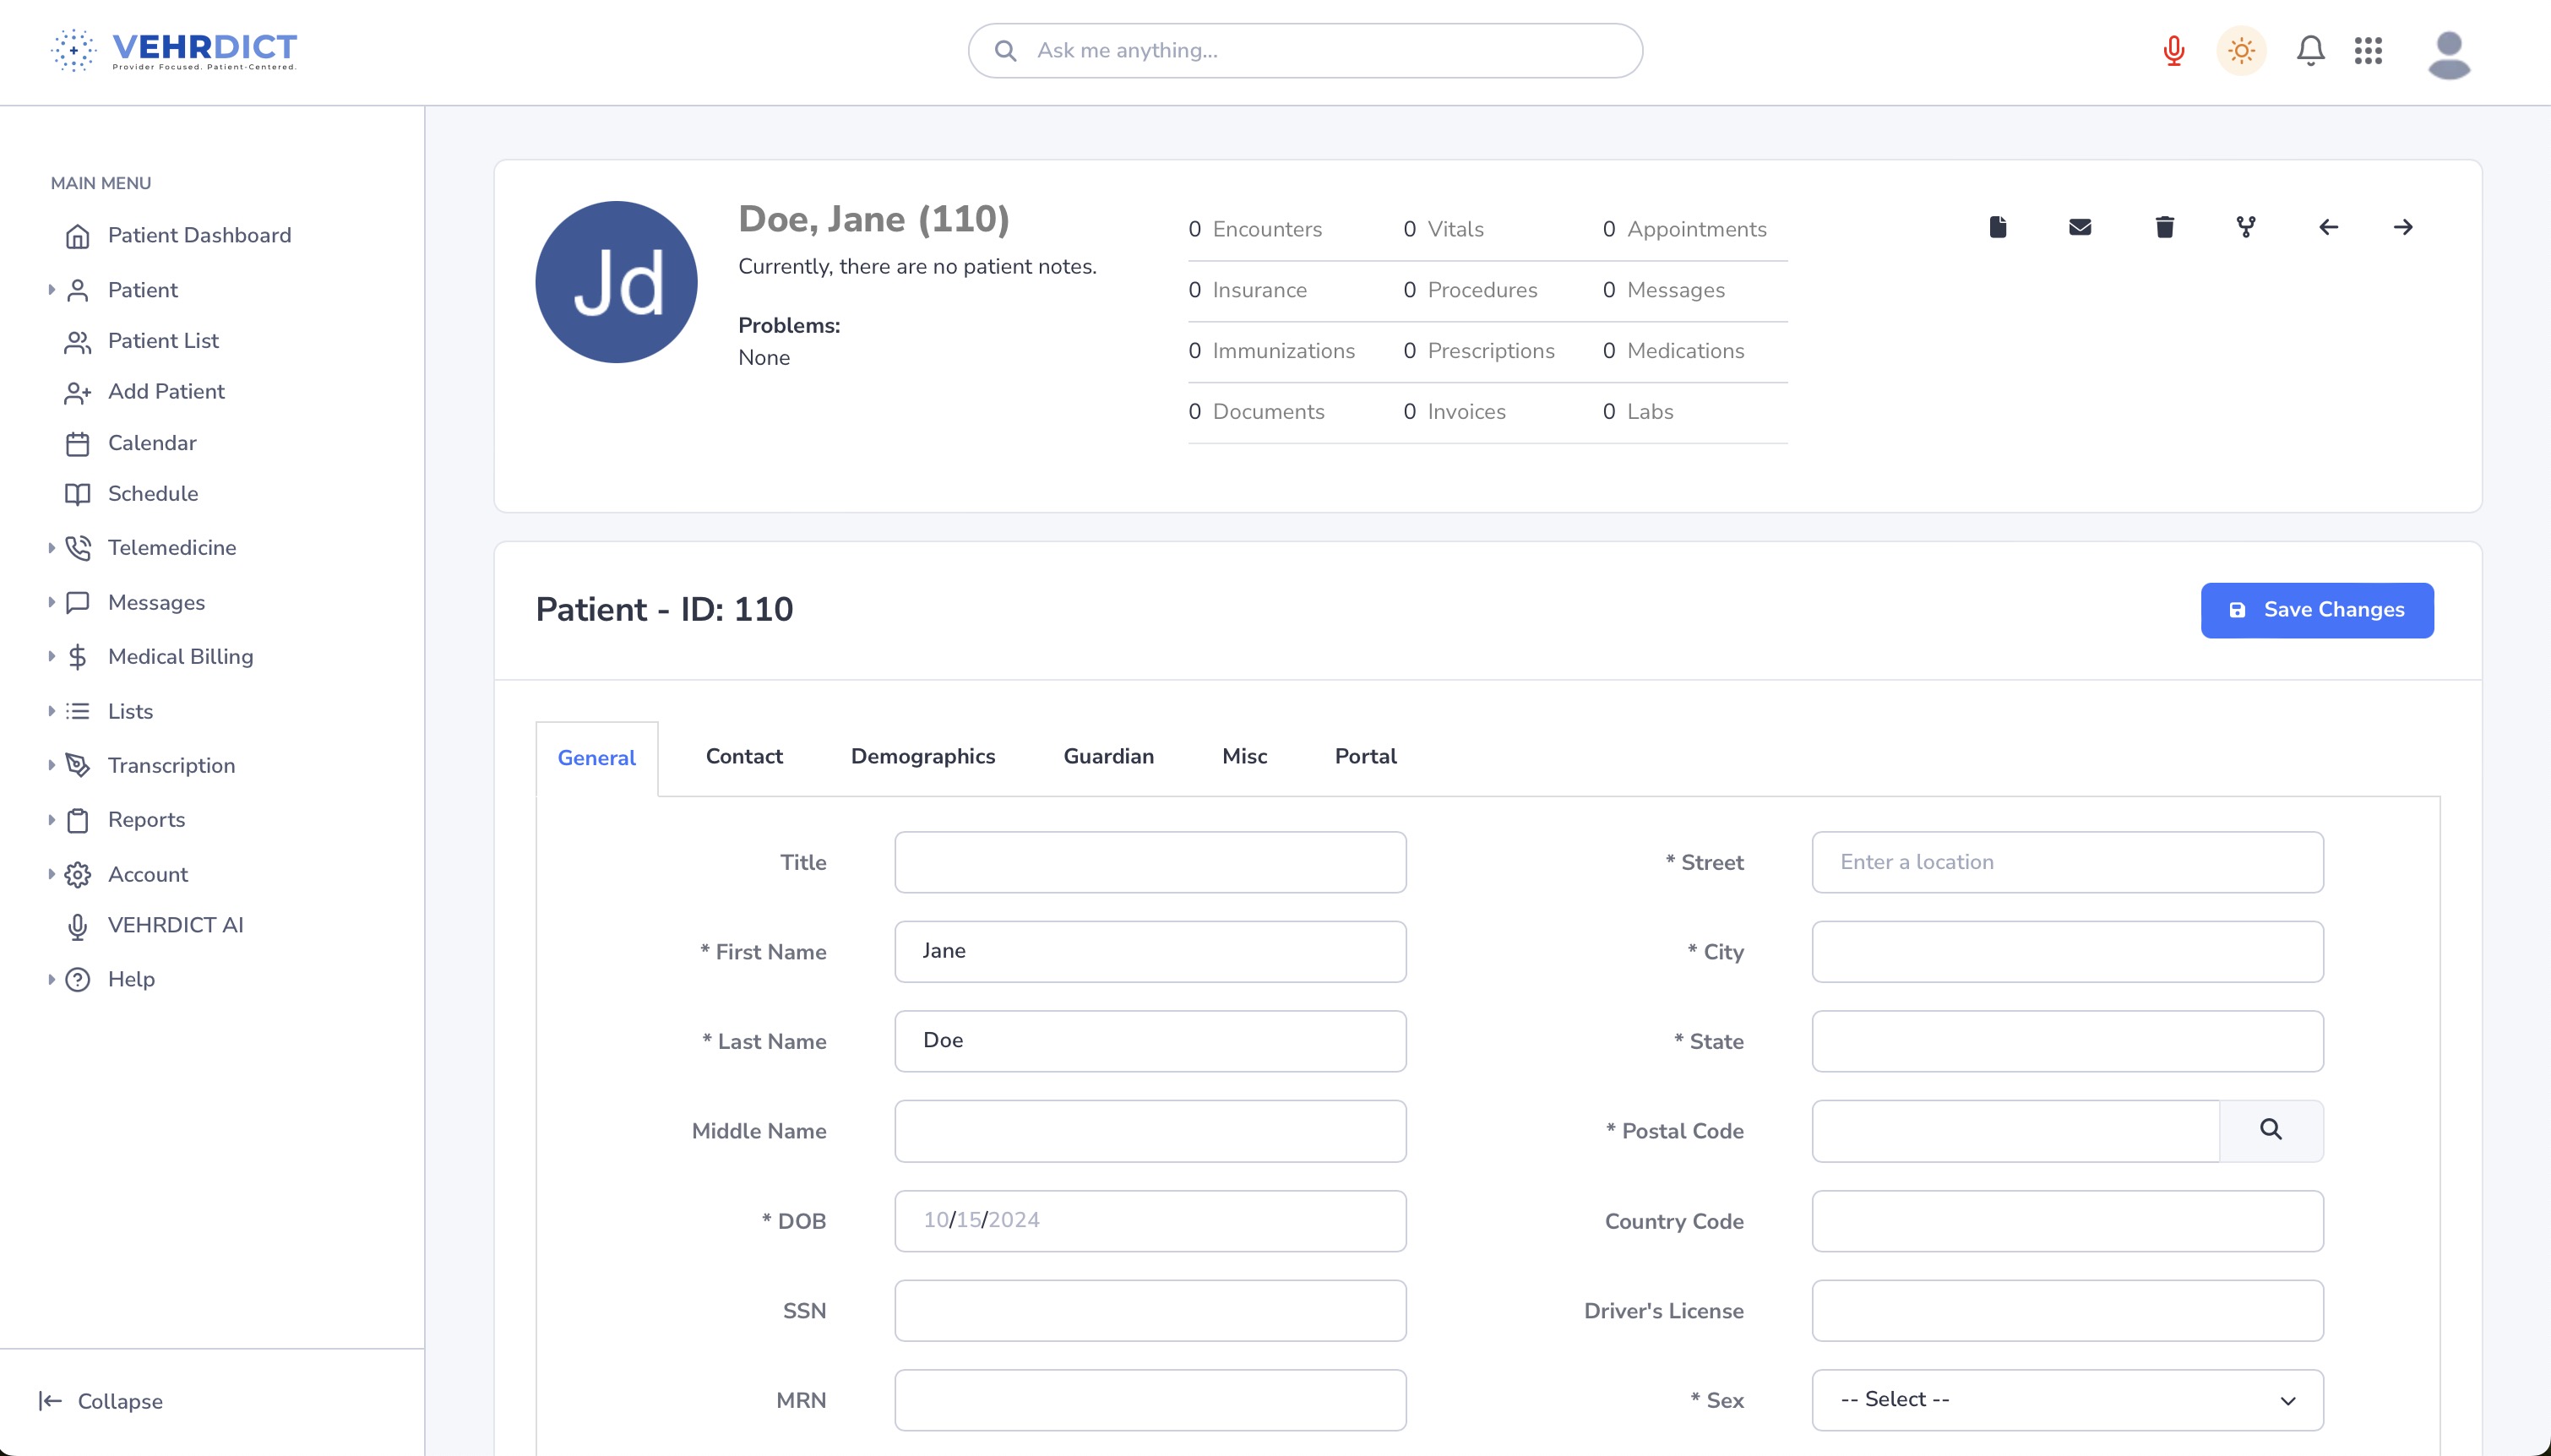
The '''General''' tab captures: | |||
* Full name | |||
* Date of birth | |||
* SSN | |||
* Gender | |||
* Basic identity information | |||
<div style="text-align:center; margin: 1em 0;"> | |||
[[File:edit_patient_nx.jpg|thumb|center|600px|'''General Info Tab''' – Foundational patient information and demographics.]] | |||
</div> | |||
--- | |||
=== Contact Tab === | |||
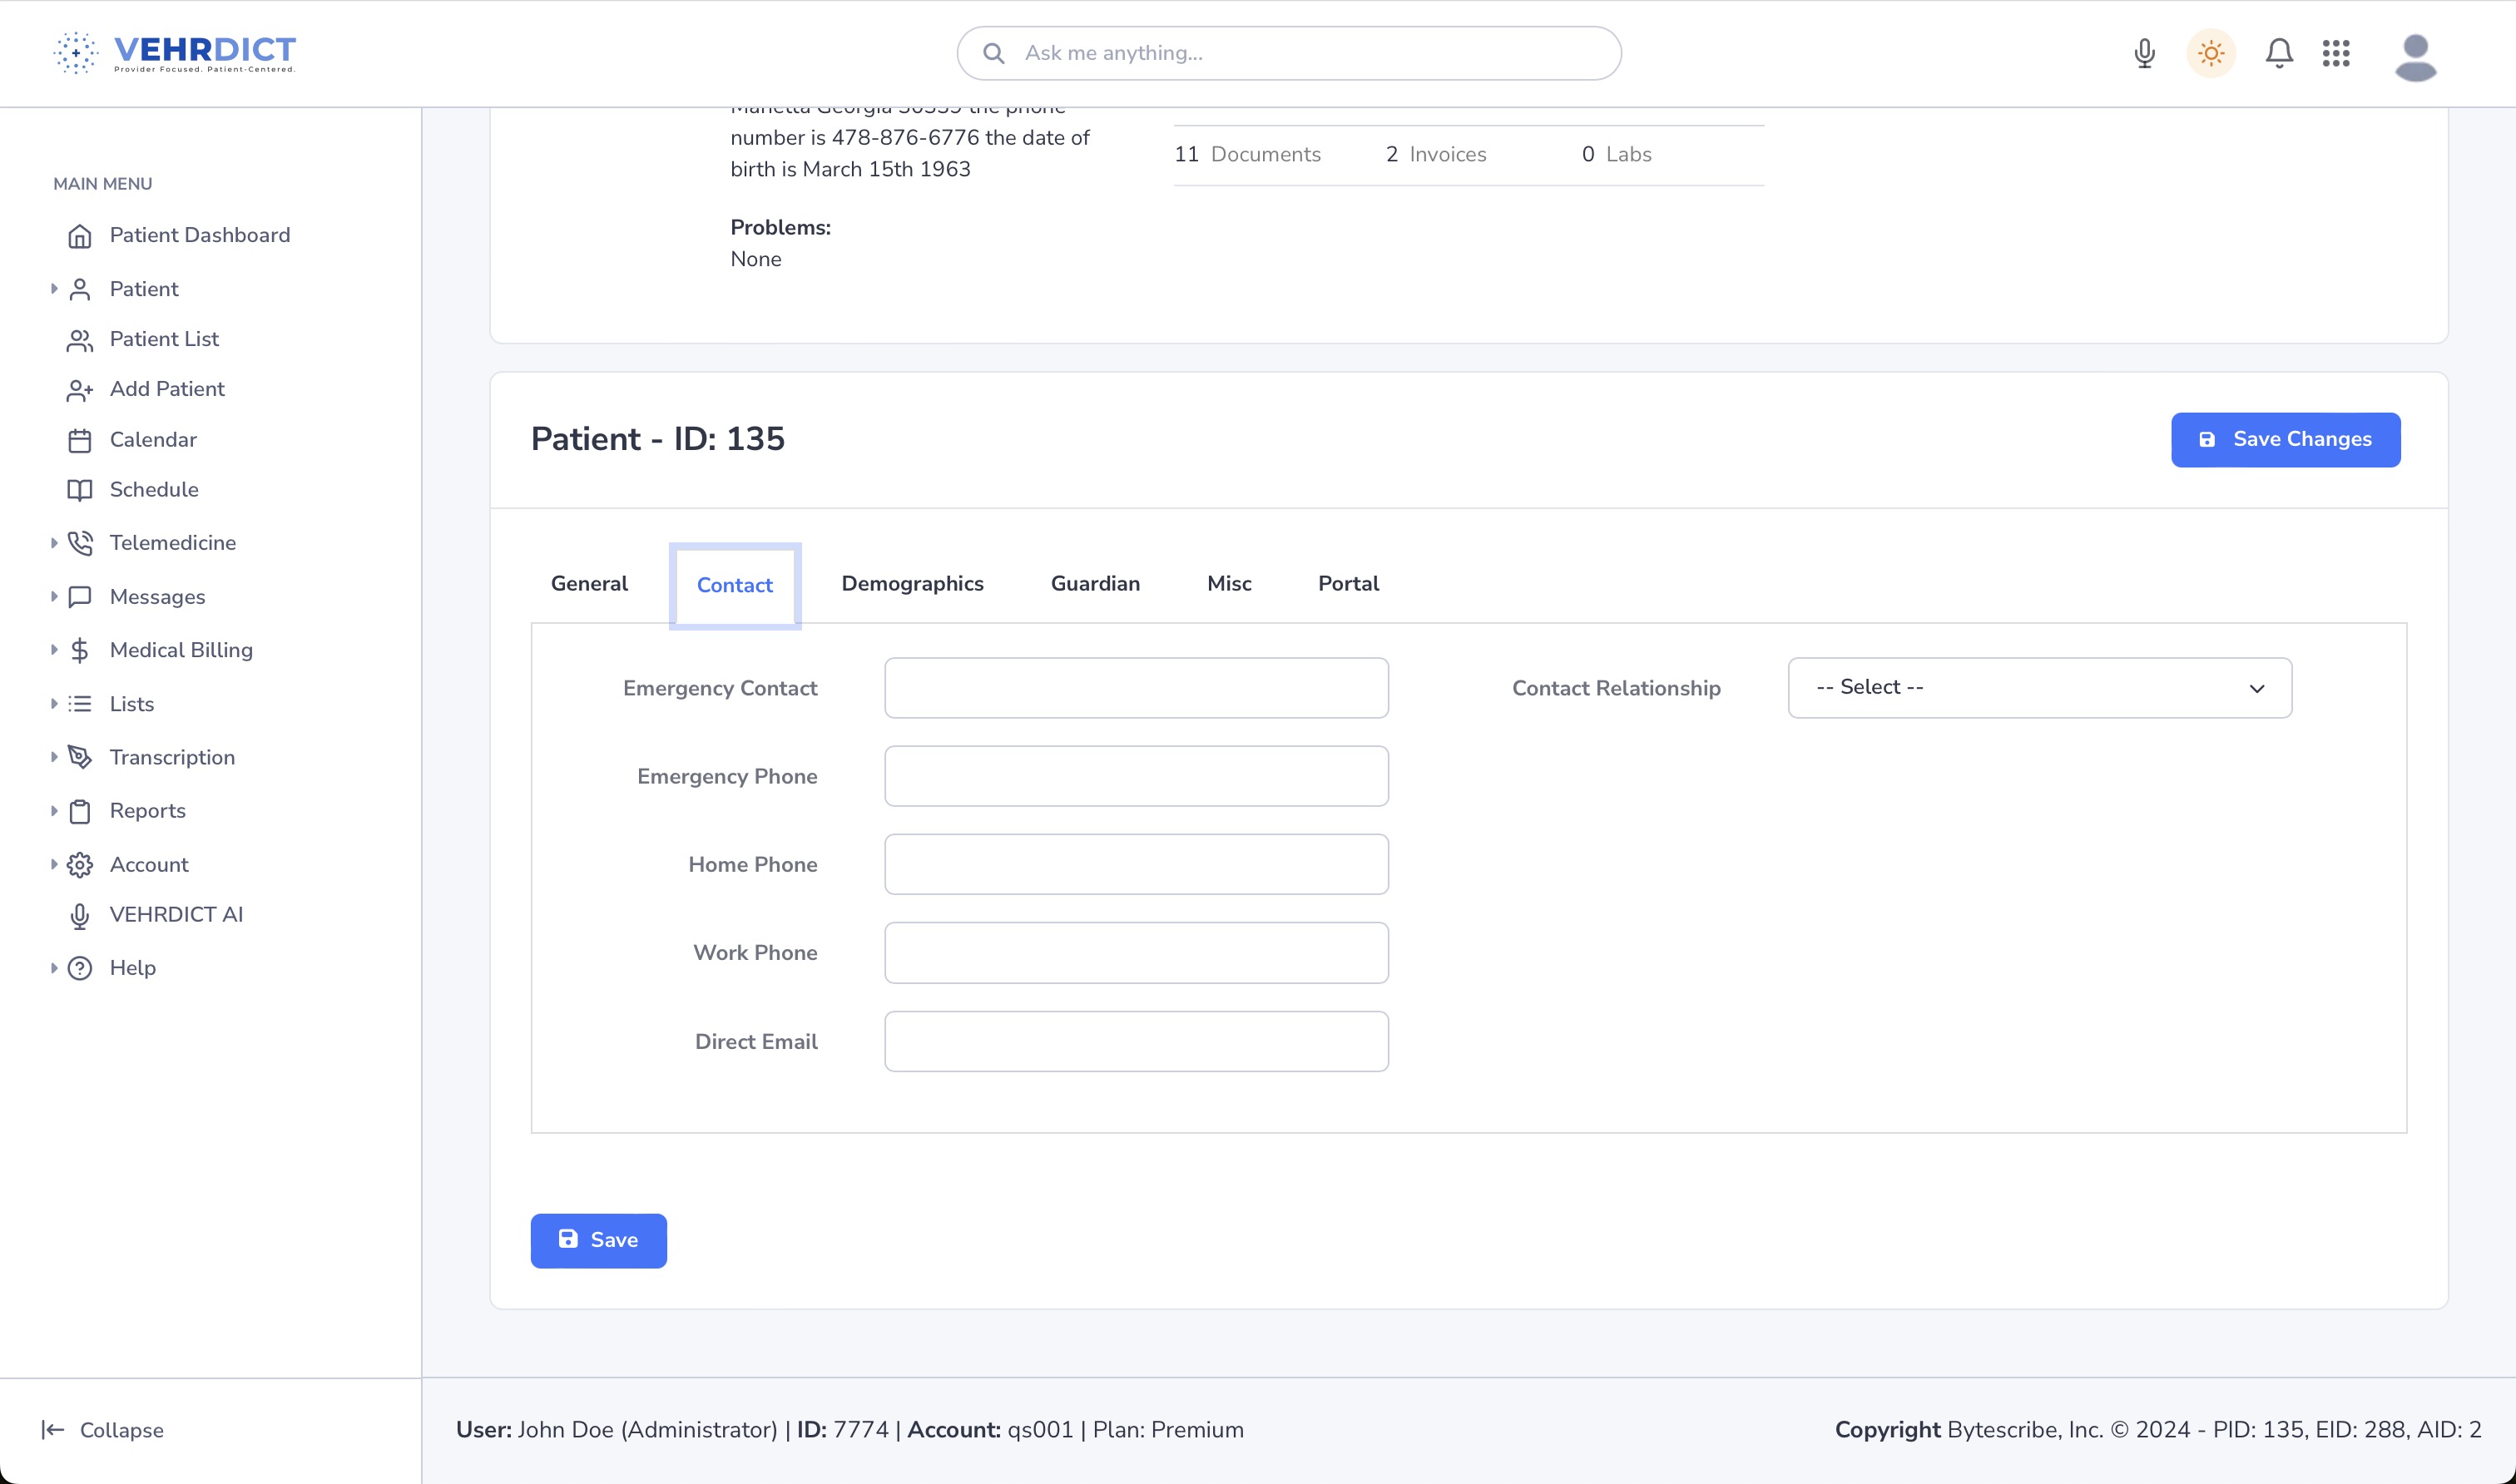
The '''Contact''' tab includes: | |||
* Emergency contact name and relationship | |||
* Phone numbers and email | |||
* Additional contact preferences | |||
= | <div style="text-align:center; margin: 1em 0;"> | ||
[[File:Contacttab.jpg|thumb|center|600px|'''Emergency Contact Info''' – Ensure a point of contact is recorded.]] | |||
</div> | |||
--- | |||
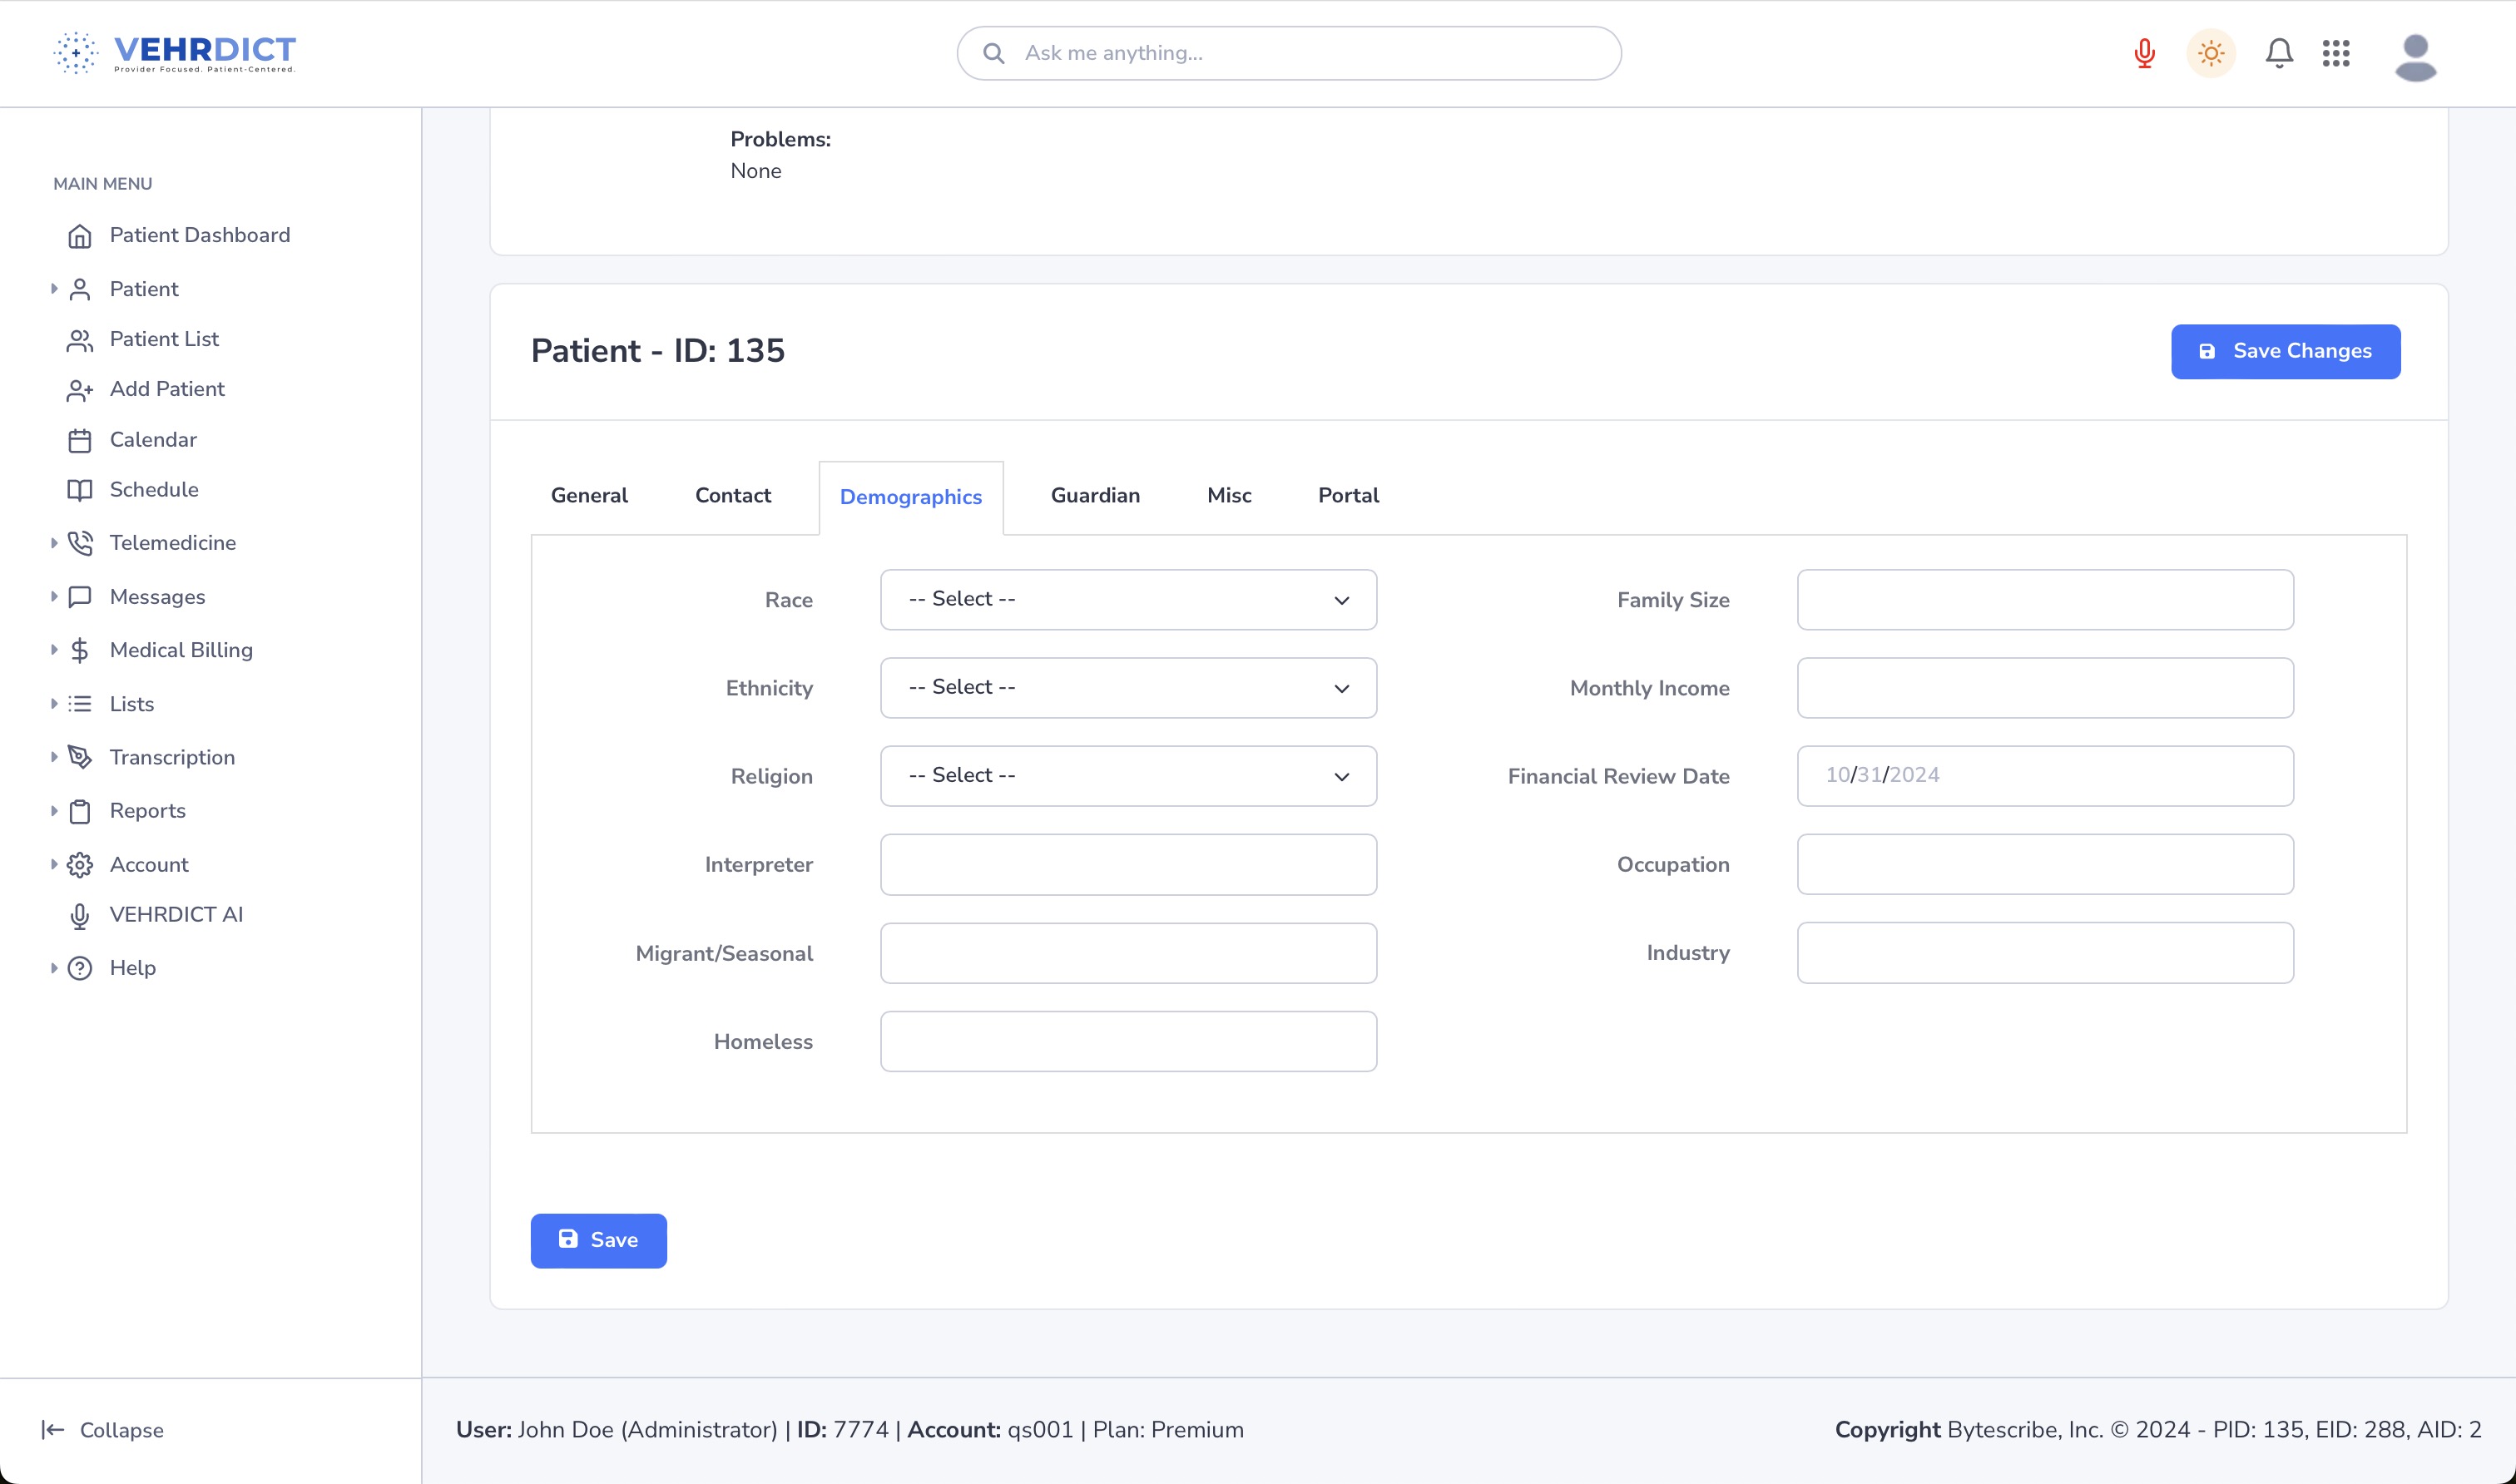
=== Demographics Tab === | |||
Here, you'll record: | |||
* Race | |||
* Ethnicity | |||
* Religion | |||
* Language preferences | |||
This information helps personalize care and improve documentation compliance. | |||
[[File: | <div style="text-align:center; margin: 1em 0;"> | ||
[[File:Demographicstab.jpg|thumb|center|600px|'''Demographics Tab''' – Required for care personalization and reporting.]] | |||
</div> | |||
--- | |||
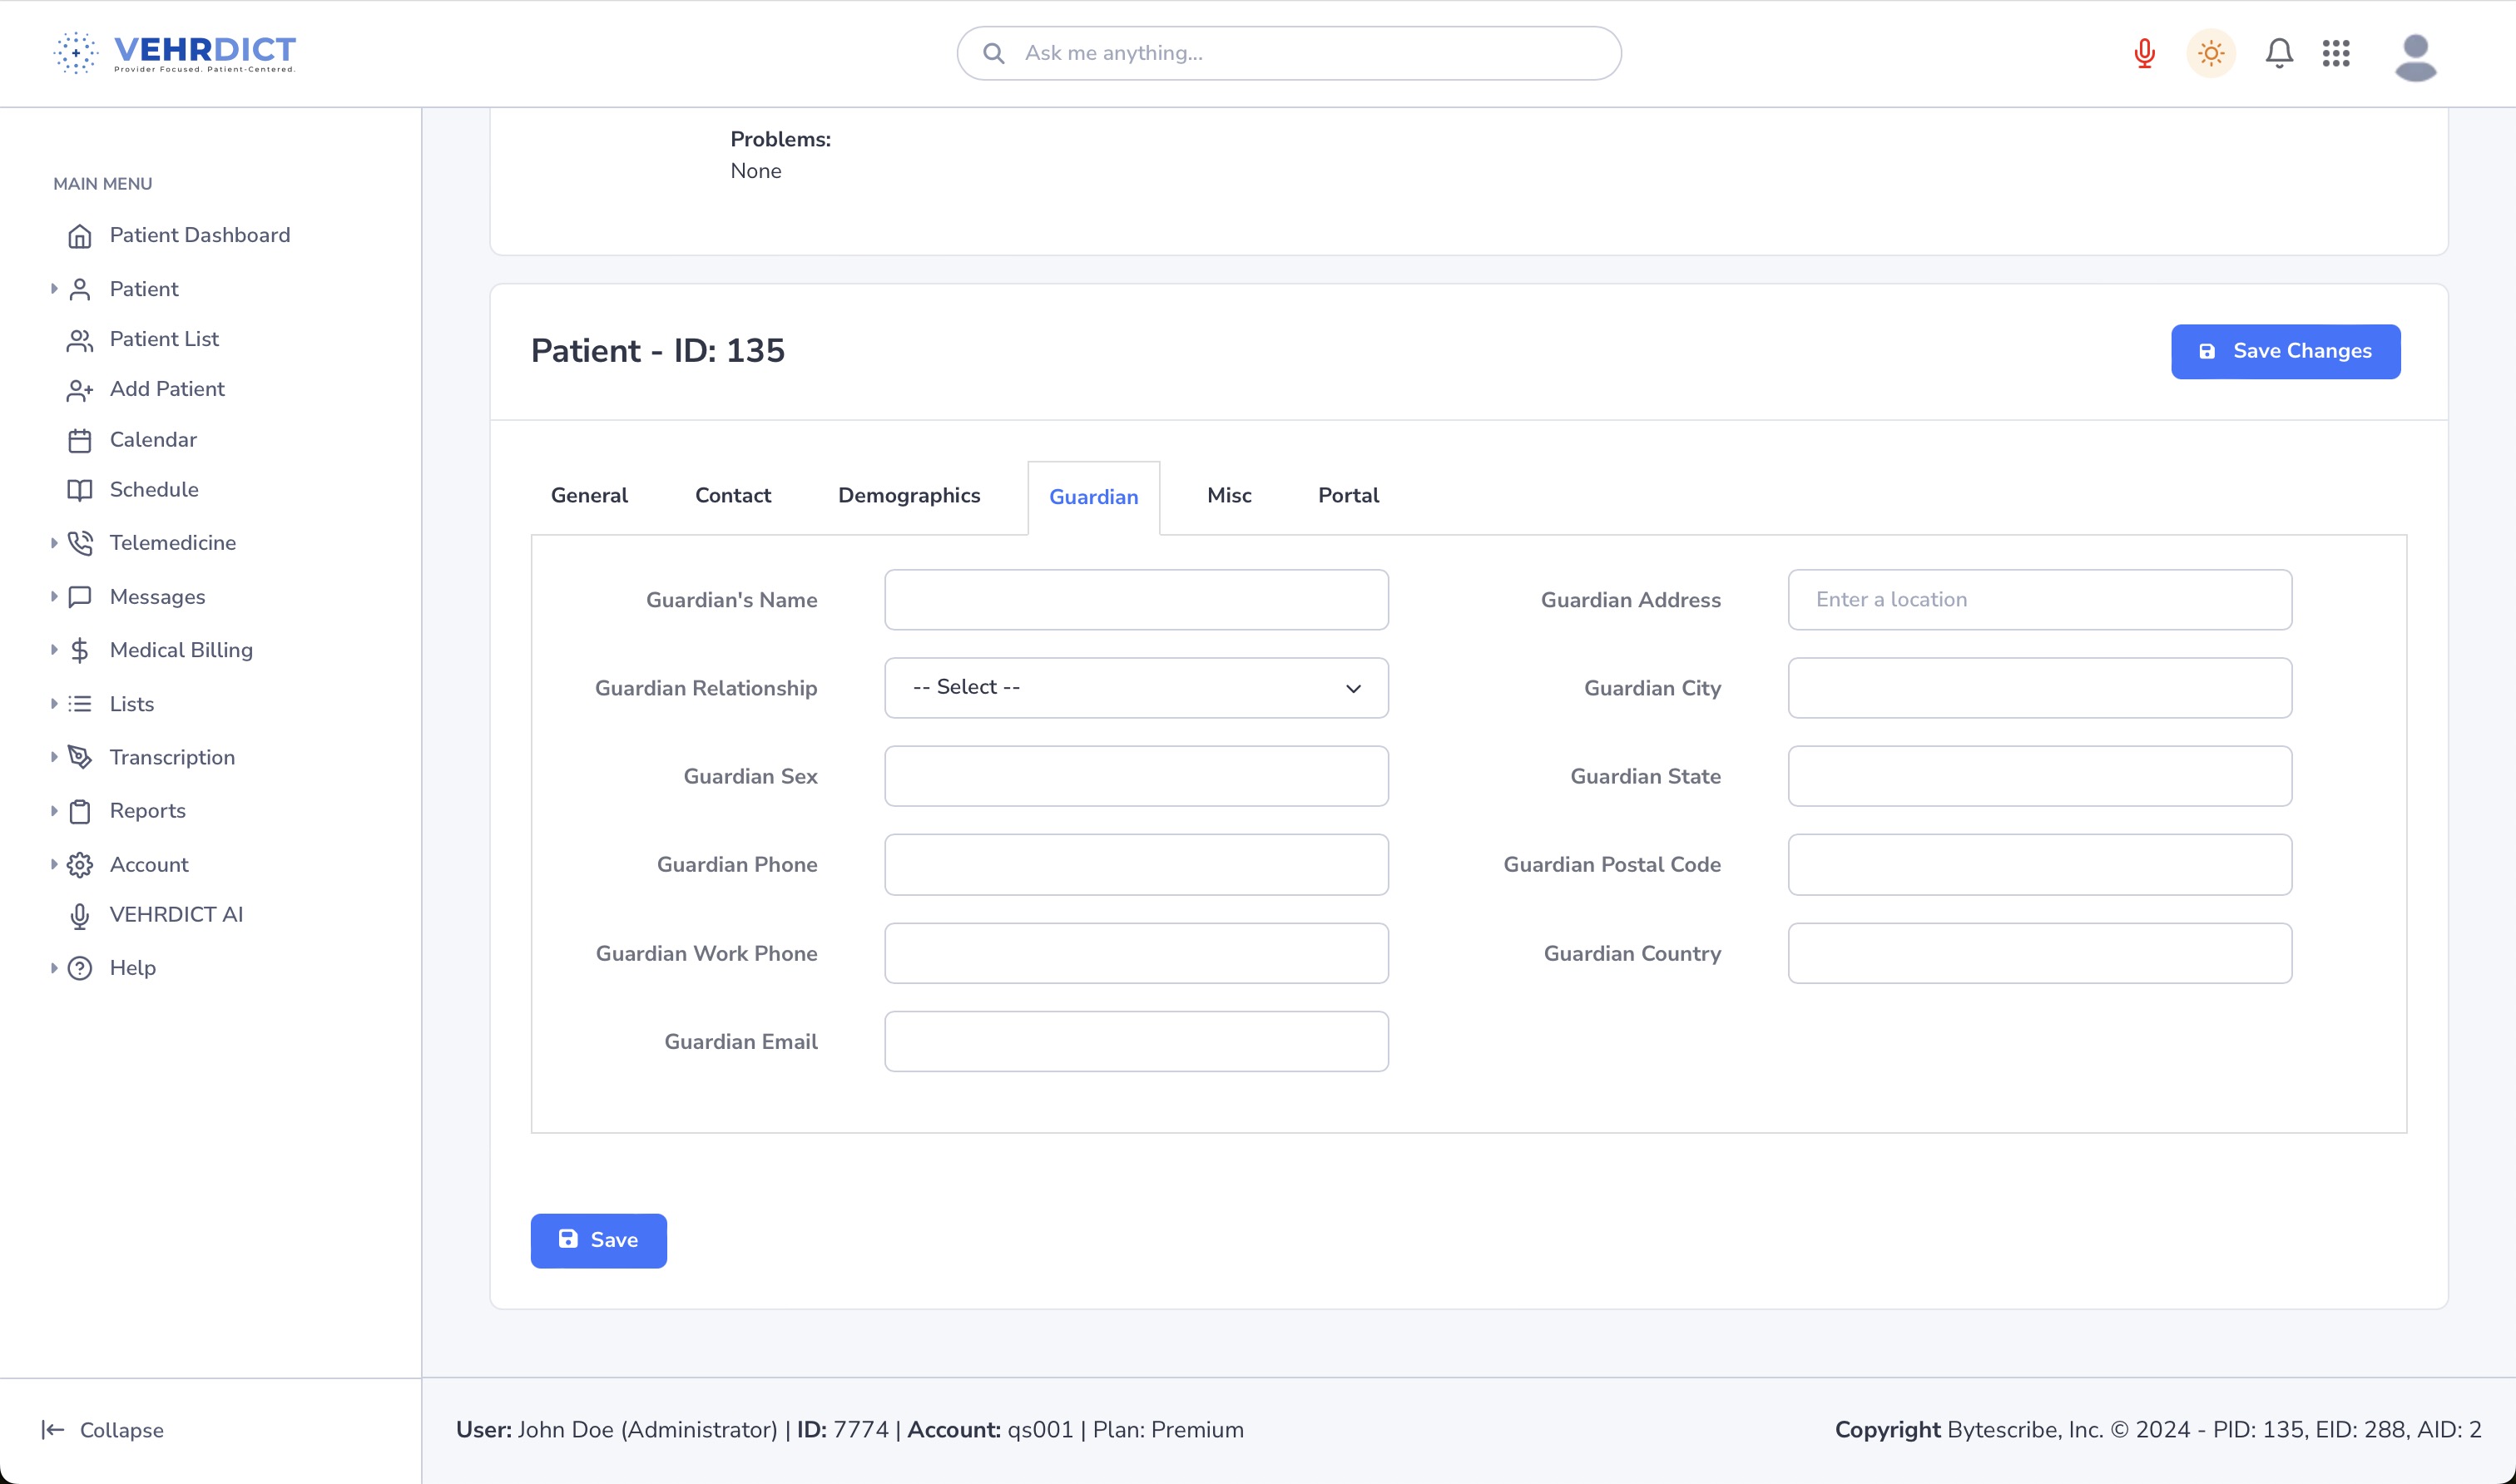
=== Guardian Tab === | |||
Use this section for minor patients or those with appointed guardians. | |||
* Enter guardian name and relationship | |||
* Select '''Self''' if the patient is their own guardian | |||
<div style="text-align:center; margin: 1em 0;"> | |||
[[File:Guardiantab.jpg|thumb|center|600px|'''Guardian Information''' – Critical for dependent or pediatric records.]] | |||
</div> | |||
--- | |||
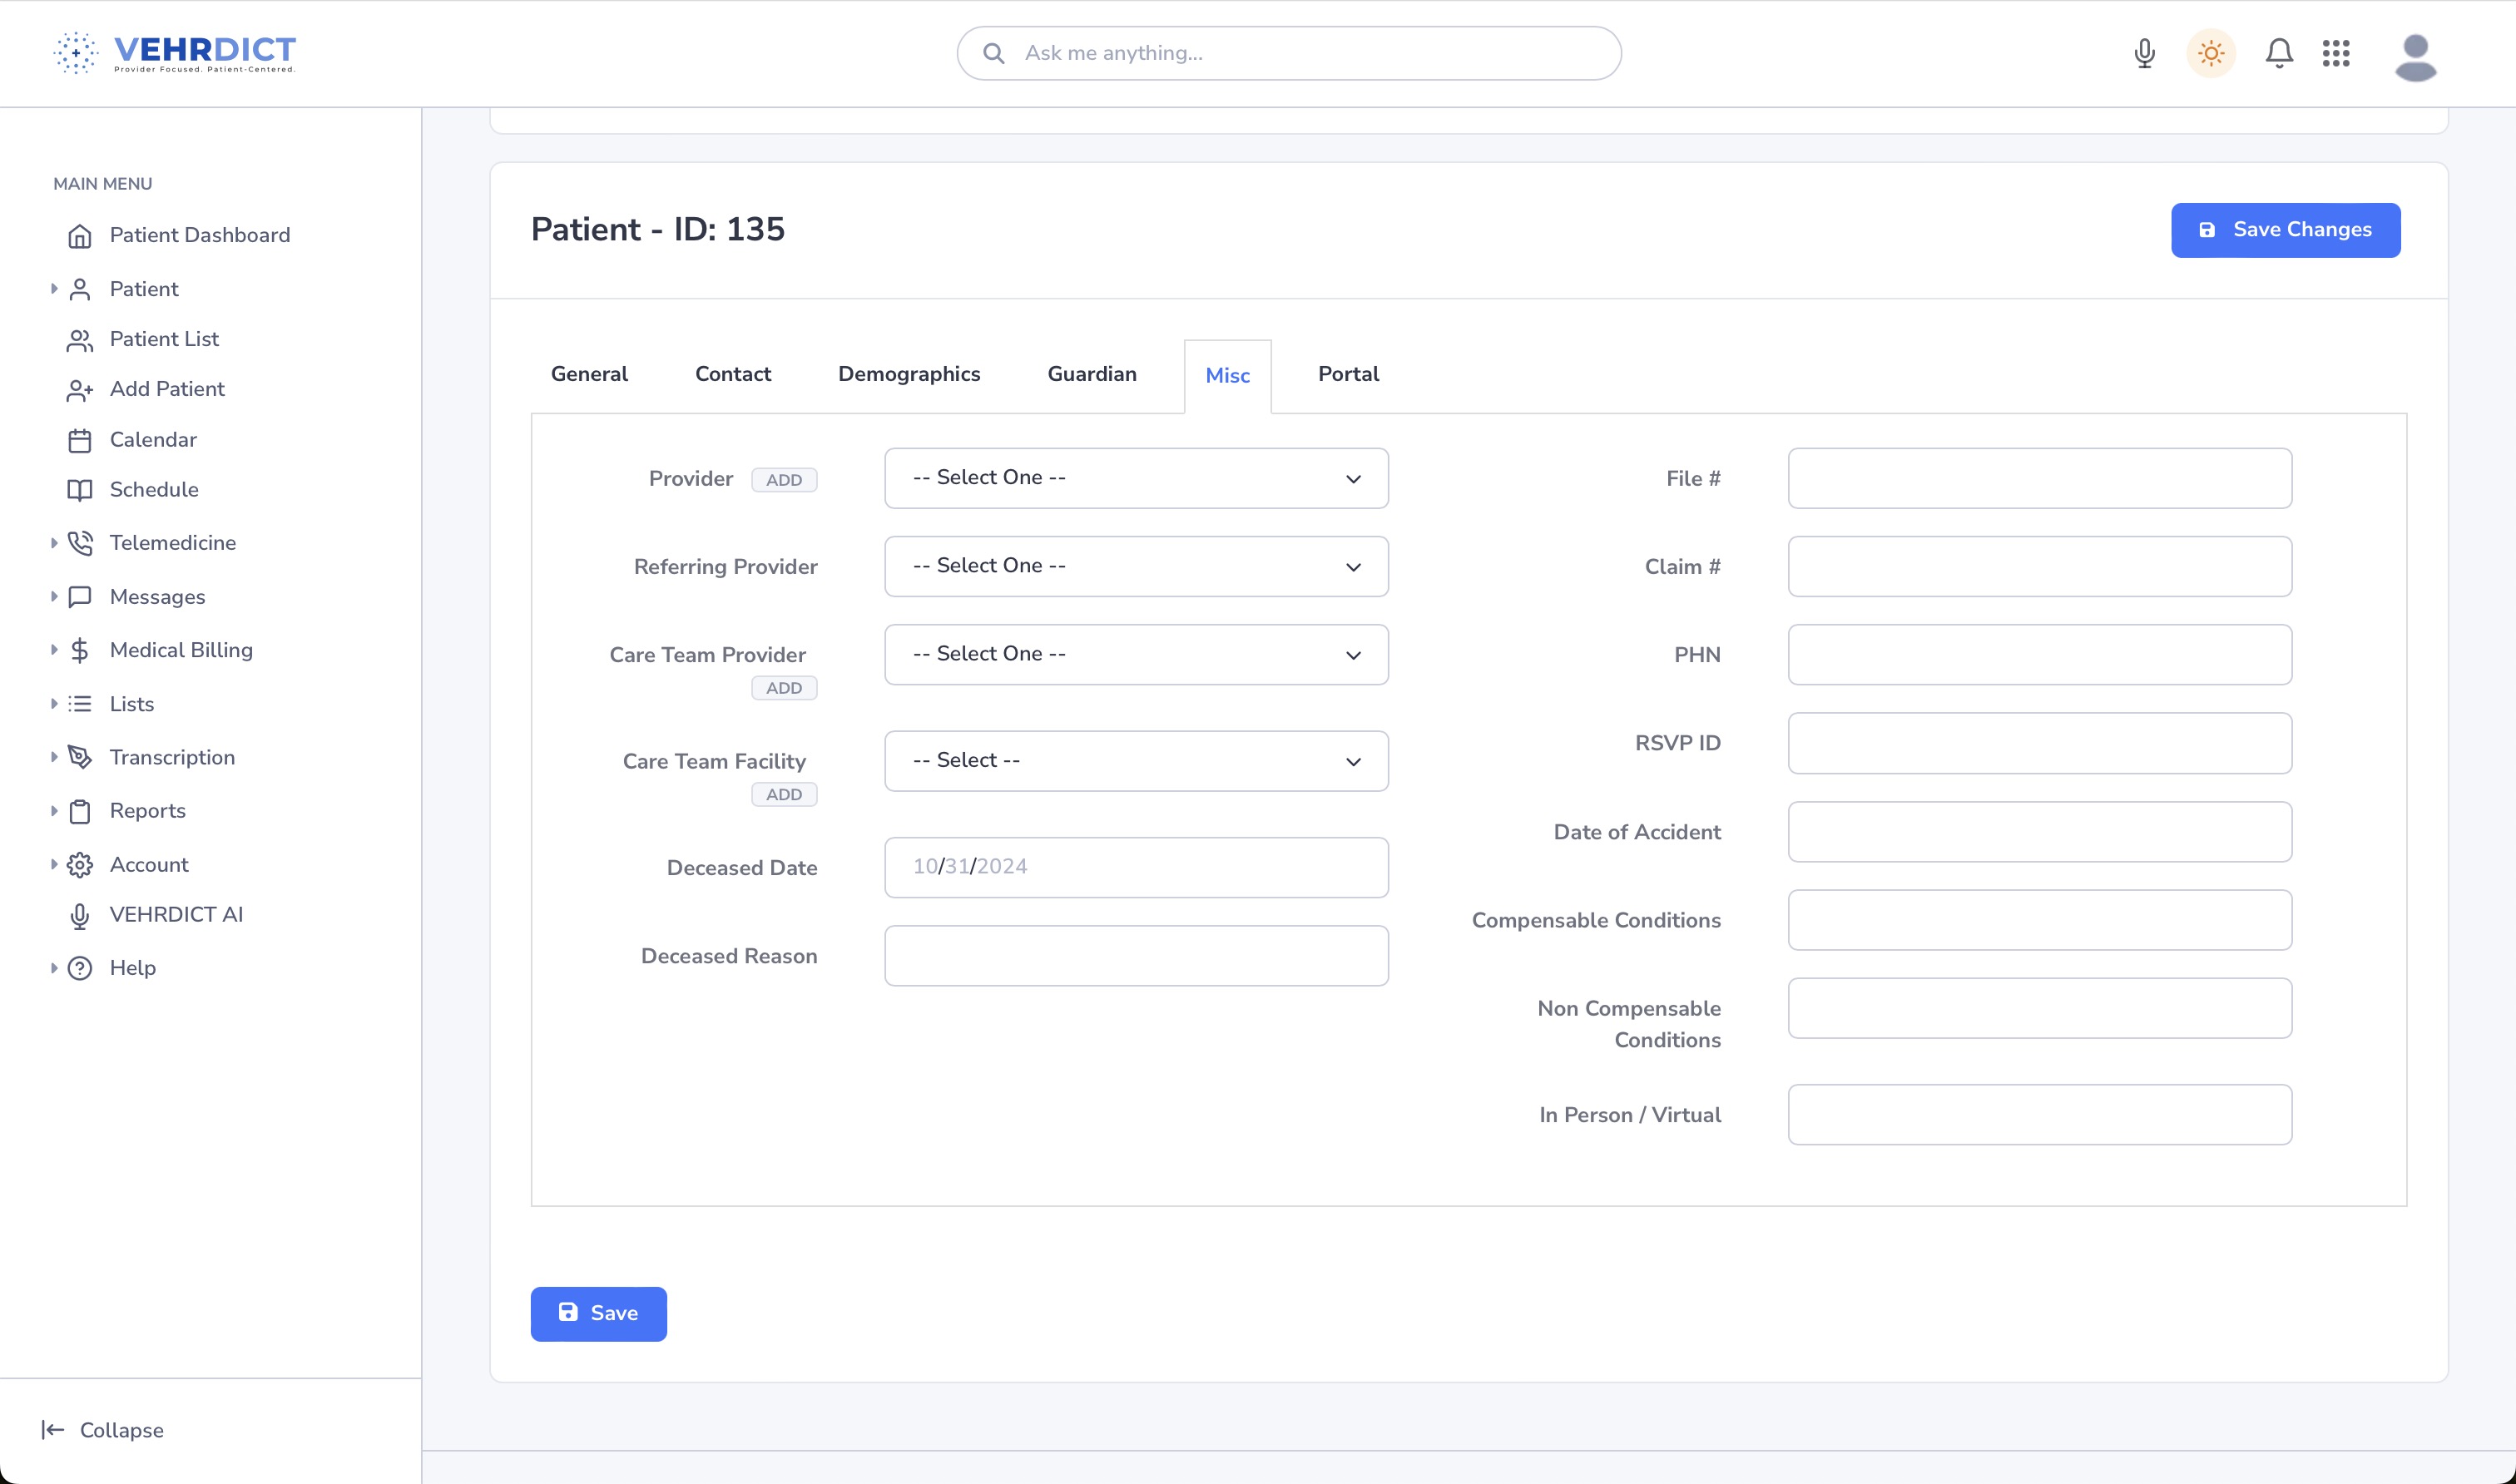
=== | === Misc Tab === | ||
This flexible tab allows you to: | |||
* Upload a photo | |||
* Add provider assignments | |||
* Record sensitive status info such as: | |||
* Deceased status | |||
* Notes and tags | |||
<div style="text-align:center; margin: 1em 0;"> | |||
[[File:Misctab.jpg|thumb|center|600px|'''Misc Tab''' – Upload photo, assign provider, or record status changes.]] | |||
</div> | |||
Once | --- | ||
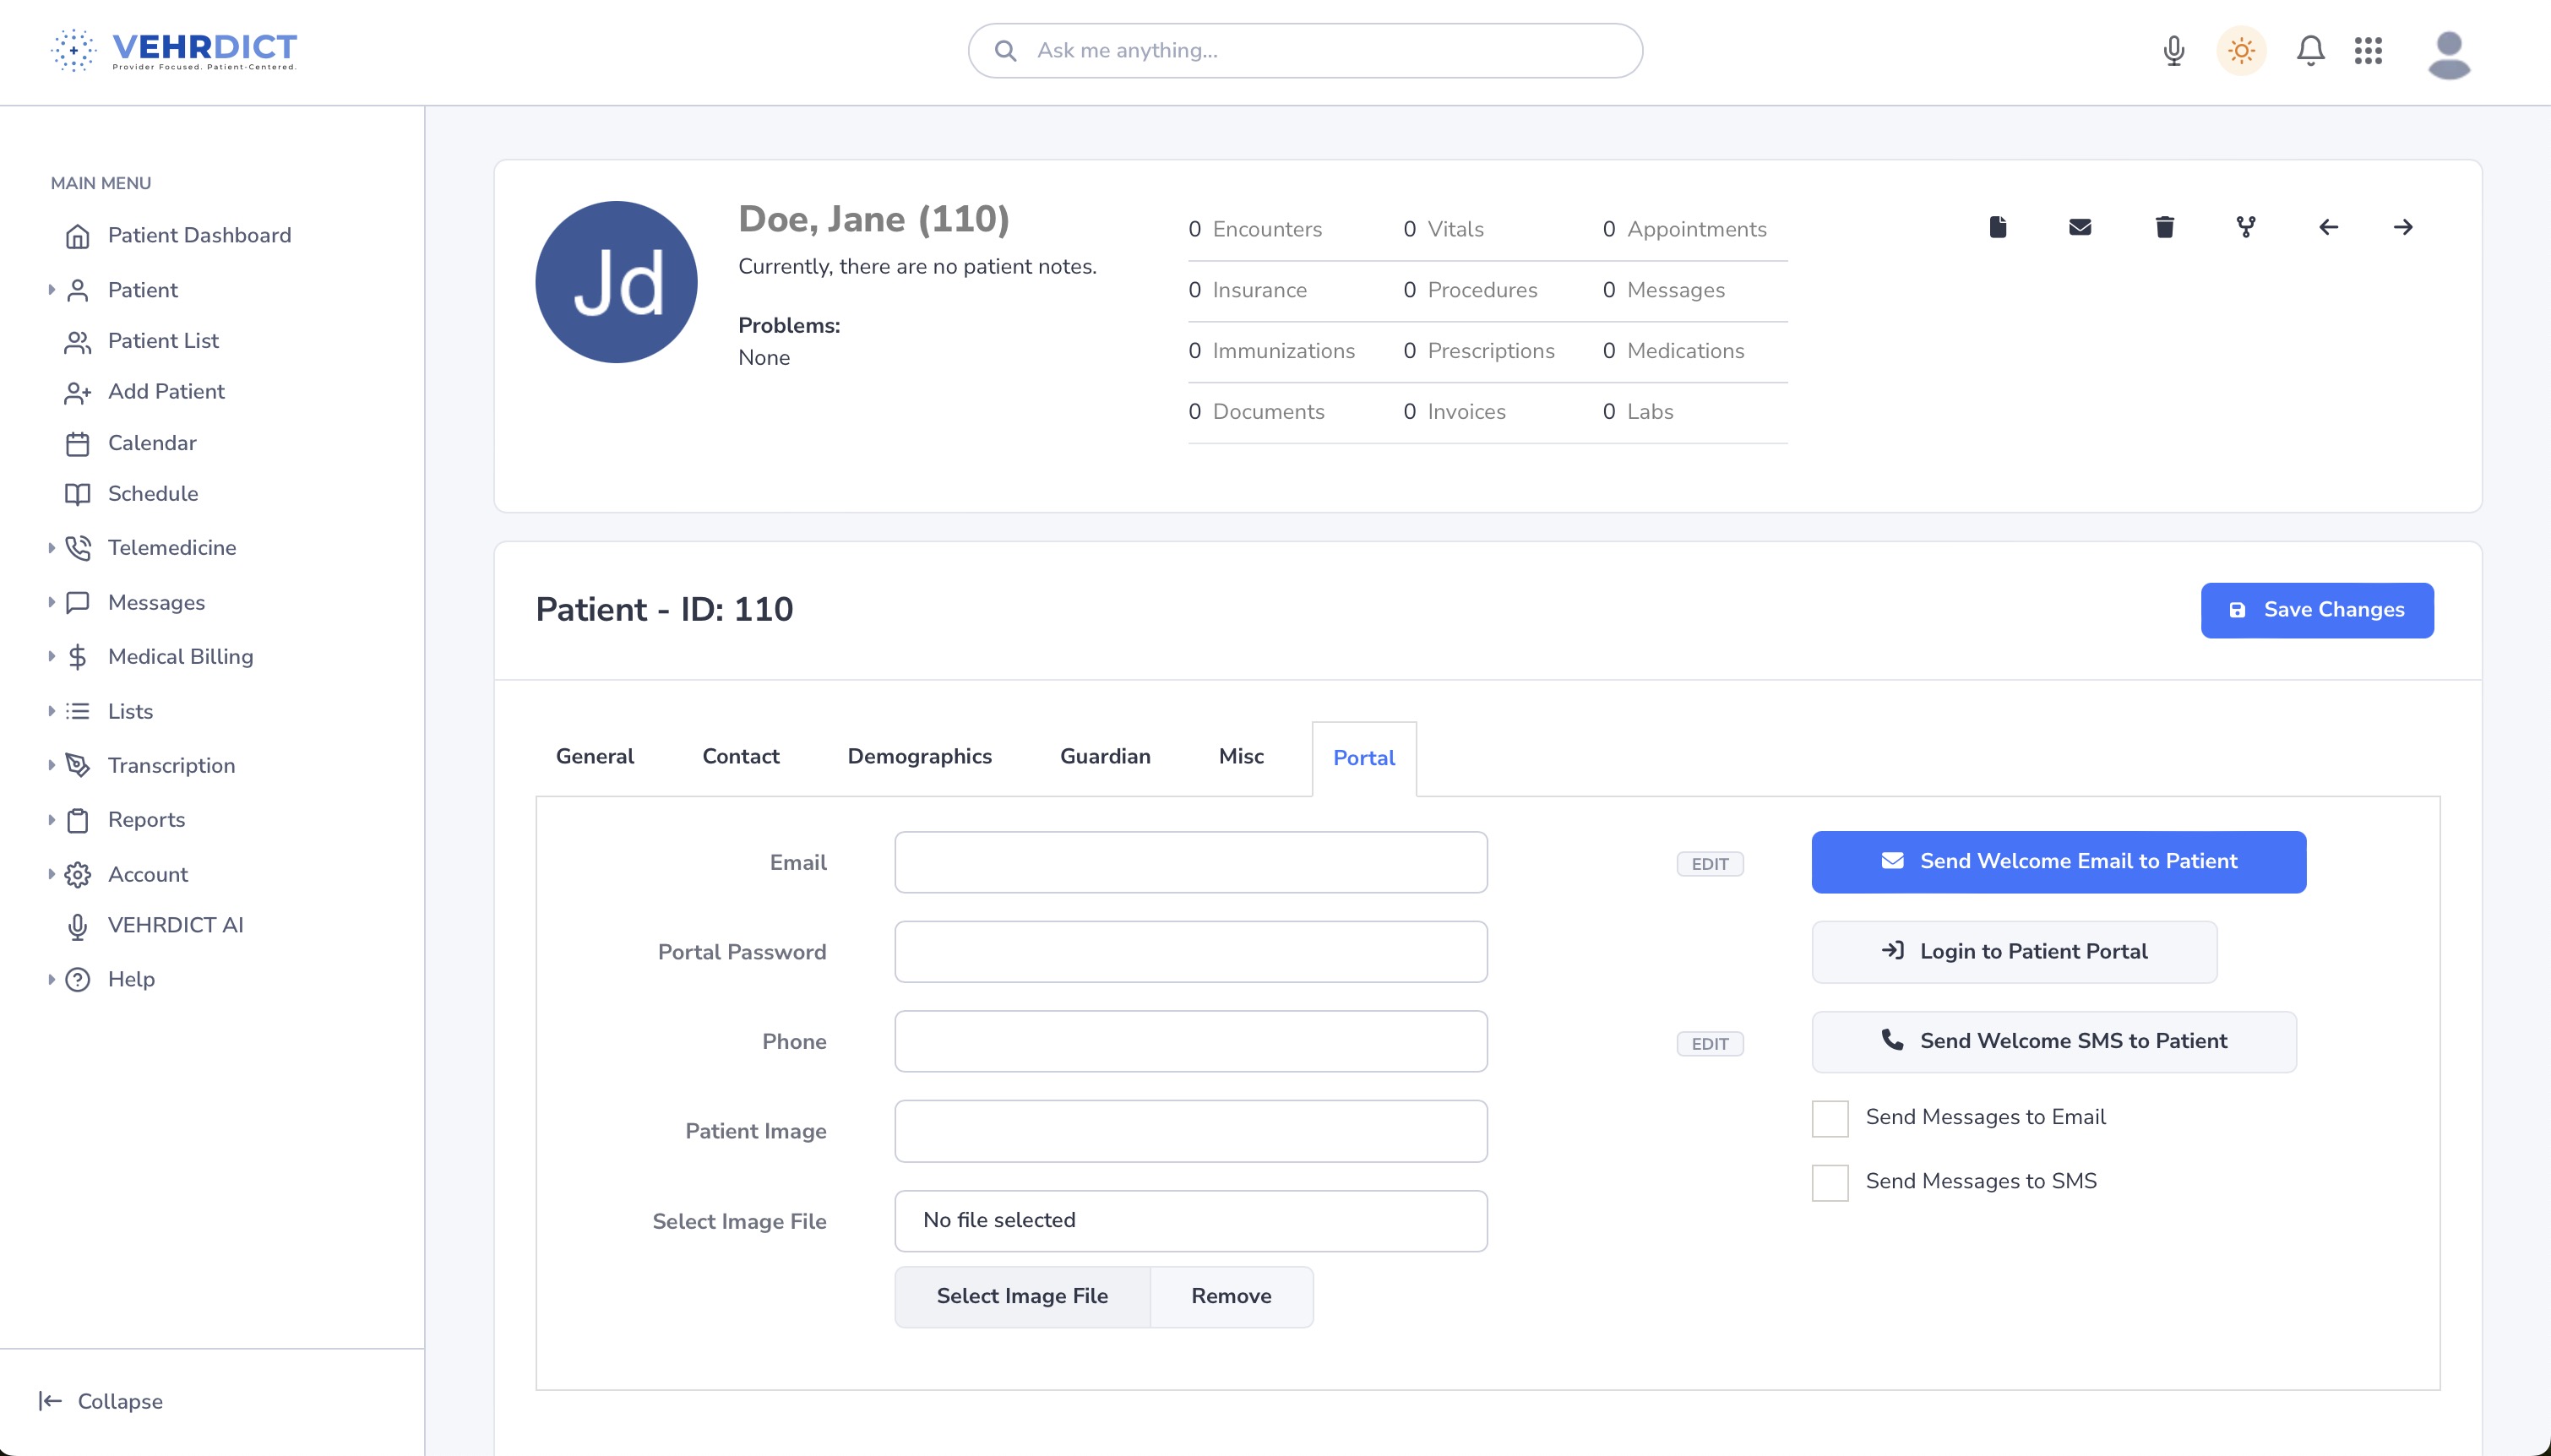
=== Portal Tab === | |||
Here you enable and manage patient portal access: | |||
* Set up login credentials | |||
* Send a welcome email | |||
* View current portal access status | |||
<div style="text-align:center; margin: 1em 0;"> | |||
[[File:patient_portal_tab_nx.jpg|thumb|center|600px|'''Patient Portal Tab''' – Manage access credentials and welcome messages.]] | |||
</div> | |||
--- | |||
Once all required fields are filled and tabs completed, the patient record becomes active in the system and accessible for appointments, documentation, billing, and portal communication. | |||
Latest revision as of 16:05, 20 June 2025
Adding a Patient Record
The electronic healthcare record process begins by entering patient data. VEHRDICT provides both voice-driven AI entry and manual form-based entry to make this process fast, intuitive, and accurate.
---
Adding a Patient Using AI
To create a new patient record using voice commands:
- Click the microphone icon at the top toolbar.
- Say: "Create a new patient record for..." and begin speaking naturally.
* Example: “Address is 123 Main Street”, “Phone number is 404-555-2323”, “Email is emily.j@example.com”
- When finished, say: "Do it" or click the Do it button to create the record.
Once the record is created:
- Review the auto-filled fields.
- Click the Edit Patient button to modify or complete missing information.
---
Adding a Patient Manually
To add a patient manually:
- Navigate to the main menu.
- Click Add Patient.
- Complete each section across the following tabs:
  * General
  * Contact
  * Demographics
  * Guardian
  * Misc
  * Portal
Each tab captures specific data essential for a complete patient profile.
---
General Tab
The General tab captures:
- Full name
- Date of birth
- SSN
- Gender
- Basic identity information
---
Contact Tab
The Contact tab includes:
- Emergency contact name and relationship
- Phone numbers and email
- Additional contact preferences
---
Demographics Tab
Here, you'll record:
- Race
- Ethnicity
- Religion
- Language preferences
This information helps personalize care and improve documentation compliance.
---
Guardian Tab
Use this section for minor patients or those with appointed guardians.
- Enter guardian name and relationship
- Select Self if the patient is their own guardian
---
Misc Tab
This flexible tab allows you to:
- Upload a photo
- Add provider assignments
- Record sensitive status info such as:
 * Deceased status
 * Notes and tags
---
Portal Tab
Here you enable and manage patient portal access:
- Set up login credentials
- Send a welcome email
- View current portal access status
---
Once all required fields are filled and tabs completed, the patient record becomes active in the system and accessible for appointments, documentation, billing, and portal communication.

