Insurance: Difference between revisions
No edit summary |
No edit summary |
||
| Line 1: | Line 1: | ||
== Managing Patient Insurance Information == | |||
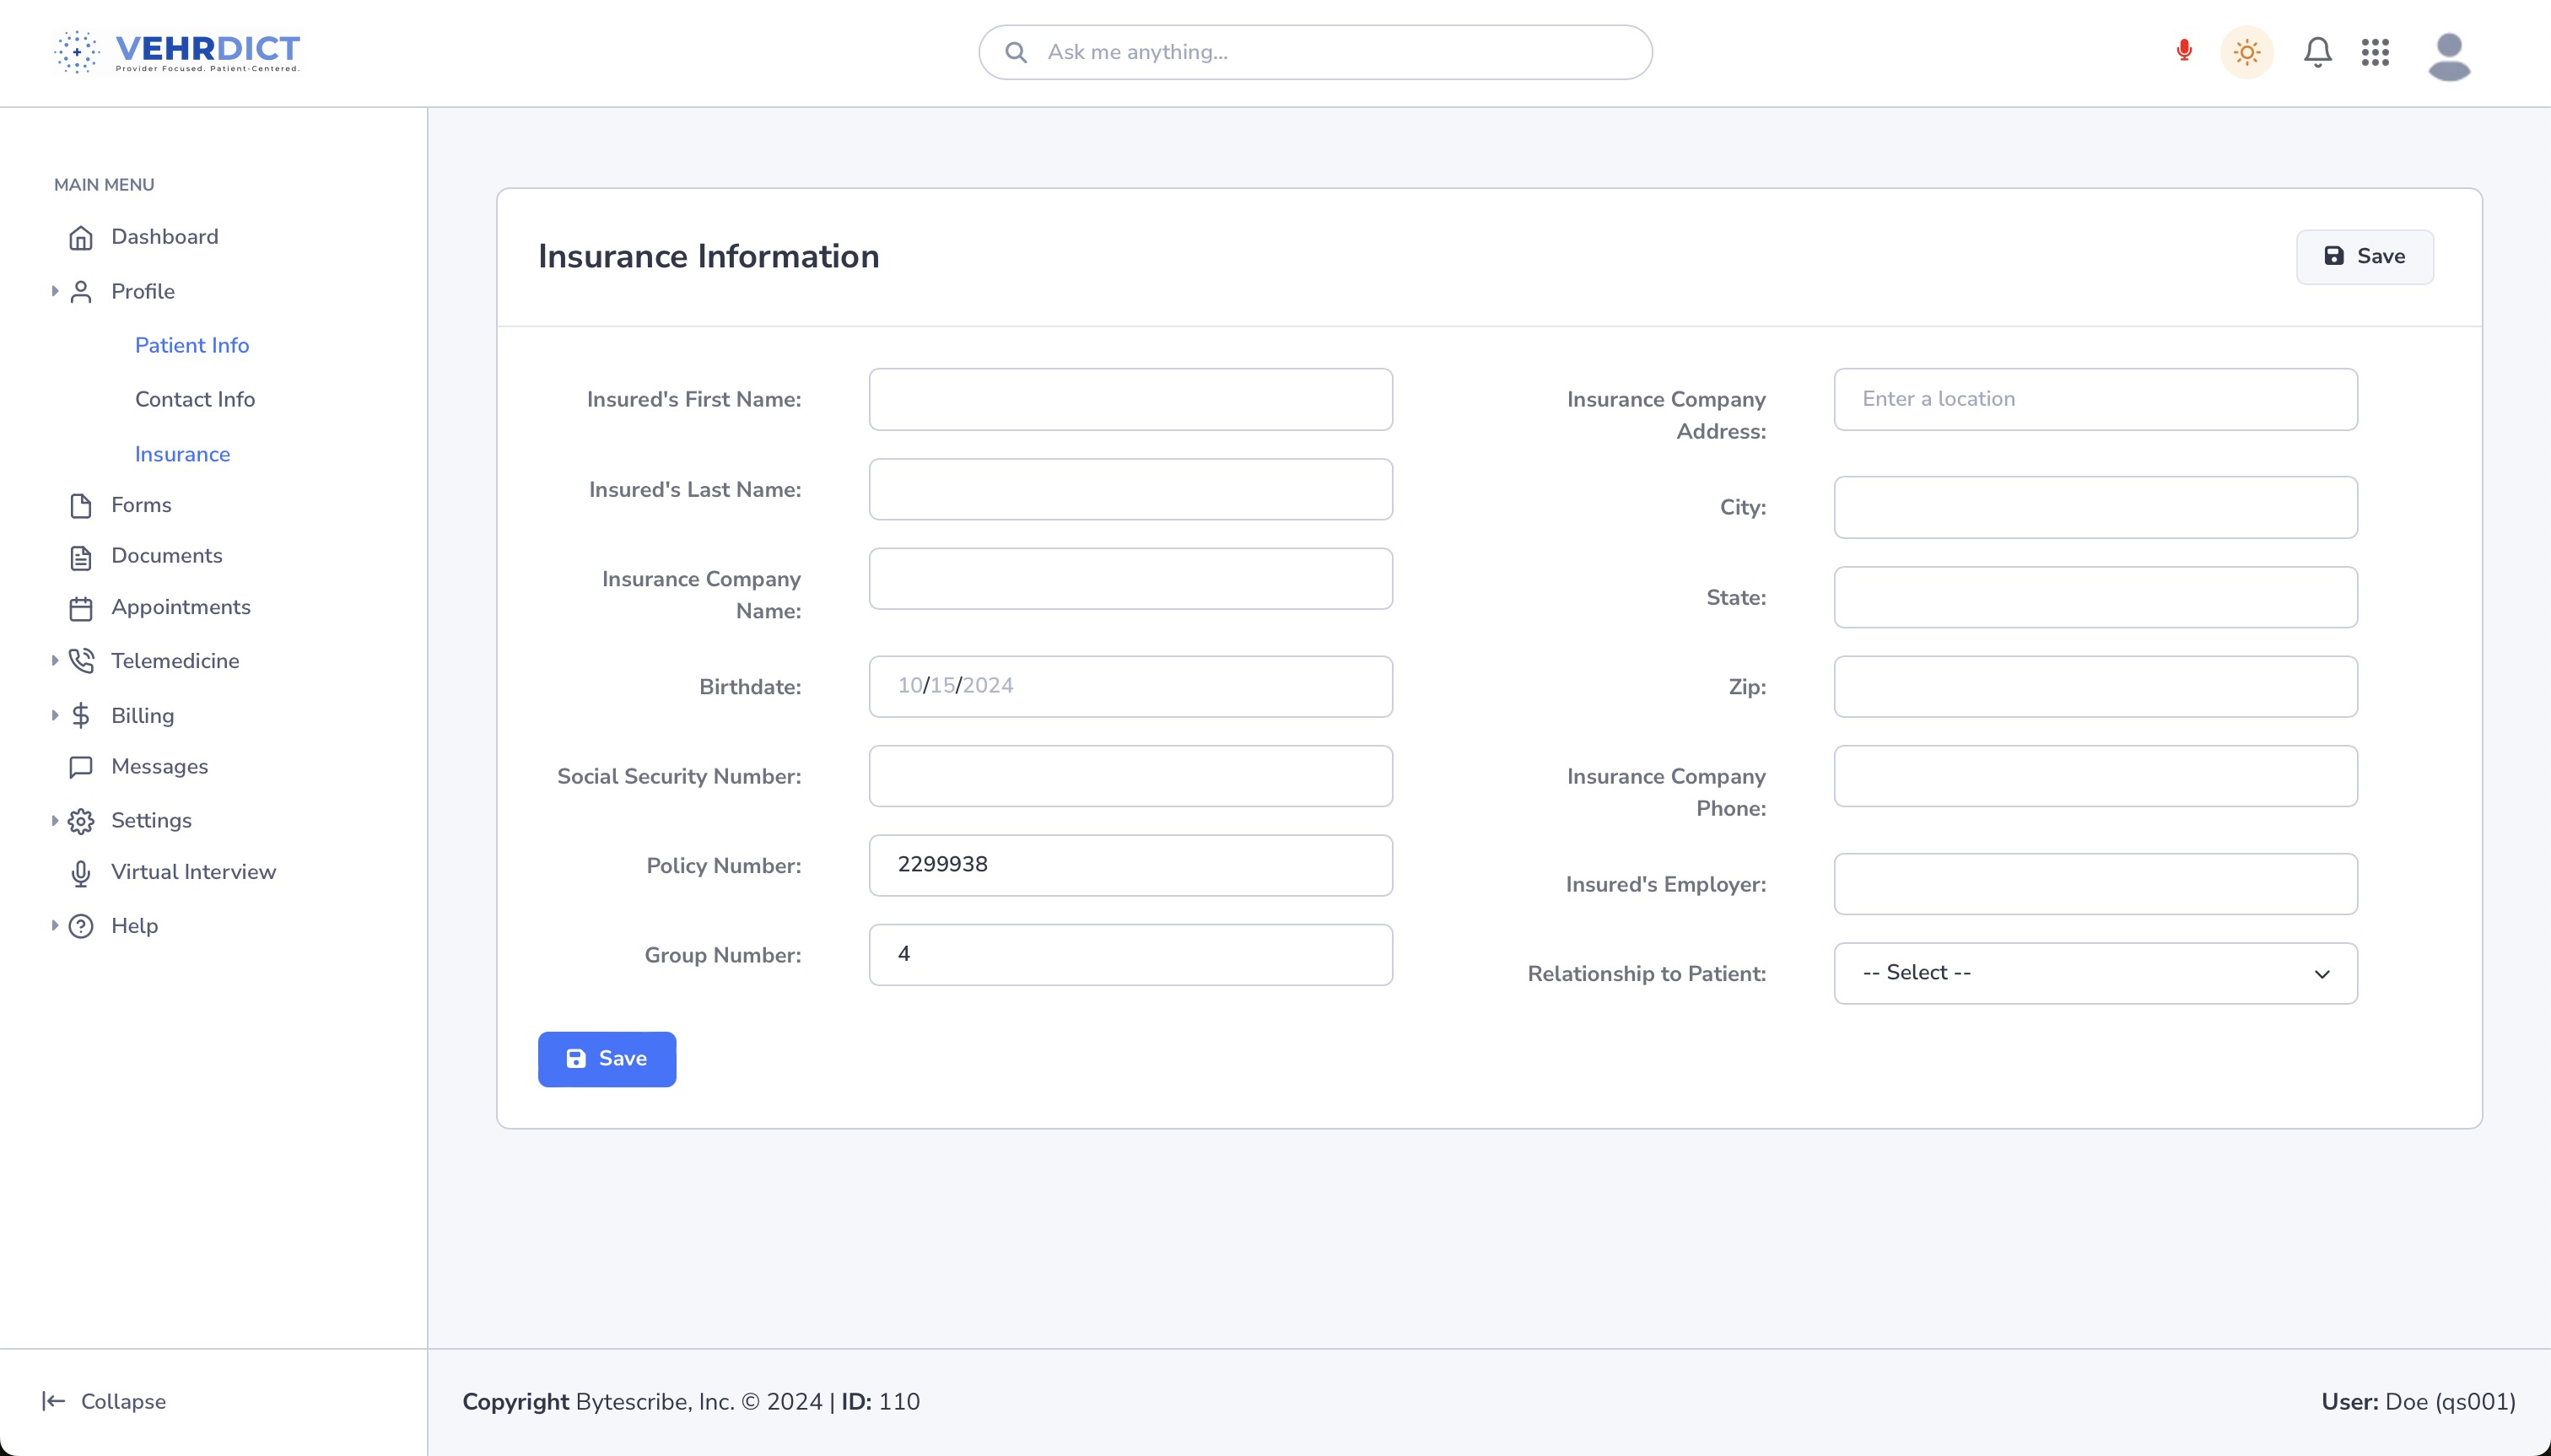
Keeping insurance information accurate and up to date is essential for proper billing, claim submission, and minimizing delays in patient care. VEHRDICT allows users or patients (via the Patient Portal) to easily enter and manage insurance details. | |||
> {{Tip|Verifying and updating insurance details before each visit helps prevent claim rejections and ensures smooth payment processing.}} | |||
[[File:PatientPortal_Insurance1_nx.jpg|800px]] | --- | ||
== Adding or Updating Insurance == | |||
To add or edit insurance information for a patient: | |||
# Navigate to the patient's record in the '''Patient Dashboard''' | |||
# Click on the '''Insurance''' tab | |||
# Select the '''Add New''' button to begin entering insurance details | |||
[[File:PatientPortal_Insurance1_nx.jpg|center|800px|Begin adding insurance by selecting 'Add New' in the Patient Dashboard]] | |||
--- | |||
== Insurance Entry Tabs == | |||
The insurance entry page is divided into three key sections: | |||
=== '''1. General''' === | |||
Enter the core details about the insurance plan: | |||
* Insurance Company Name | |||
* Plan Type (e.g., PPO, HMO) | |||
* Policy Number | |||
* Group Number | |||
* Effective and Expiration Dates | |||
* Insurance Phone Number | |||
* Relationship to Subscriber | |||
> {{Tip|Be sure to select the correct insurance provider from the list if it is already saved in the system. This ensures claim routing is accurate.}} | |||
--- | |||
=== '''2. Subscriber''' === | |||
This section captures information about the individual who holds the insurance policy: | |||
* Full Name | |||
* Date of Birth | |||
* Address | |||
* Social Security Number (if required) | |||
* Relationship to Patient | |||
This data is especially important if the patient is not the primary policyholder (e.g., a child under a parent’s plan). | |||
--- | |||
=== '''3. Employer''' === | |||
Add employer information if the insurance is obtained through a workplace plan: | |||
* Employer Name | |||
* Address | |||
* Phone Number | |||
* Contact Person (optional) | |||
> {{Tip|Complete employer fields even if the patient is retired. Entering “Retired” or “N/A” provides clarity for billing.}} | |||
--- | |||
== Final Step: Save Insurance == | |||
After all tabs are complete: | |||
# Click the '''Save''' button at the bottom of the form | |||
# Confirm that the new insurance appears in the patient's Insurance list | |||
The saved insurance record will now be available to attach to encounters, invoices, and claims. | |||
> {{Tip|Multiple insurances can be saved (e.g., primary and secondary). Be sure to select the correct one when generating invoices.}} | |||
--- | |||
=== Related Pages === | |||
* [[Invoice Creation and Claim Submission]] | |||
* [[Patient Portal Access and Onboarding]] | |||
* [[Insurance Company Master List]] | |||
Latest revision as of 15:45, 20 June 2025
Managing Patient Insurance Information
Keeping insurance information accurate and up to date is essential for proper billing, claim submission, and minimizing delays in patient care. VEHRDICT allows users or patients (via the Patient Portal) to easily enter and manage insurance details.
>
Tip: Verifying and updating insurance details before each visit helps prevent claim rejections and ensures smooth payment processing.
---
Adding or Updating Insurance
To add or edit insurance information for a patient:
- Navigate to the patient's record in the Patient Dashboard
- Click on the Insurance tab
- Select the Add New button to begin entering insurance details

---
Insurance Entry Tabs
The insurance entry page is divided into three key sections:
1. General
Enter the core details about the insurance plan:
- Insurance Company Name
- Plan Type (e.g., PPO, HMO)
- Policy Number
- Group Number
- Effective and Expiration Dates
- Insurance Phone Number
- Relationship to Subscriber
>
Tip: Be sure to select the correct insurance provider from the list if it is already saved in the system. This ensures claim routing is accurate.
---
2. Subscriber
This section captures information about the individual who holds the insurance policy:
- Full Name
- Date of Birth
- Address
- Social Security Number (if required)
- Relationship to Patient
This data is especially important if the patient is not the primary policyholder (e.g., a child under a parent’s plan).
---
3. Employer
Add employer information if the insurance is obtained through a workplace plan:
- Employer Name
- Address
- Phone Number
- Contact Person (optional)
>
Tip: Complete employer fields even if the patient is retired. Entering “Retired” or “N/A” provides clarity for billing.
---
Final Step: Save Insurance
After all tabs are complete:
- Click the Save button at the bottom of the form
- Confirm that the new insurance appears in the patient's Insurance list
The saved insurance record will now be available to attach to encounters, invoices, and claims.
>
Tip: Multiple insurances can be saved (e.g., primary and secondary). Be sure to select the correct one when generating invoices.
---