Patient Documents: Difference between revisions
Jump to navigation
Jump to search
No edit summary |
|||
| (11 intermediate revisions by the same user not shown) | |||
| Line 1: | Line 1: | ||
The 'Documents' tab serves as a repository for | The '''Documents''' tab serves as a secure, centralized repository for storing patient-related files, such as signed consent forms, treatment plans, and scanned records. It allows clinicians and administrative staff to upload, view, manage, and associate documents with specific patient records. | ||
[[File:howto_documents.mov|800px|'''Tutorial – Managing Patient Documents''' – Learn how to upload, assign, and organize patient files.]] | |||
=== How to Upload a Document === | === How to Upload a Document === | ||
# ''' | ==== Step 1: Navigate to the Documents Tab ==== | ||
## To | |||
# From the patient dashboard, click on the '''Documents''' tab in the left-hand sidebar. | |||
# | # This section displays all files currently associated with the selected patient. | ||
## [[File: | |||
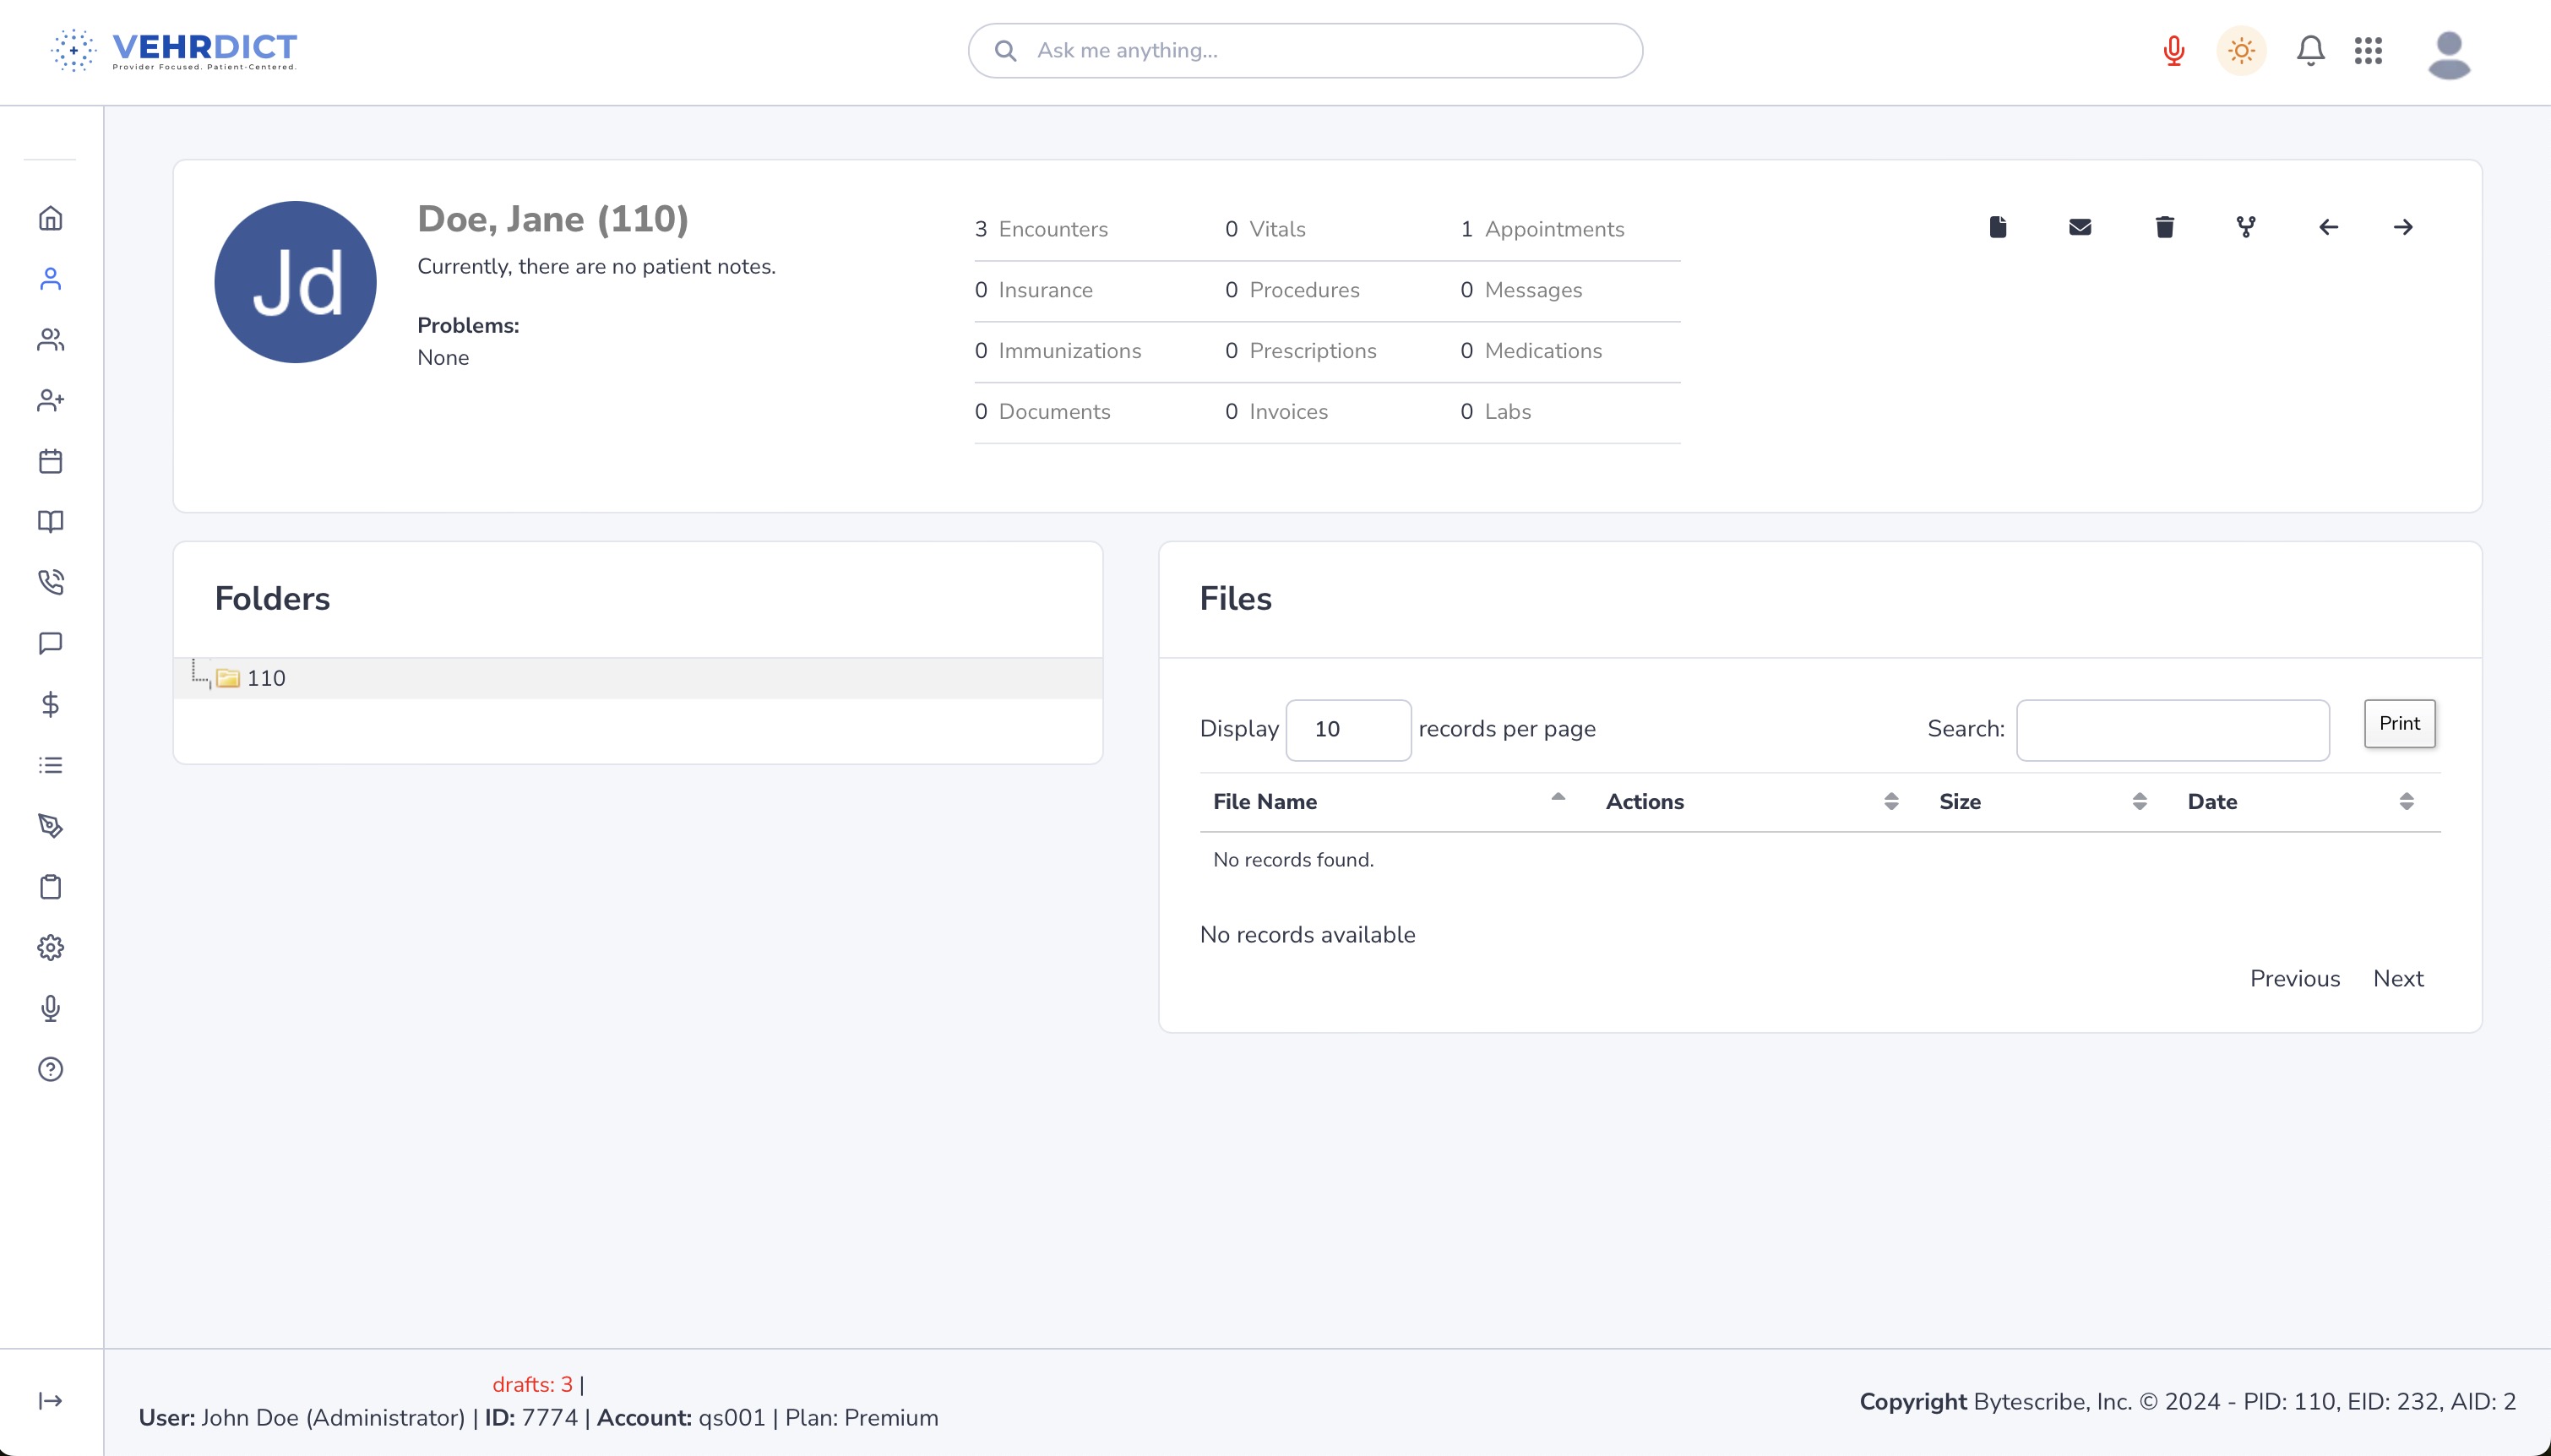
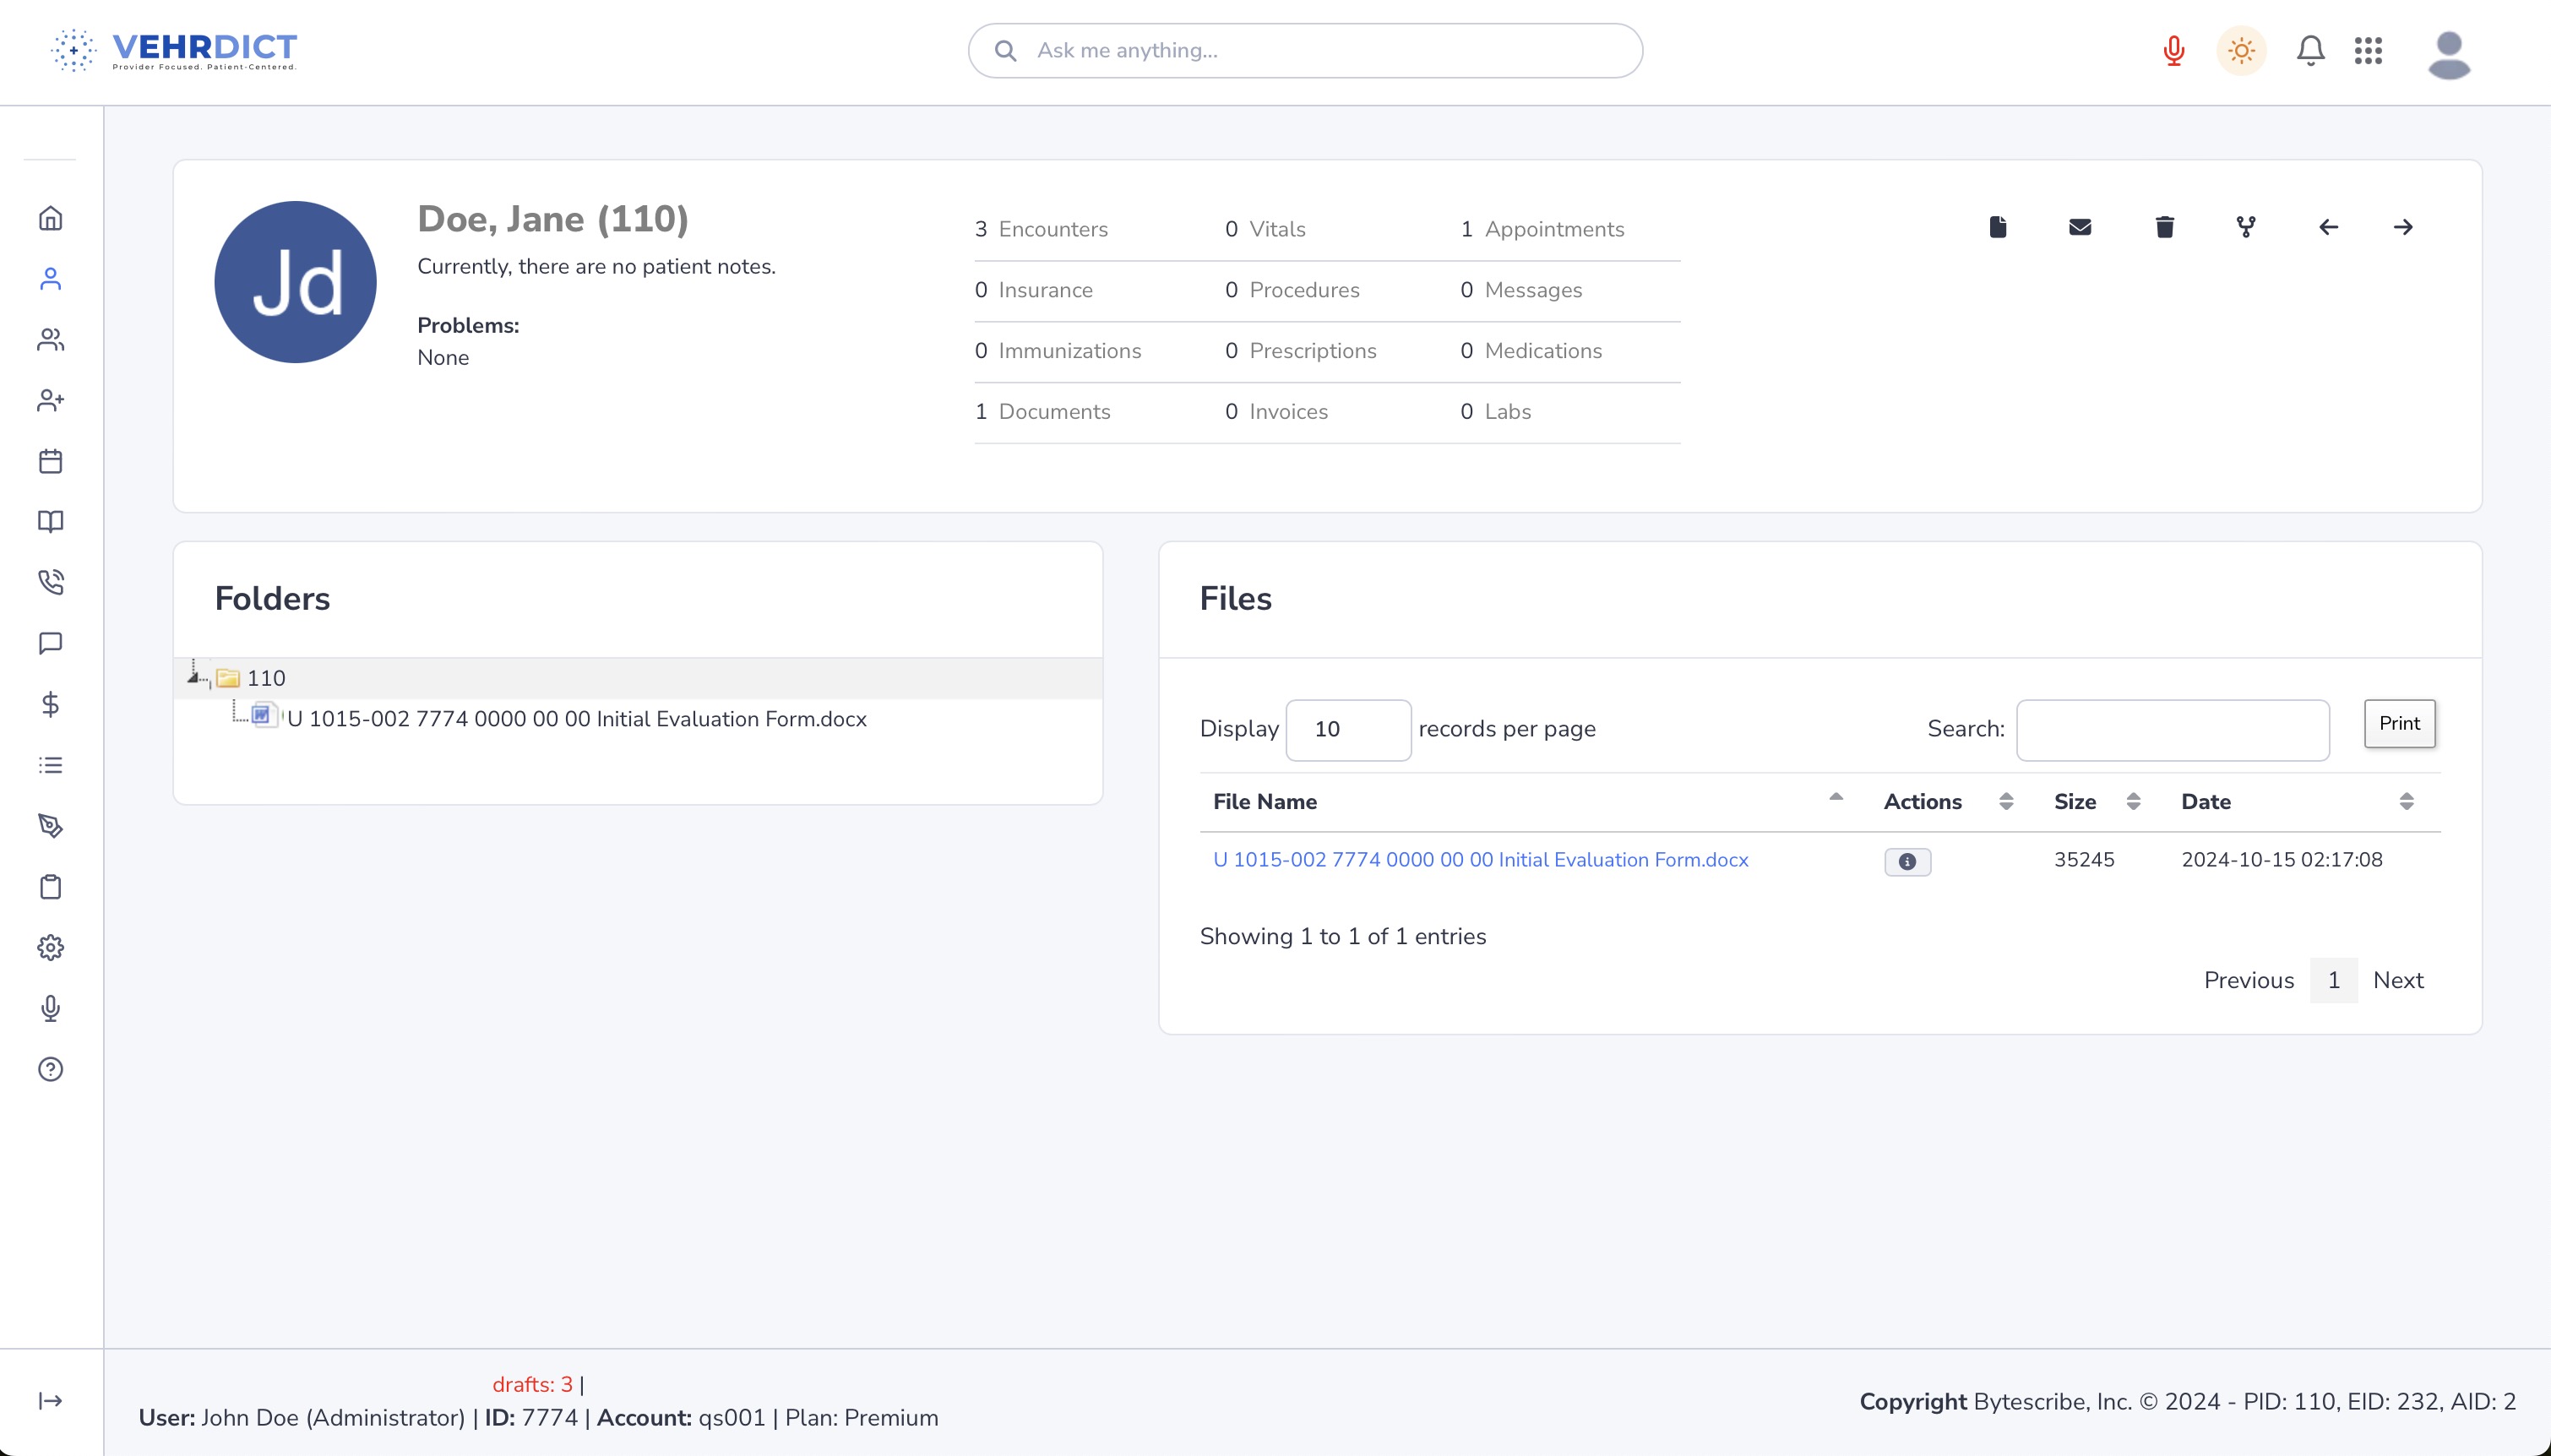
[[File:patient_file_none_nx.jpg|800px|'''Documents Tab''' – View all patient-associated files in one place.]] | |||
==== Step 2: Upload Files ==== | |||
# To begin uploading, navigate to the '''Transcription''' tab in the sidebar and click '''Upload'''. | |||
# Alternatively, use the search bar at the top of the page and type '''Upload''' to access the file uploader. | |||
# Drag your file(s) into the designated dropzone area, or click to manually select files from your device. | |||
# (Optional) Add a description, assign a folder, and set a priority level for organizational purposes. | |||
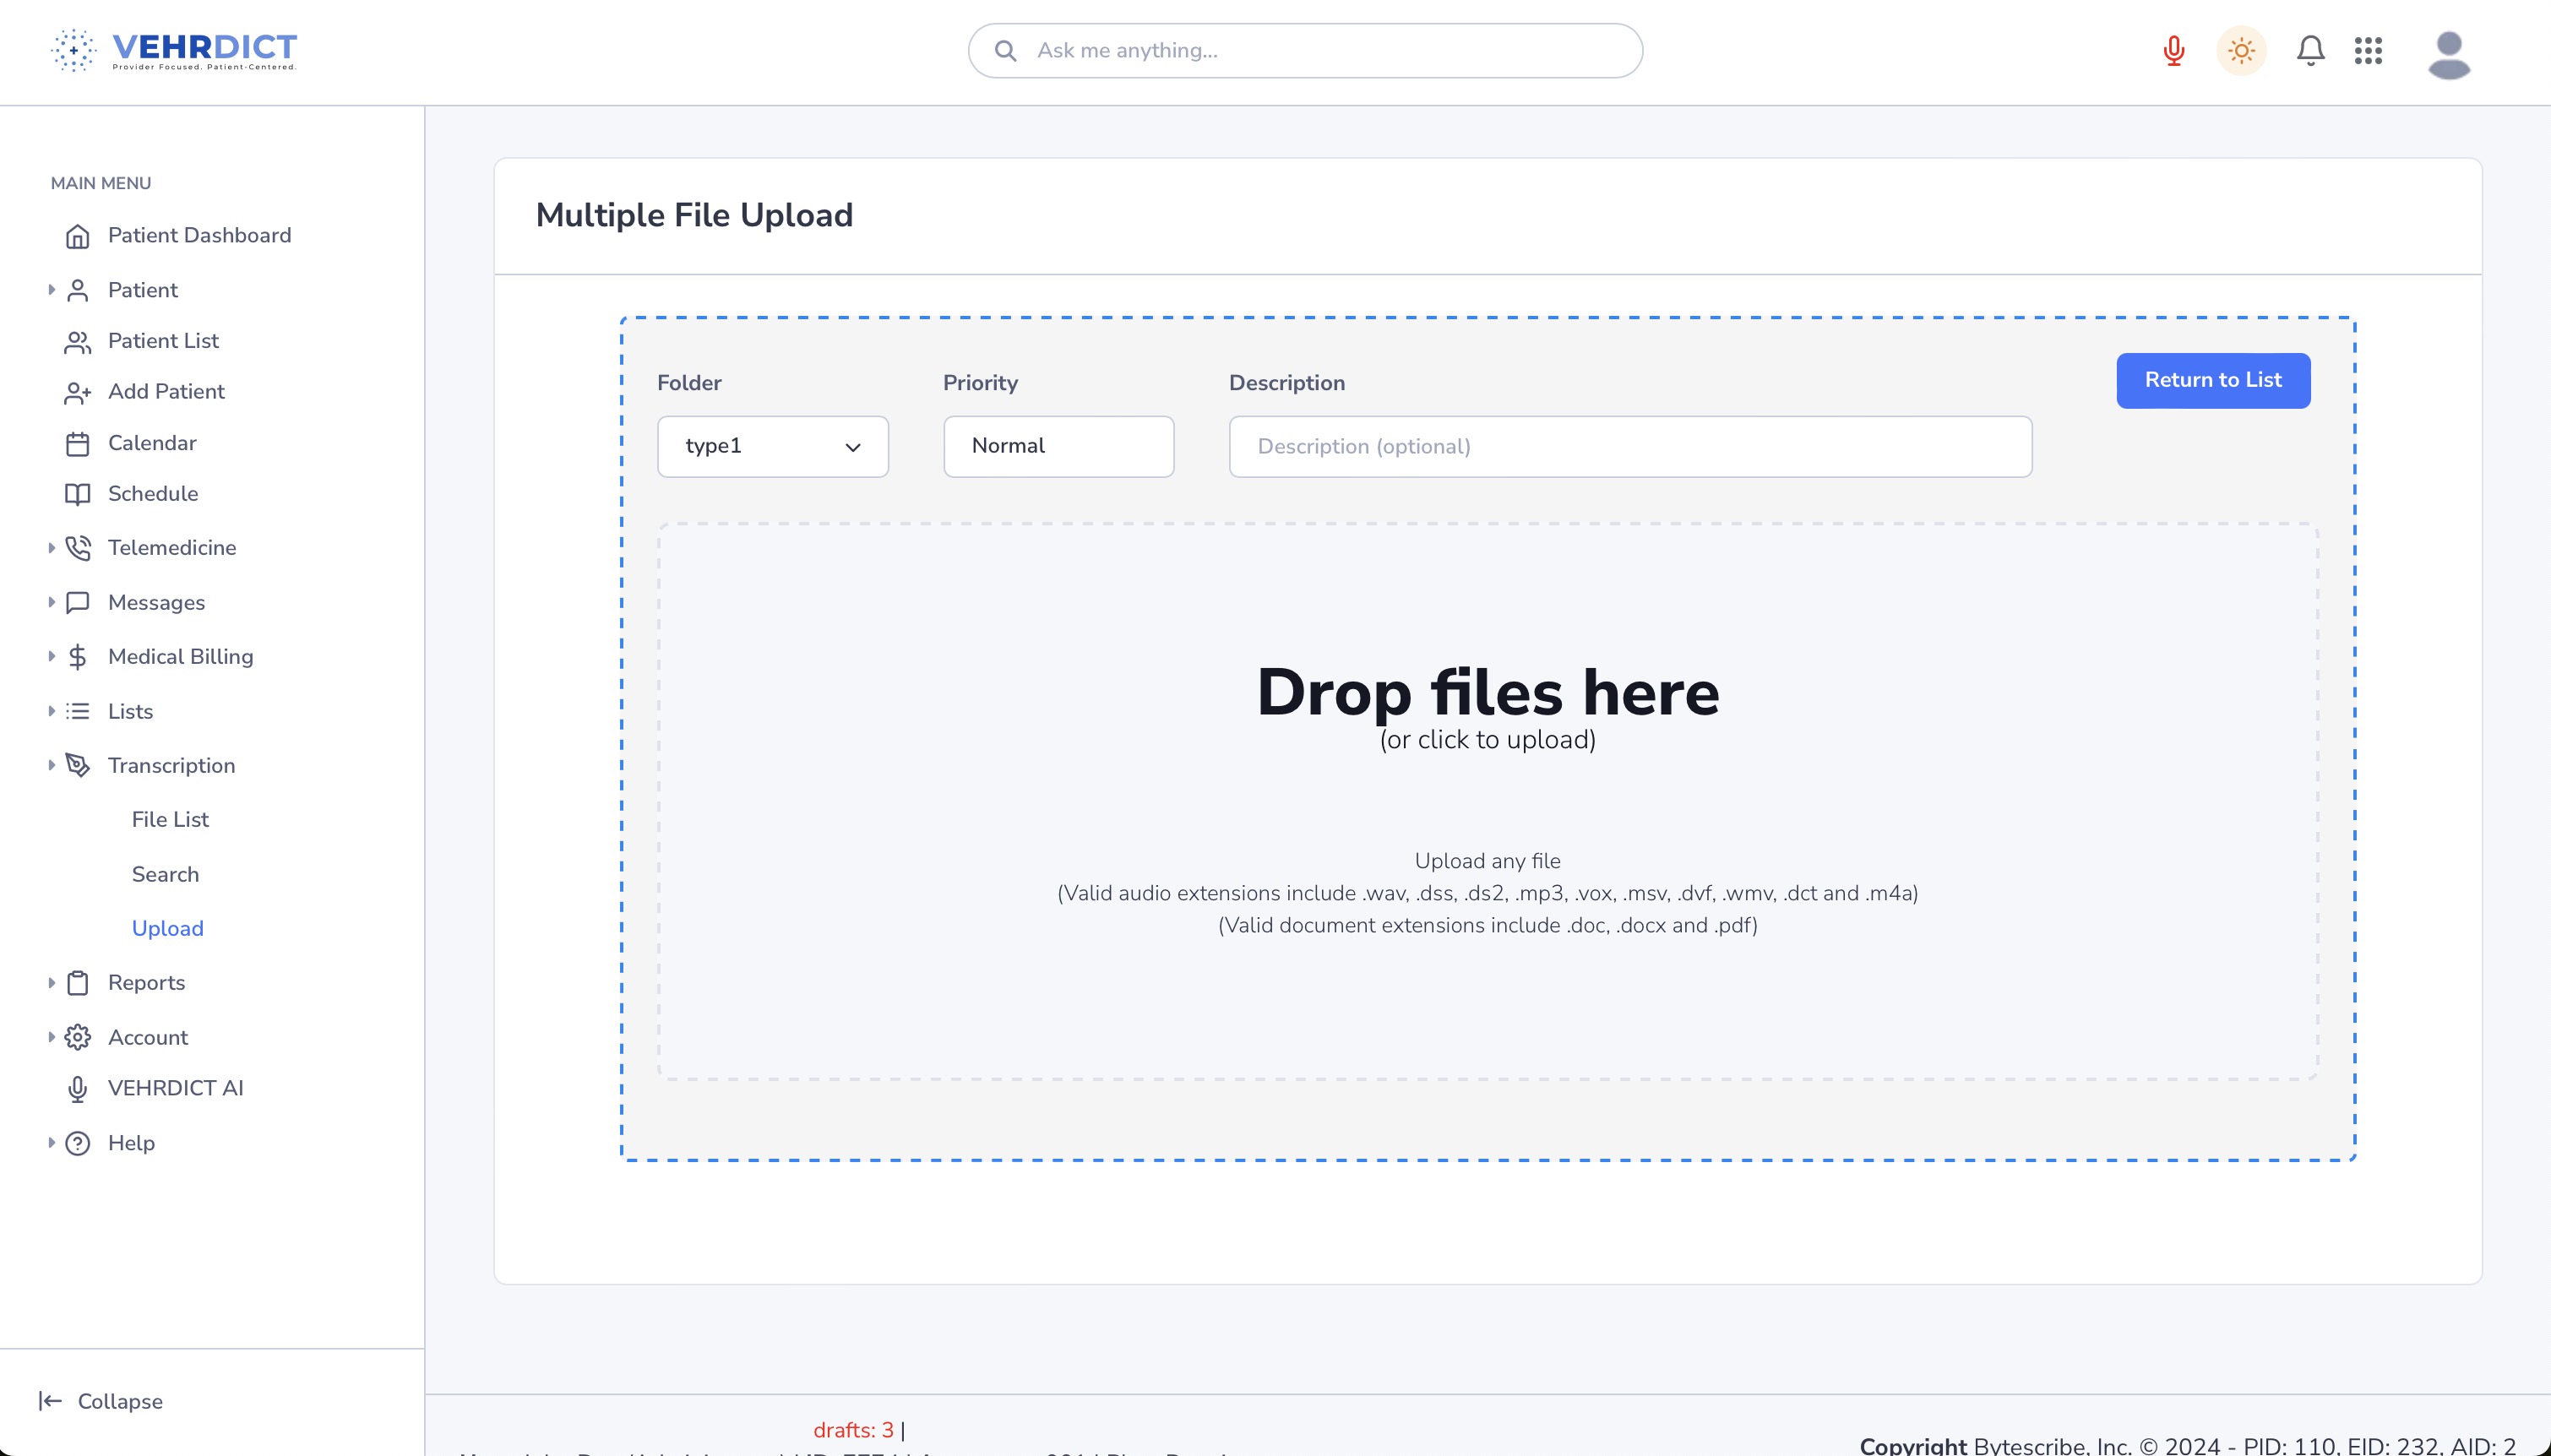
[[File:upload_nx.jpg|800px|'''File Upload Interface''' – Drag and drop or select files for upload.]] | |||
==== Step 3: Return to Documents List ==== | |||
# After uploading, click '''Return to List''' to go back to the documents view. | |||
# Select the newly uploaded file from the list to preview or manage it. | |||
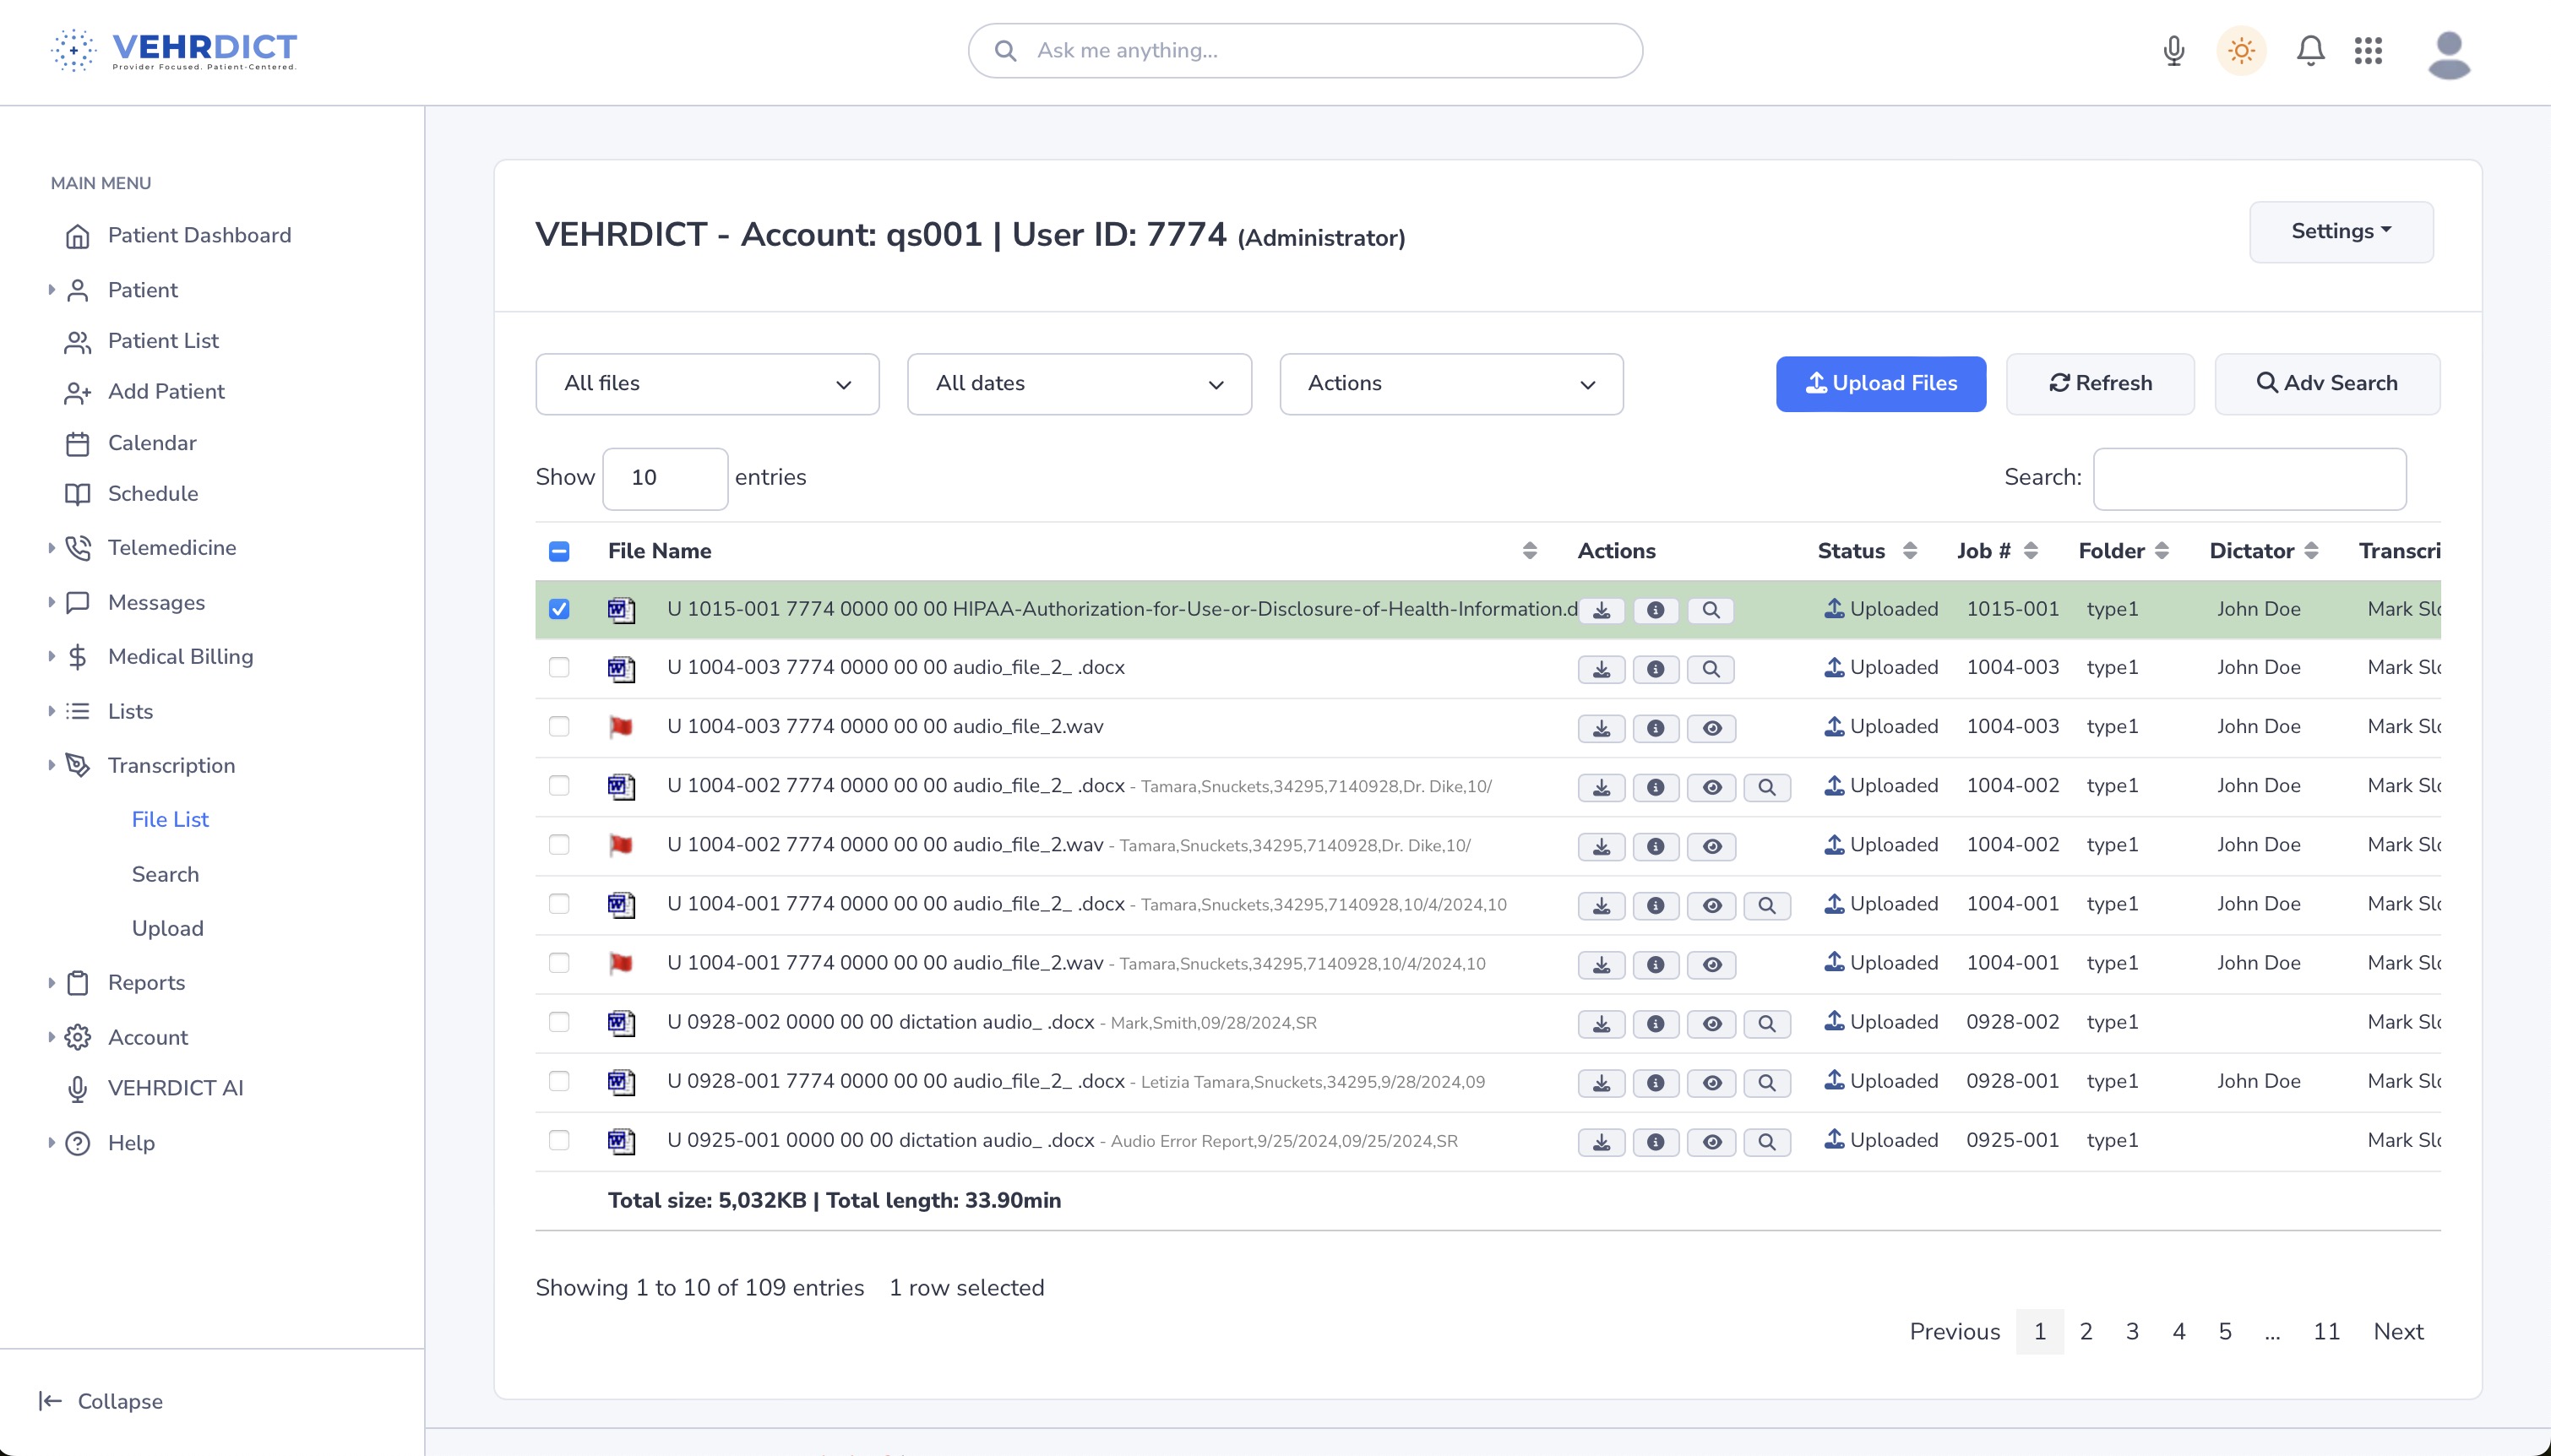
[[File:file_list_nx.jpg|800px|'''Documents List''' – Manage newly uploaded files.]] | |||
==== Step 4: Assign File to Patient Chart ==== | |||
# To attach a file to a patient record, click the '''Chart''' button in the top toolbar. | |||
# Select the appropriate patient from the list. | |||
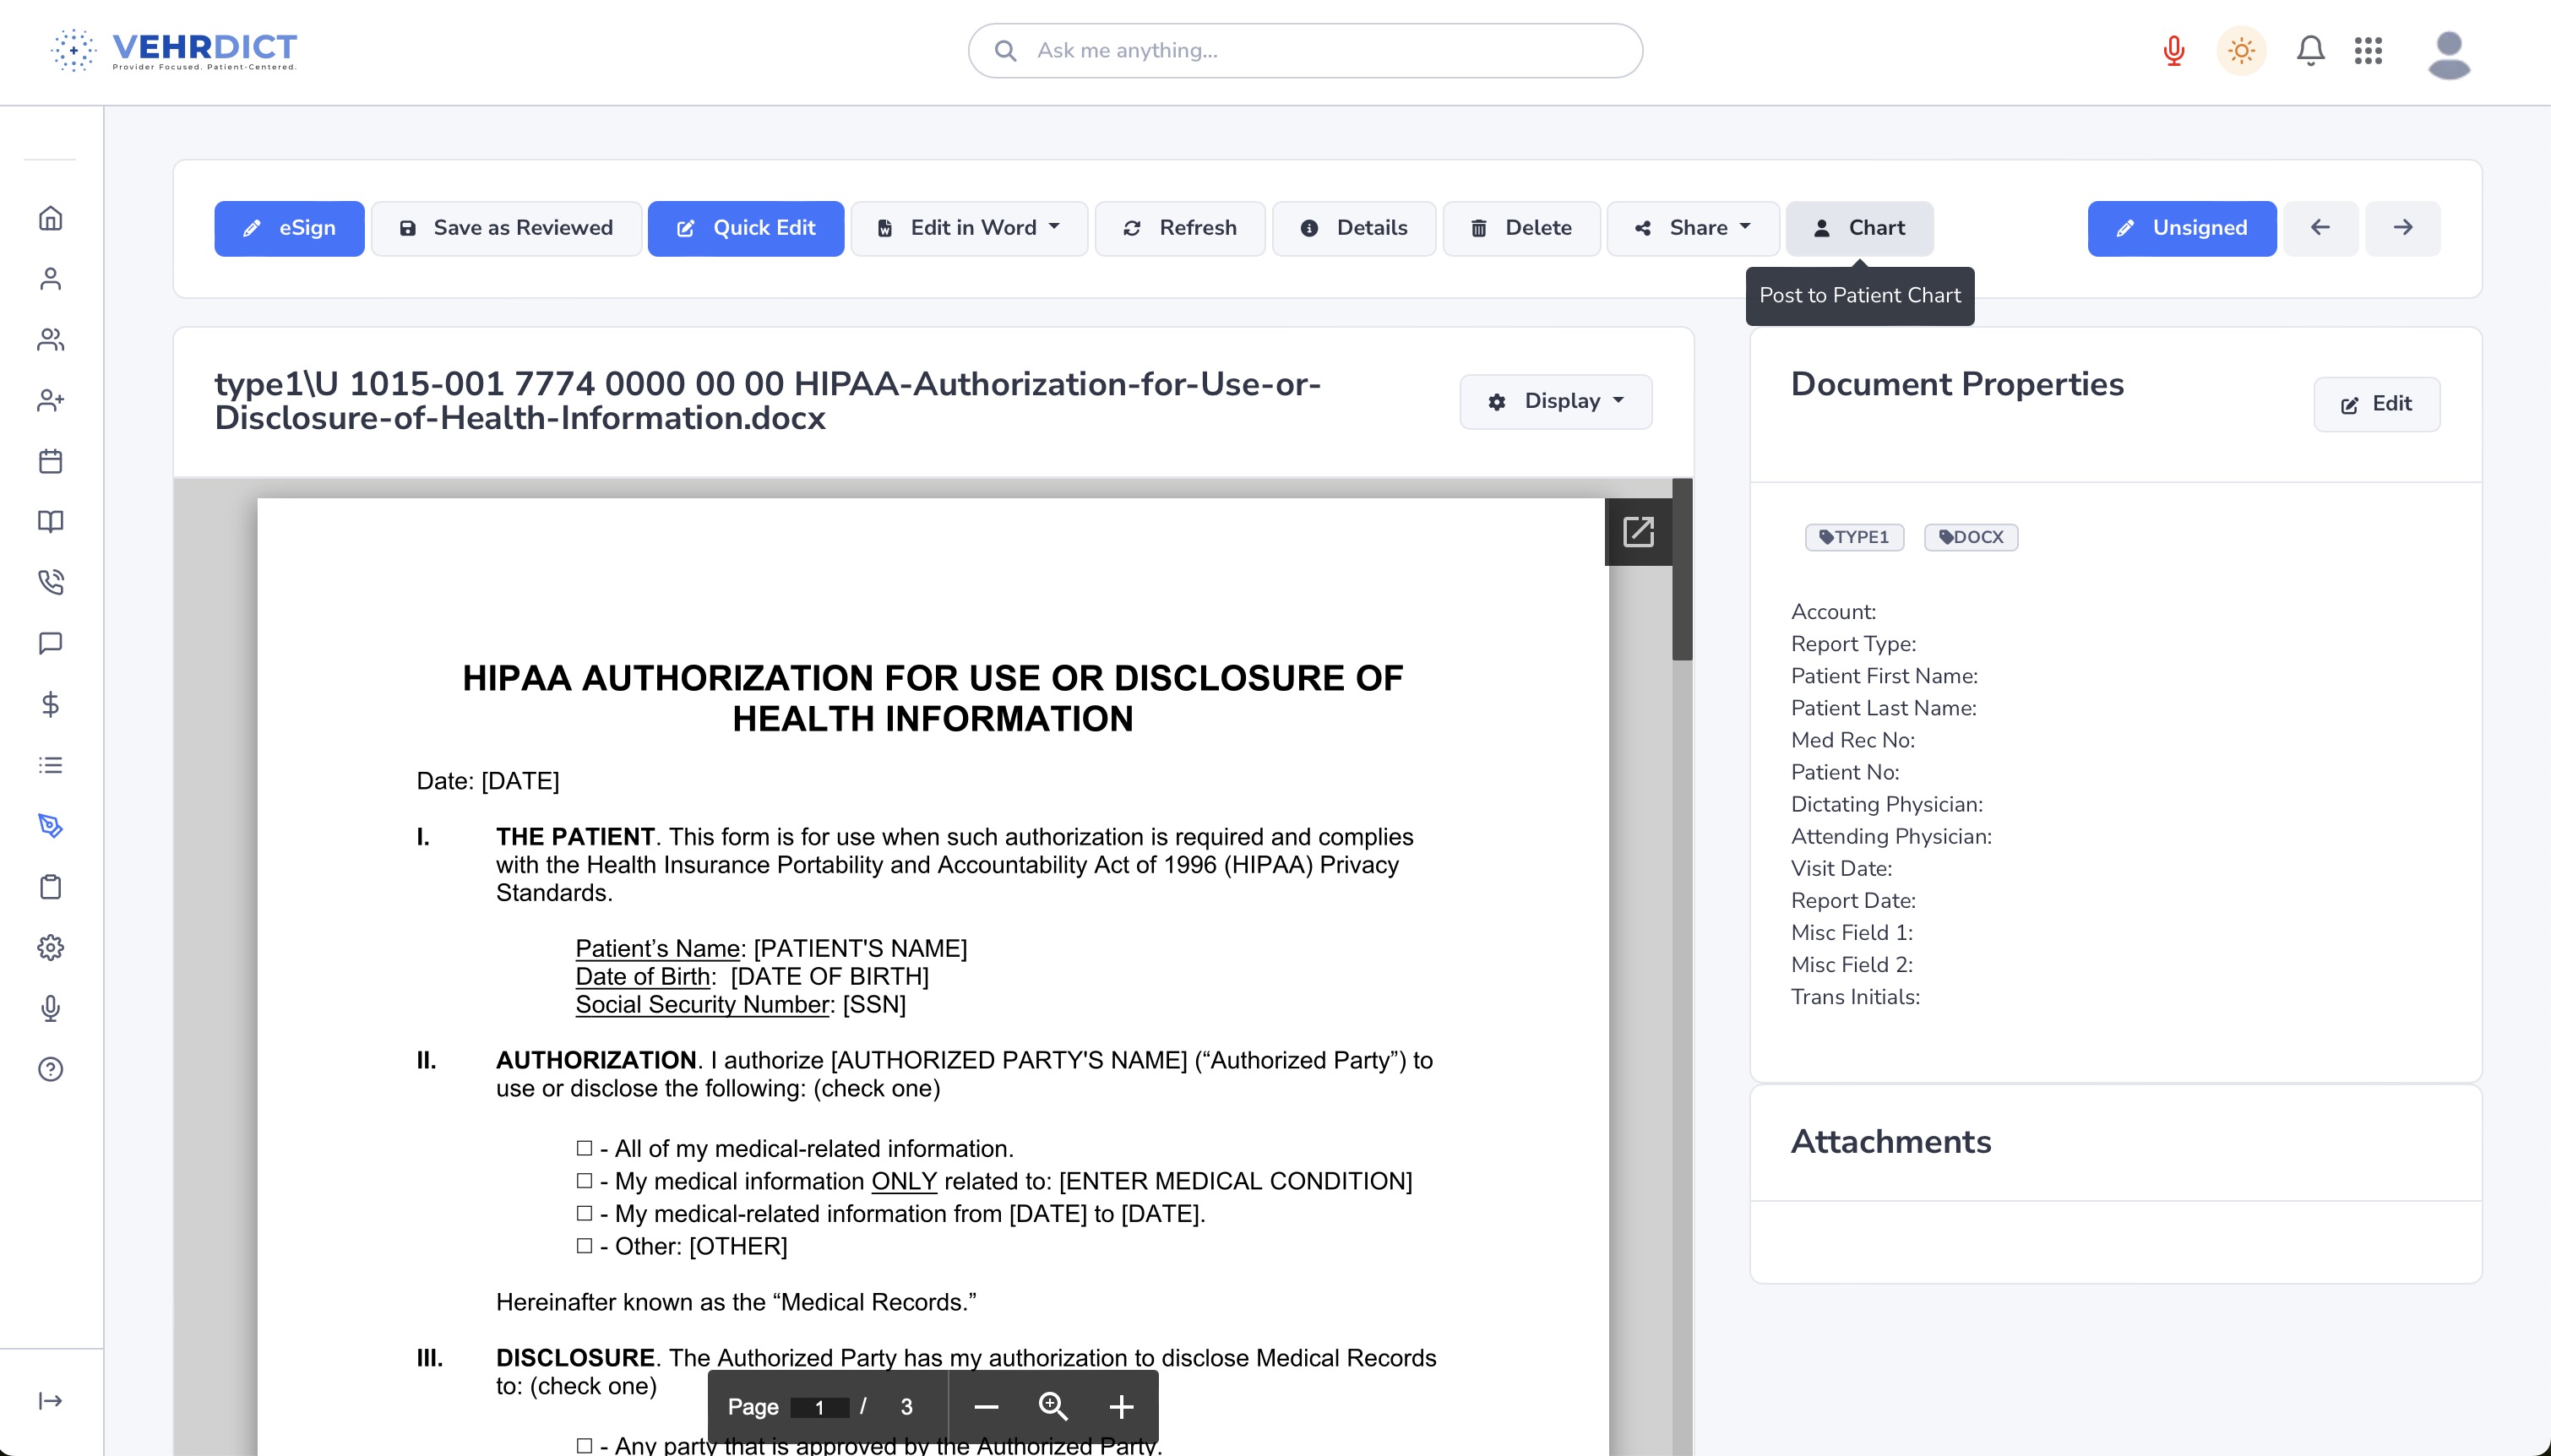
[[File:file_list_chart_nx.jpg|800px|'''Chart Tool''' – Choose the patient to assign the file to.]] | |||
# The document will now appear in the selected patient’s document folder under their chart. | |||
[[File:patient_file_nx.jpg|800px|'''Document Added''' – File now visible under patient’s Documents tab.]] | |||
=== Key Features === | === Key Features === | ||
* '''Secure Storage''' | |||
* '''Easy Access''' | * '''Secure Storage''' – All documents are encrypted and stored in compliance with data protection and healthcare regulations. | ||
* '''Organized''' | * '''Easy Access''' – Search and filter tools help you locate files quickly within a patient’s chart. | ||
* '''Organized Structure''' – Files are organized by type, date, and folder for efficient retrieval and record-keeping. | |||
--- | |||
For best results, ensure that uploaded files follow naming conventions and are categorized appropriately for reporting and audits. | |||
Latest revision as of 14:34, 4 July 2025
The Documents tab serves as a secure, centralized repository for storing patient-related files, such as signed consent forms, treatment plans, and scanned records. It allows clinicians and administrative staff to upload, view, manage, and associate documents with specific patient records.
How to Upload a Document
Step 1: Navigate to the Documents Tab
- From the patient dashboard, click on the Documents tab in the left-hand sidebar.
- This section displays all files currently associated with the selected patient.
Step 2: Upload Files
- To begin uploading, navigate to the Transcription tab in the sidebar and click Upload.
- Alternatively, use the search bar at the top of the page and type Upload to access the file uploader.
- Drag your file(s) into the designated dropzone area, or click to manually select files from your device.
- (Optional) Add a description, assign a folder, and set a priority level for organizational purposes.
Step 3: Return to Documents List
- After uploading, click Return to List to go back to the documents view.
- Select the newly uploaded file from the list to preview or manage it.
Step 4: Assign File to Patient Chart
- To attach a file to a patient record, click the Chart button in the top toolbar.
- Select the appropriate patient from the list.
- The document will now appear in the selected patient’s document folder under their chart.
Key Features
- Secure Storage – All documents are encrypted and stored in compliance with data protection and healthcare regulations.
- Easy Access – Search and filter tools help you locate files quickly within a patient’s chart.
- Organized Structure – Files are organized by type, date, and folder for efficient retrieval and record-keeping.
---
For best results, ensure that uploaded files follow naming conventions and are categorized appropriately for reporting and audits.
