Personal Information: Difference between revisions
No edit summary |
|||
| (4 intermediate revisions by the same user not shown) | |||
| Line 1: | Line 1: | ||
== Patient Portal Access and Onboarding == | |||
The patient’s name, contact information, and personal details are required for scheduling, clinical documentation, telemedicine, billing, and more in '''VEHRDICT'''. Users have the flexibility to either: | |||
* Enter patient details manually | |||
* Allow the patient to complete their profile via the secure Patient Portal | |||
This ensures accuracy, enhances patient engagement, and reduces administrative workload. | |||
> {{Tip|Encouraging patients to use the Patient Portal improves data accuracy, reduces intake time, and supports a more efficient visit workflow.}} | |||
--- | |||
== Log In to the Patient Portal == | |||
To assist the patient in accessing or updating their portal: | |||
# Navigate to the patient's chart | |||
# Click '''Edit Patient''' from the top of the Patient Dashboard | |||
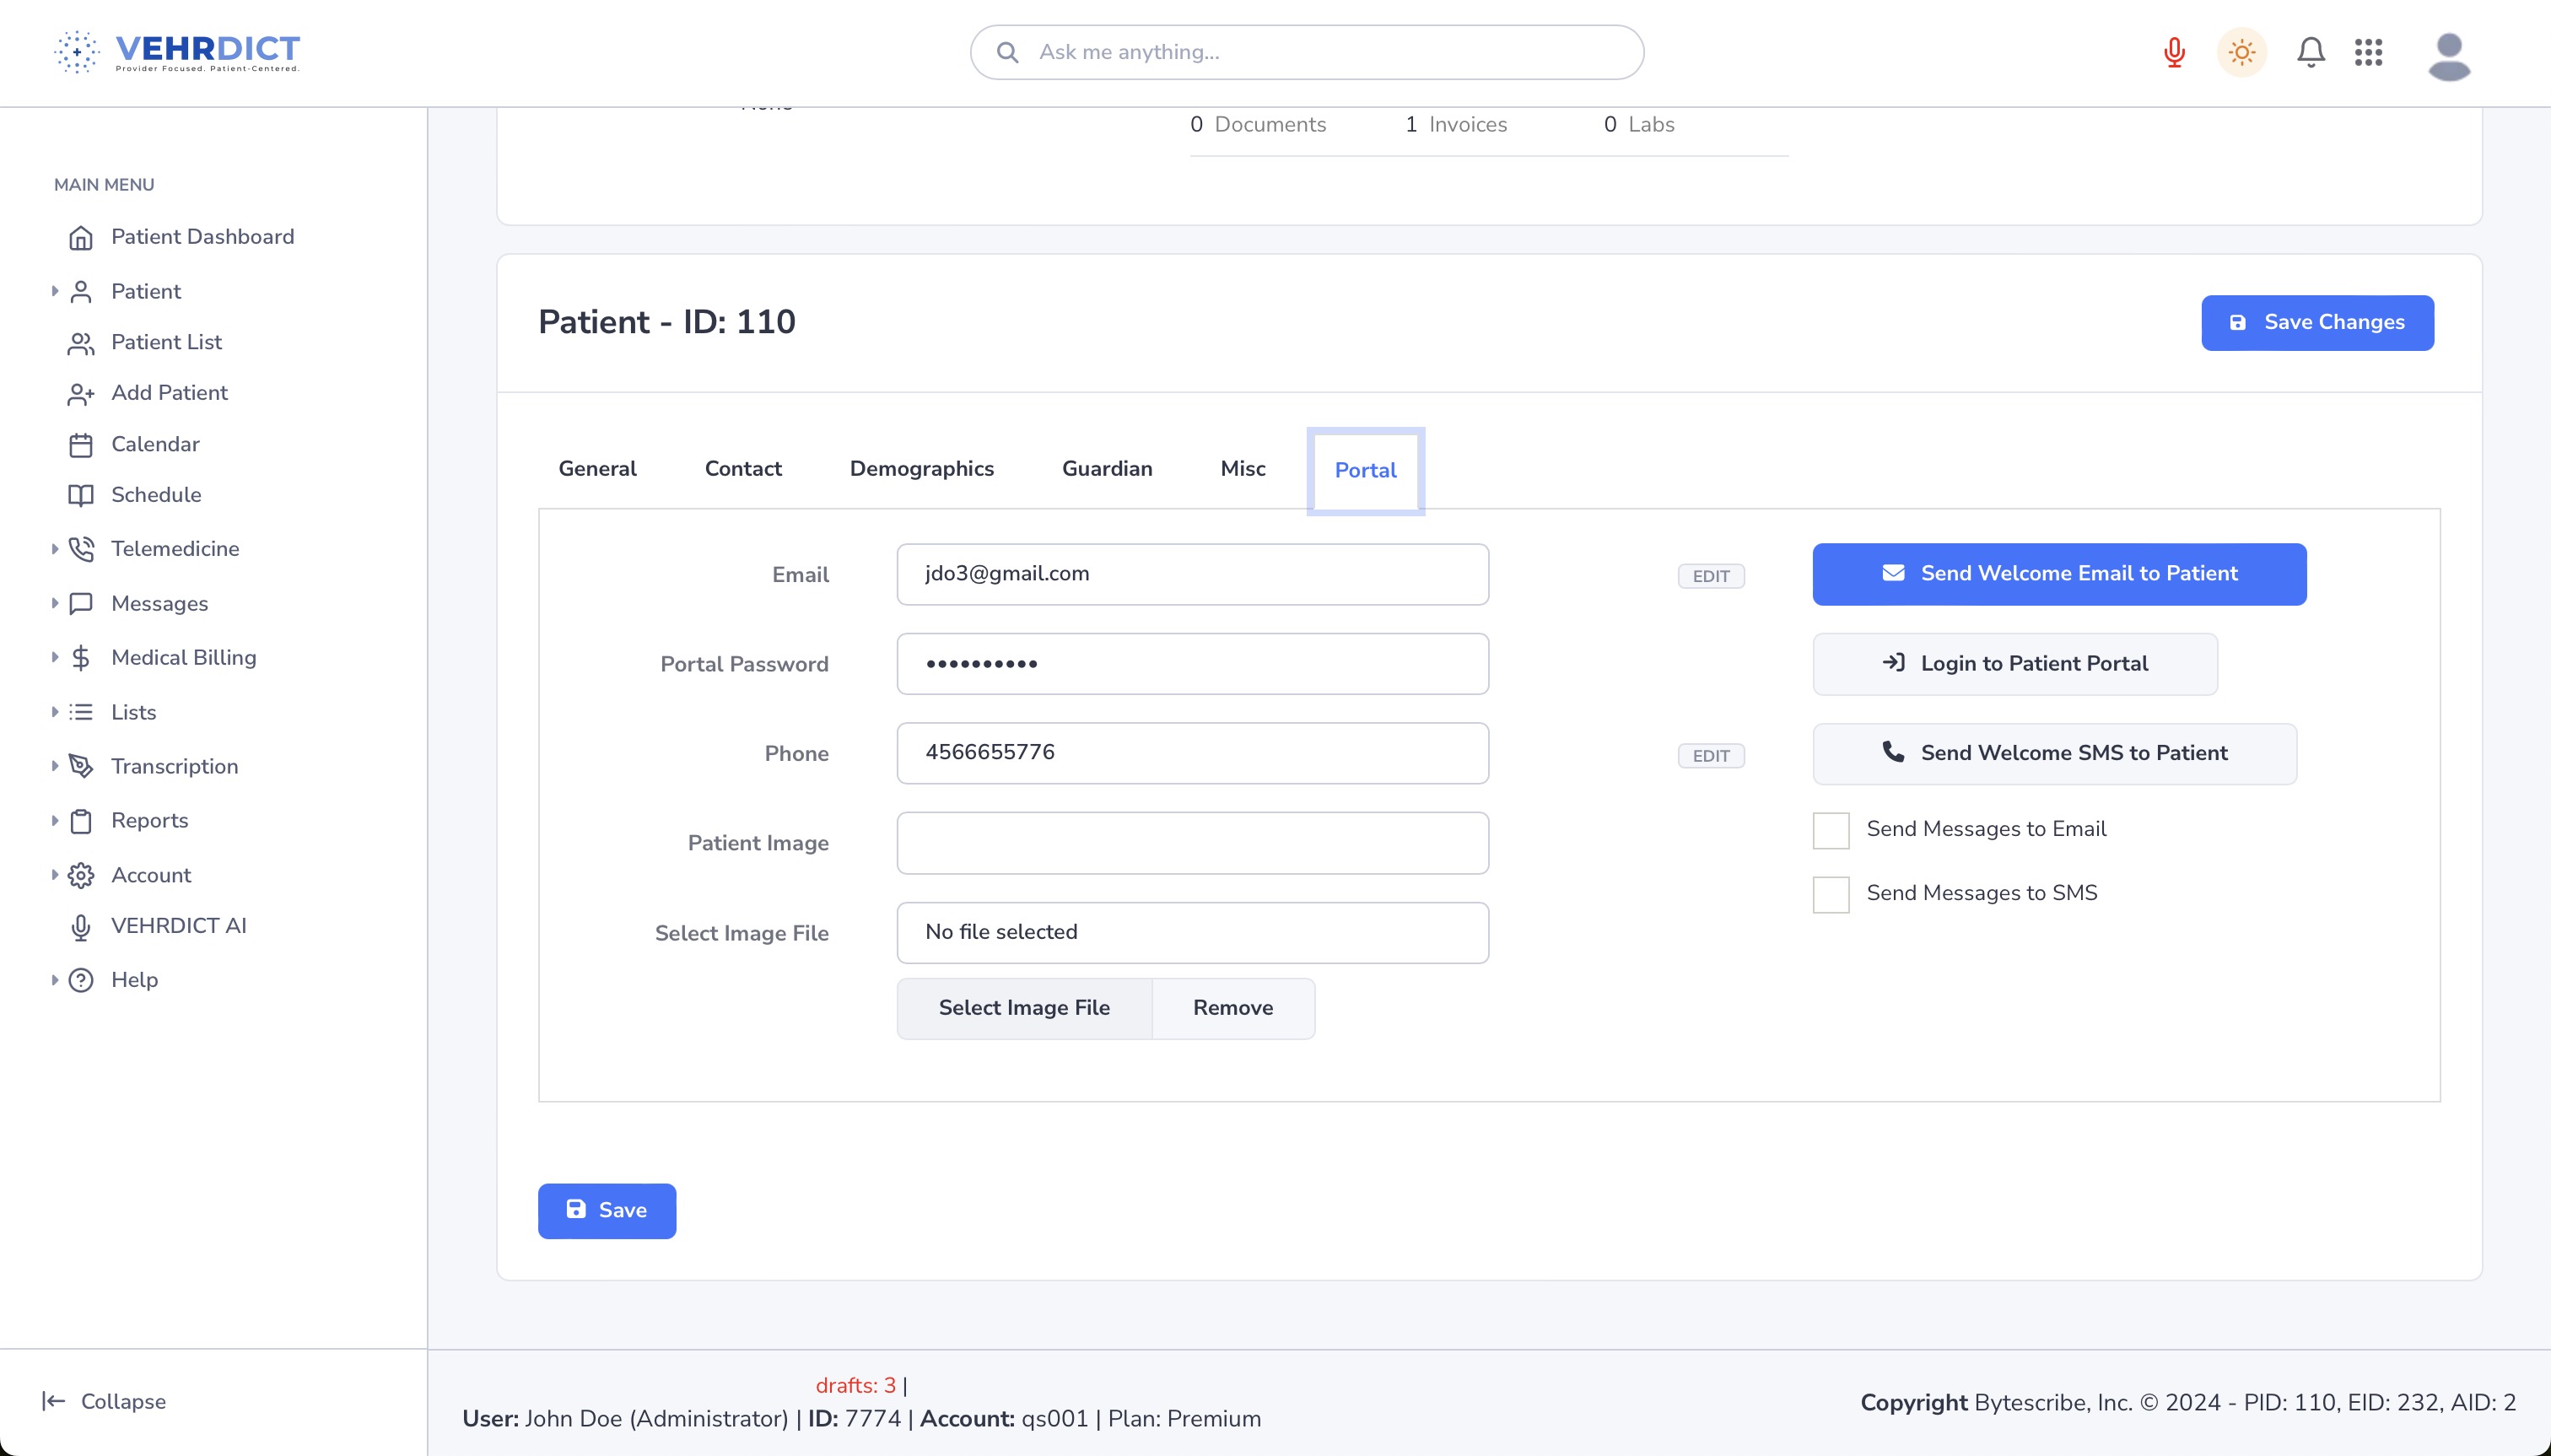
# Go to the '''Portal''' tab | |||
# Click the '''Login to Patient Portal''' button | |||
[[File:PatientPortal_login_nx.jpg|center|800px|Access the Patient Portal directly from the Portal tab]] | |||
You may also: | |||
* Upload a '''profile picture''' for the patient | |||
* Send a '''Welcome Message''' via: | |||
* SMS (if a valid phone number is on file) | |||
* Email (if a valid email is provided) | |||
[[File: | This message prompts the patient to log in and complete or update their personal details directly. | ||
> {{Tip|Sending the welcome message immediately after registration helps ensure patients onboard quickly and start using digital services.}} | |||
--- | |||
== Patient Portal Features == | |||
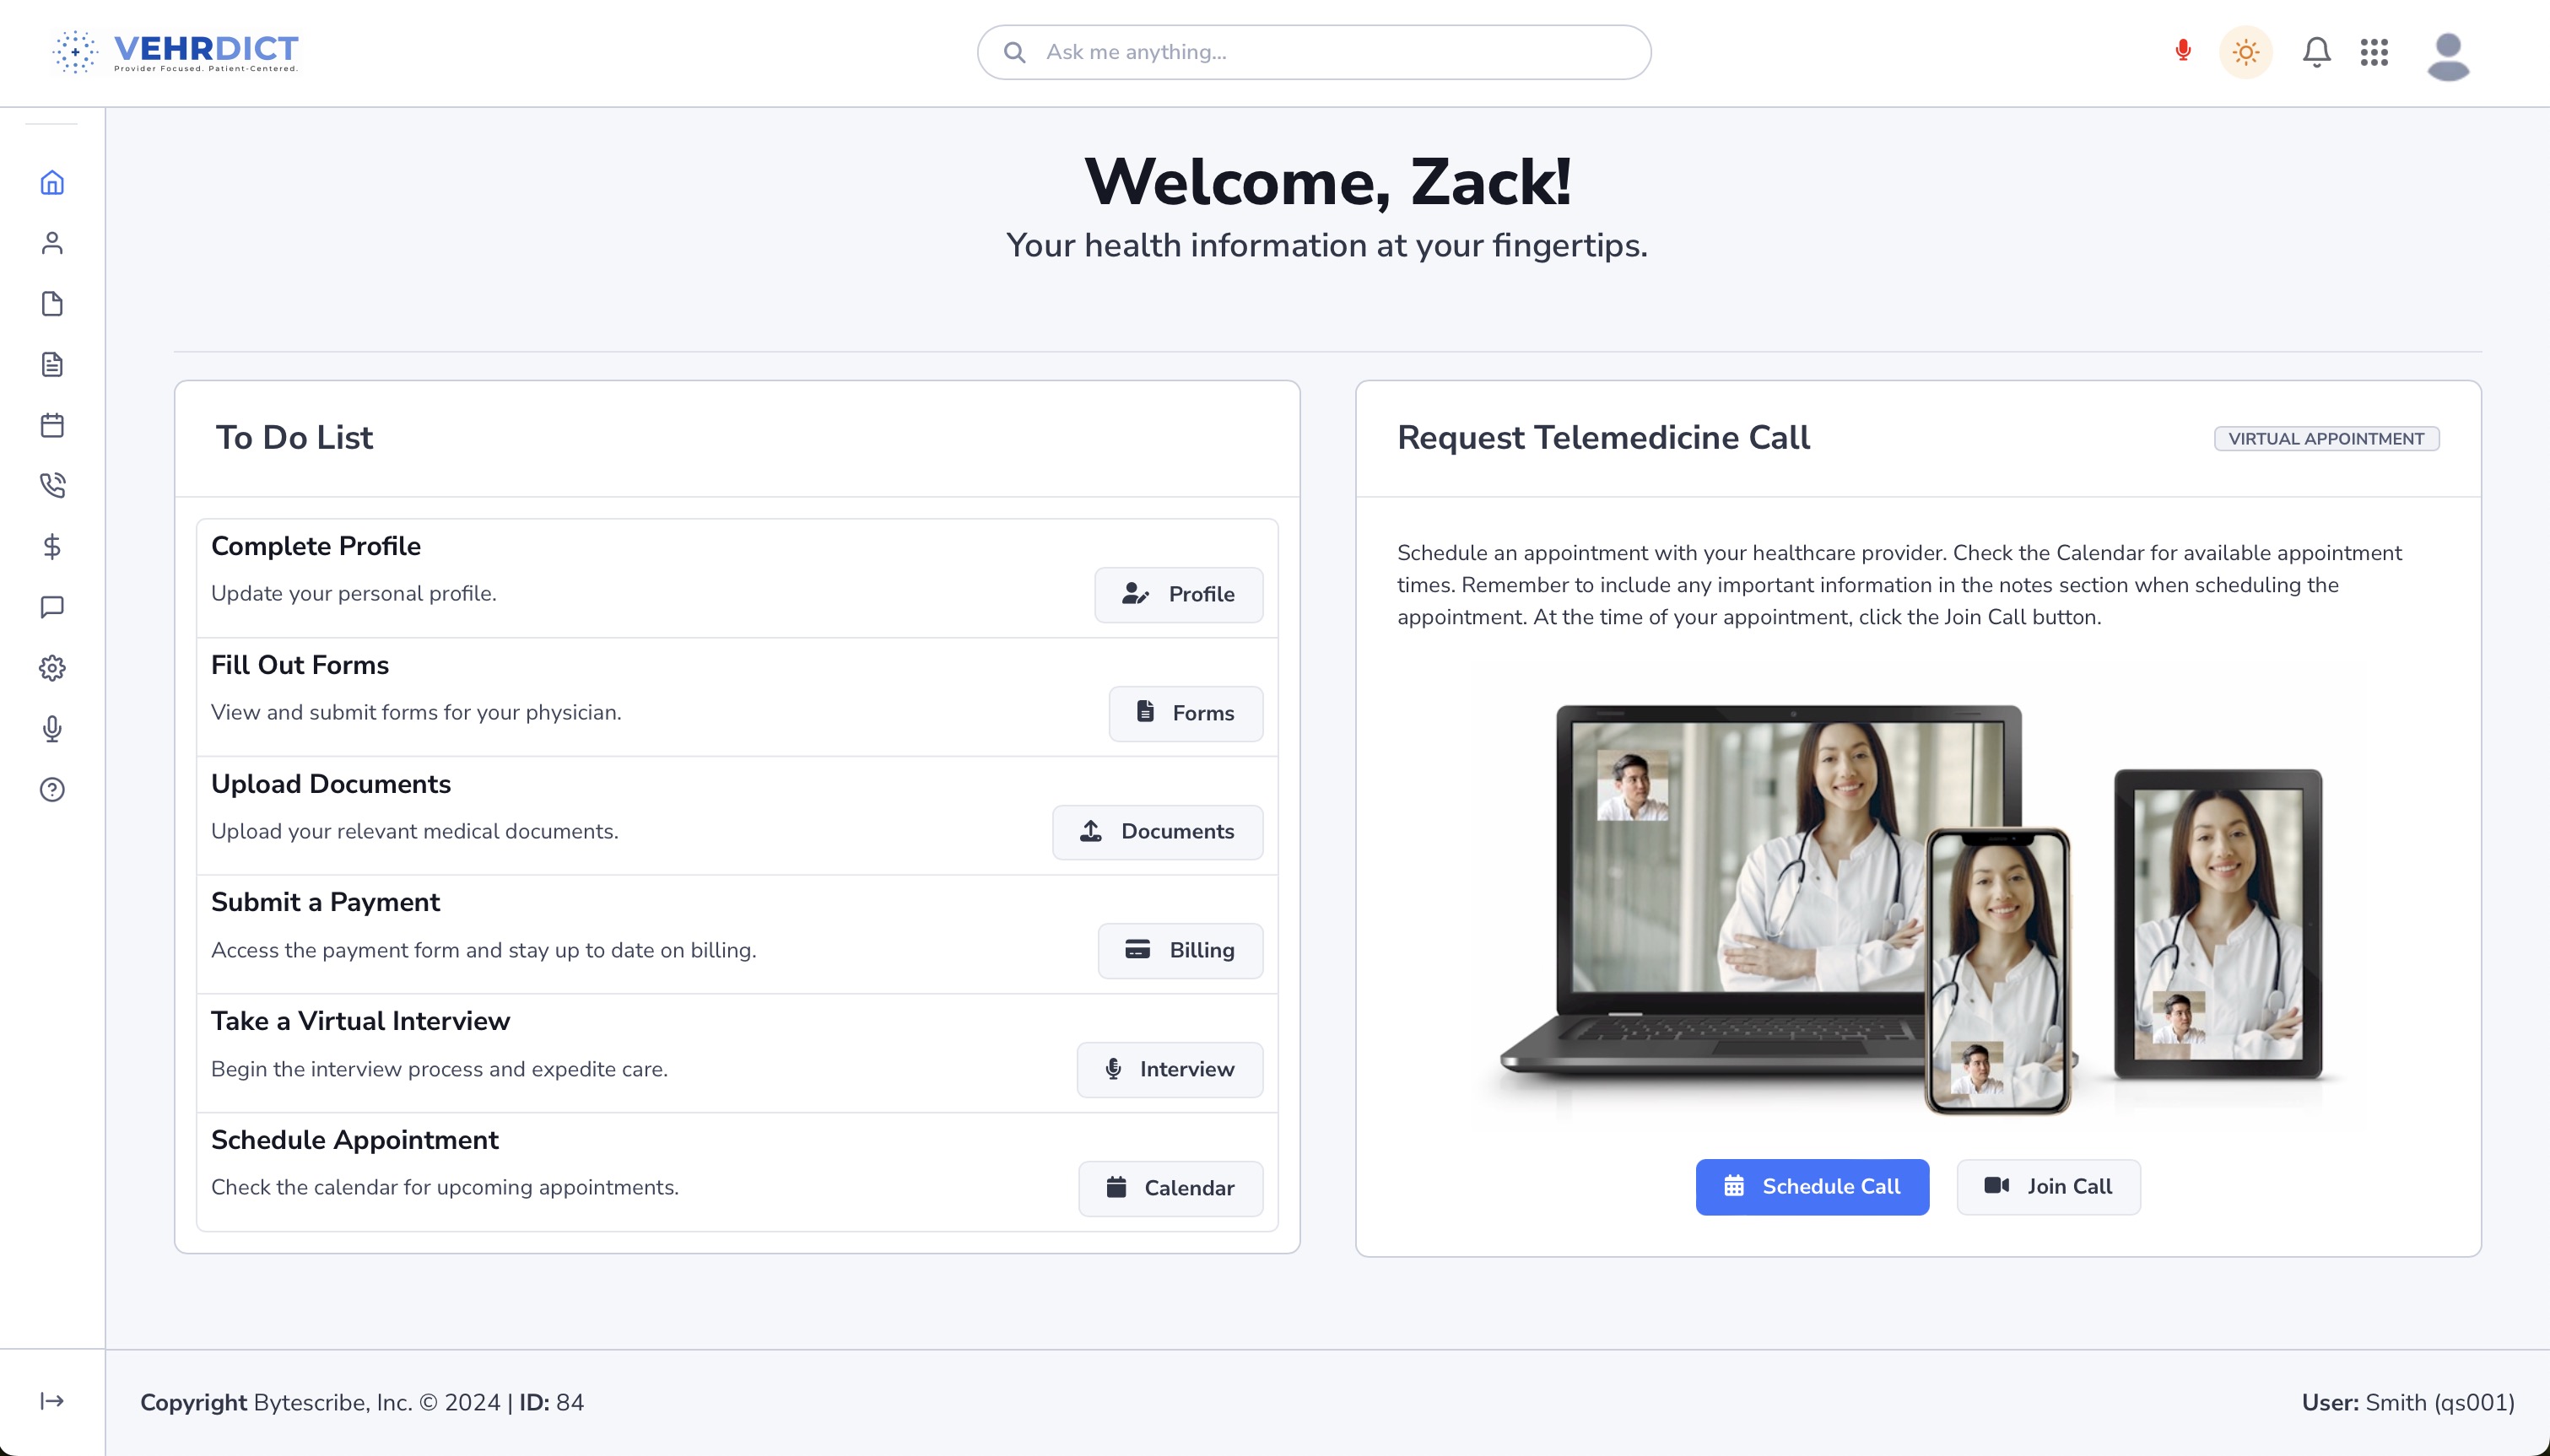
Once logged in, the patient will have access to a familiar, easy-to-navigate interface that reflects the design of the VEHRDICT system. The portal provides patients with secure access to: | |||
* Communication with providers and staff | |||
* Appointment scheduling and telemedicine access | |||
* Forms and documents for review or submission | |||
* Personal and insurance information | |||
* Billing and invoice review | |||
[[File:patient_portal_nx.jpg|center|800px|The Patient Portal gives patients control over their health information]] | |||
> {{Tip|It is best practice to introduce the Patient Portal during the patient's first visit and encourage its use for all future interactions.}} | |||
--- | |||
=== Related Pages === | |||
* [[Scheduling]] | |||
* [[Calendar]] | |||
* [[Telemedicine]] | |||
* [[Secure Messaging]] | |||
* [[Patient Dashboard]] | |||
Latest revision as of 15:44, 20 June 2025
Patient Portal Access and Onboarding
The patient’s name, contact information, and personal details are required for scheduling, clinical documentation, telemedicine, billing, and more in VEHRDICT. Users have the flexibility to either:
- Enter patient details manually
- Allow the patient to complete their profile via the secure Patient Portal
This ensures accuracy, enhances patient engagement, and reduces administrative workload.
>
Tip: Encouraging patients to use the Patient Portal improves data accuracy, reduces intake time, and supports a more efficient visit workflow.
---
Log In to the Patient Portal
To assist the patient in accessing or updating their portal:
- Navigate to the patient's chart
- Click Edit Patient from the top of the Patient Dashboard
- Go to the Portal tab
- Click the Login to Patient Portal button

You may also:
- Upload a profile picture for the patient
- Send a Welcome Message via:
 * SMS (if a valid phone number is on file)
 * Email (if a valid email is provided)
This message prompts the patient to log in and complete or update their personal details directly.
>
Tip: Sending the welcome message immediately after registration helps ensure patients onboard quickly and start using digital services.
---
Patient Portal Features
Once logged in, the patient will have access to a familiar, easy-to-navigate interface that reflects the design of the VEHRDICT system. The portal provides patients with secure access to:
- Communication with providers and staff
- Appointment scheduling and telemedicine access
- Forms and documents for review or submission
- Personal and insurance information
- Billing and invoice review

>
Tip: It is best practice to introduce the Patient Portal during the patient's first visit and encourage its use for all future interactions.
---