Patient Insurance: Difference between revisions
Jump to navigation
Jump to search
No edit summary |
No edit summary |
||
| (11 intermediate revisions by 2 users not shown) | |||
| Line 1: | Line 1: | ||
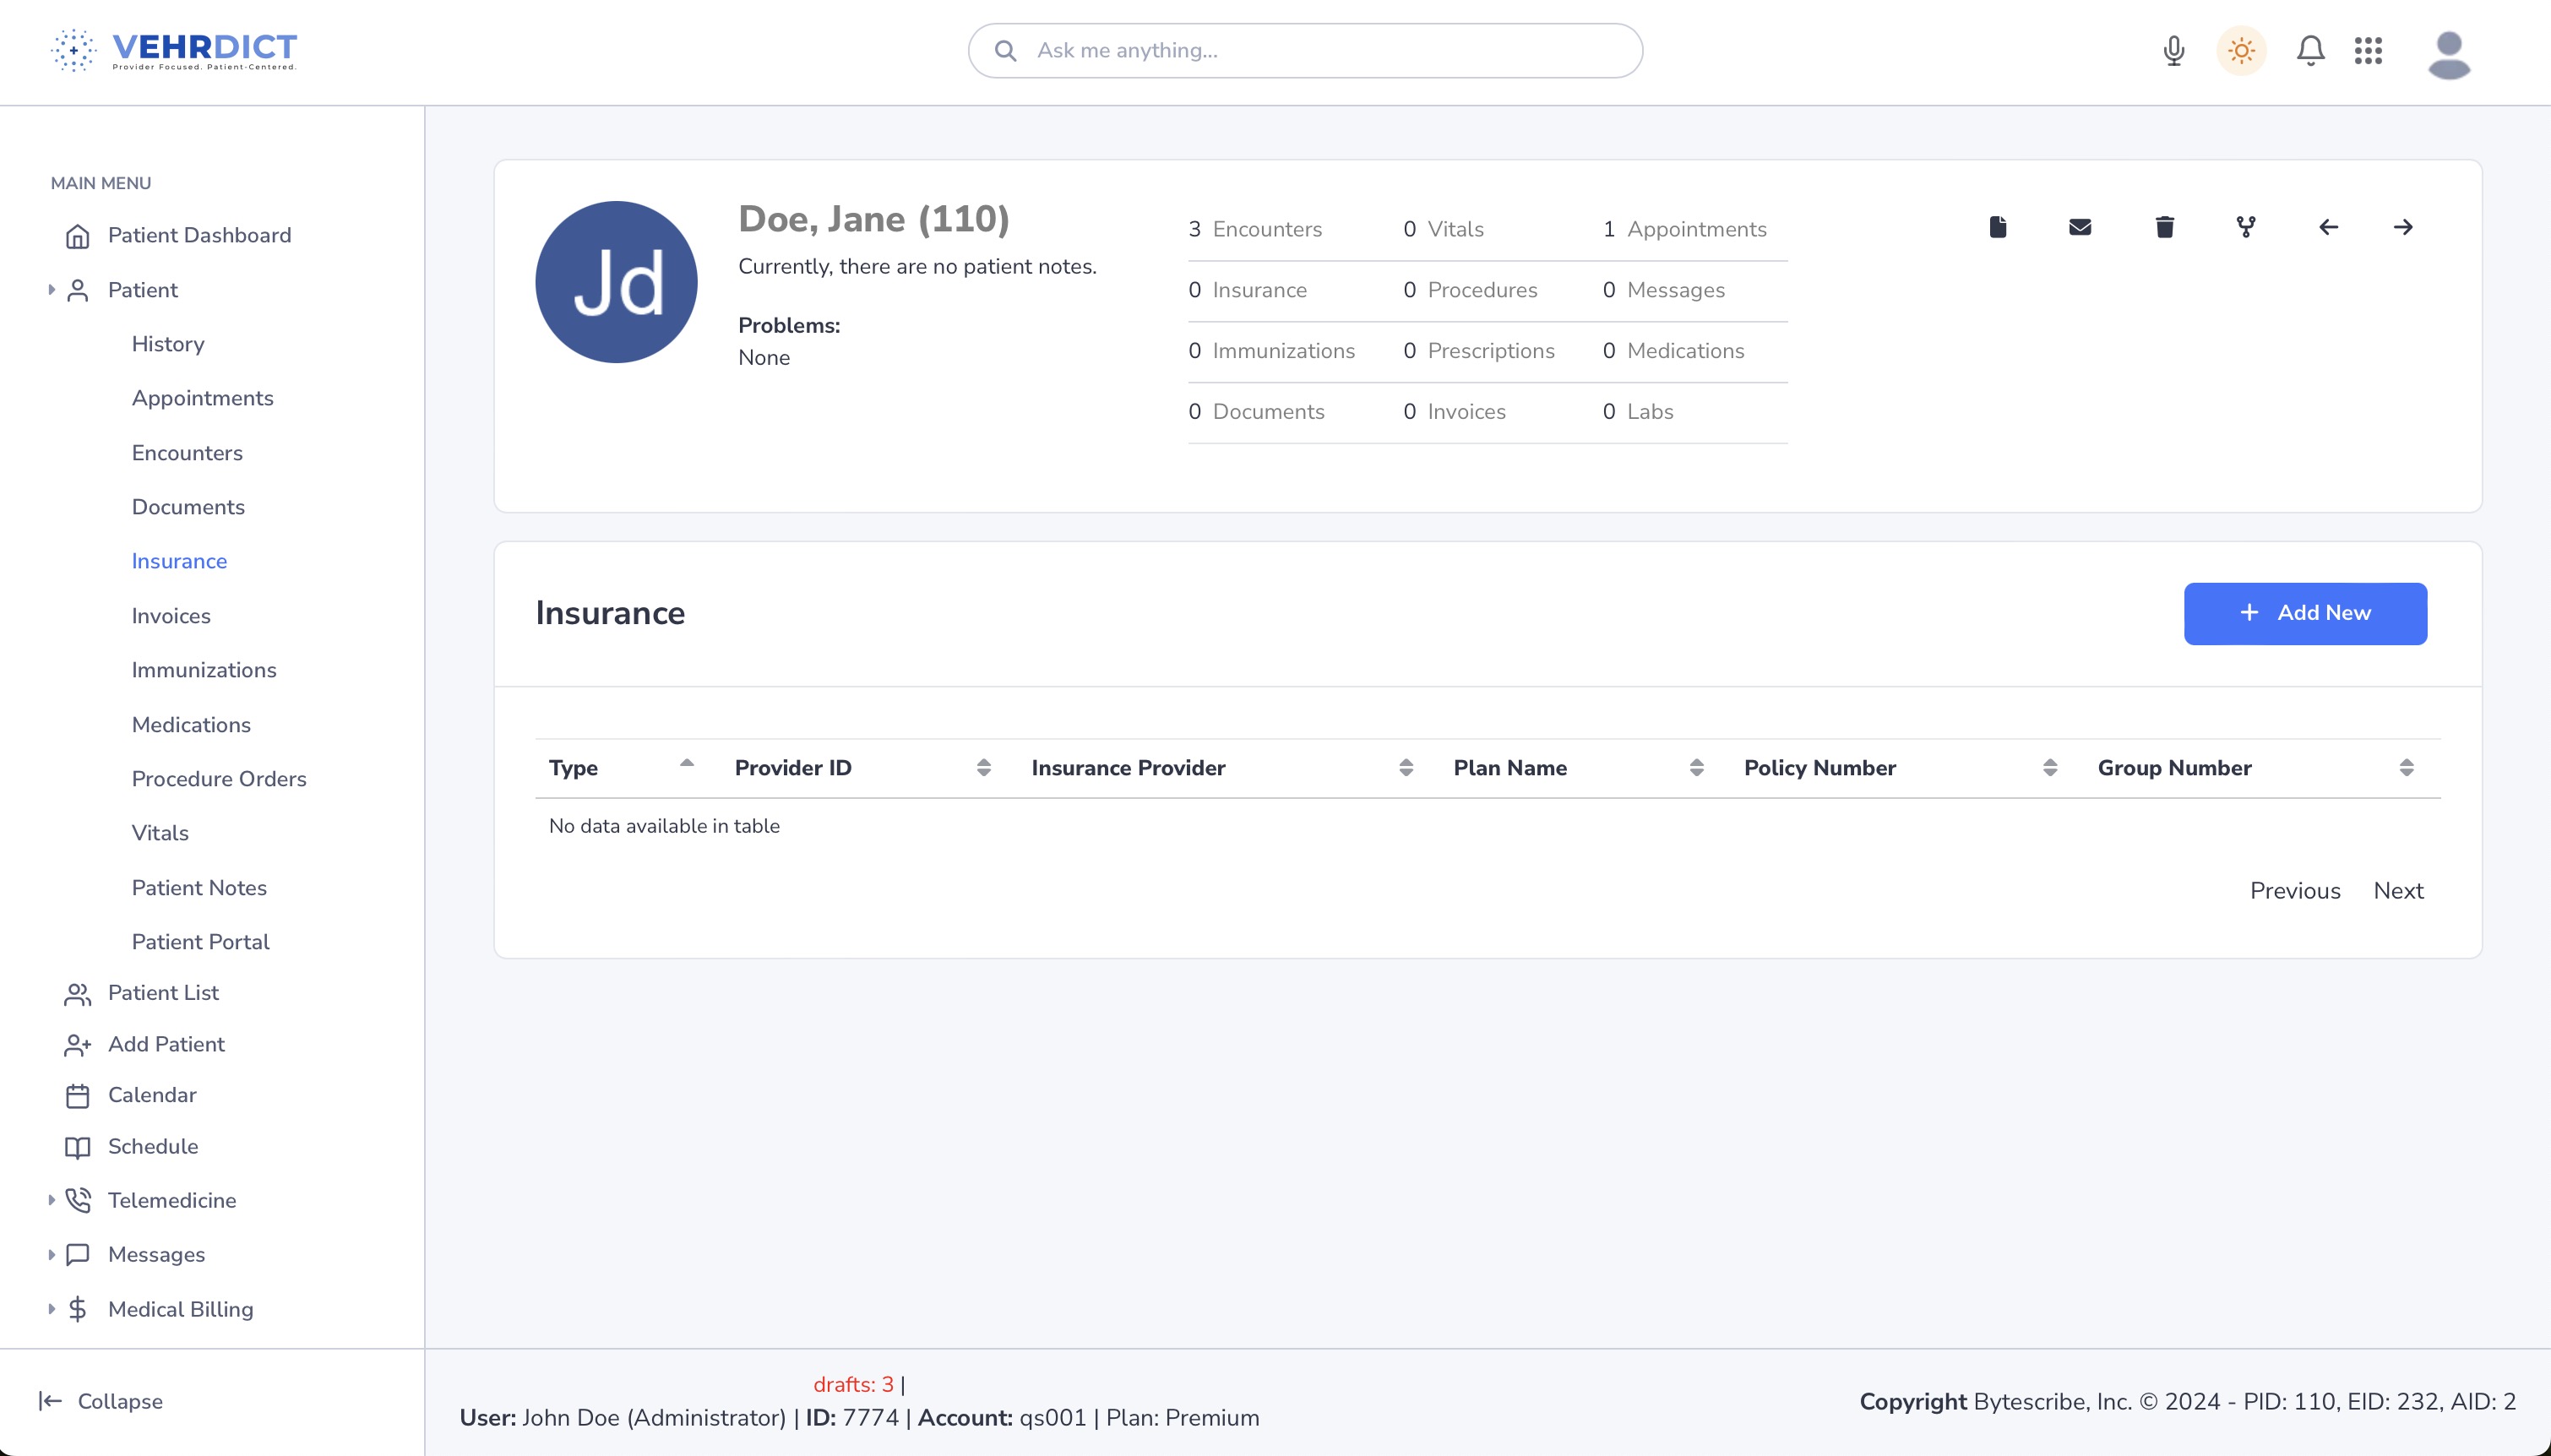
Maintaining accurate insurance information in VEHRDICT is essential for smooth processing of medical services and claims. To add or update insurance information, navigate to the '''Insurance''' section under the Patient Dashboard and click '''Add New'''. Insurance details are organized into three tabs: '''General''', '''Subscriber''', and '''Employer'''. | |||
[[File:patient_insurance_video.mp4|800px|'''Video Tutorial''' – Learn how to manage insurance details in VEHRDICT.]] | |||
[[File:insurance_nx.jpg|800px|'''Insurance Overview''' – Access and manage all insurance entries.]] | |||
== Adding or Updating Insurance Information == | |||
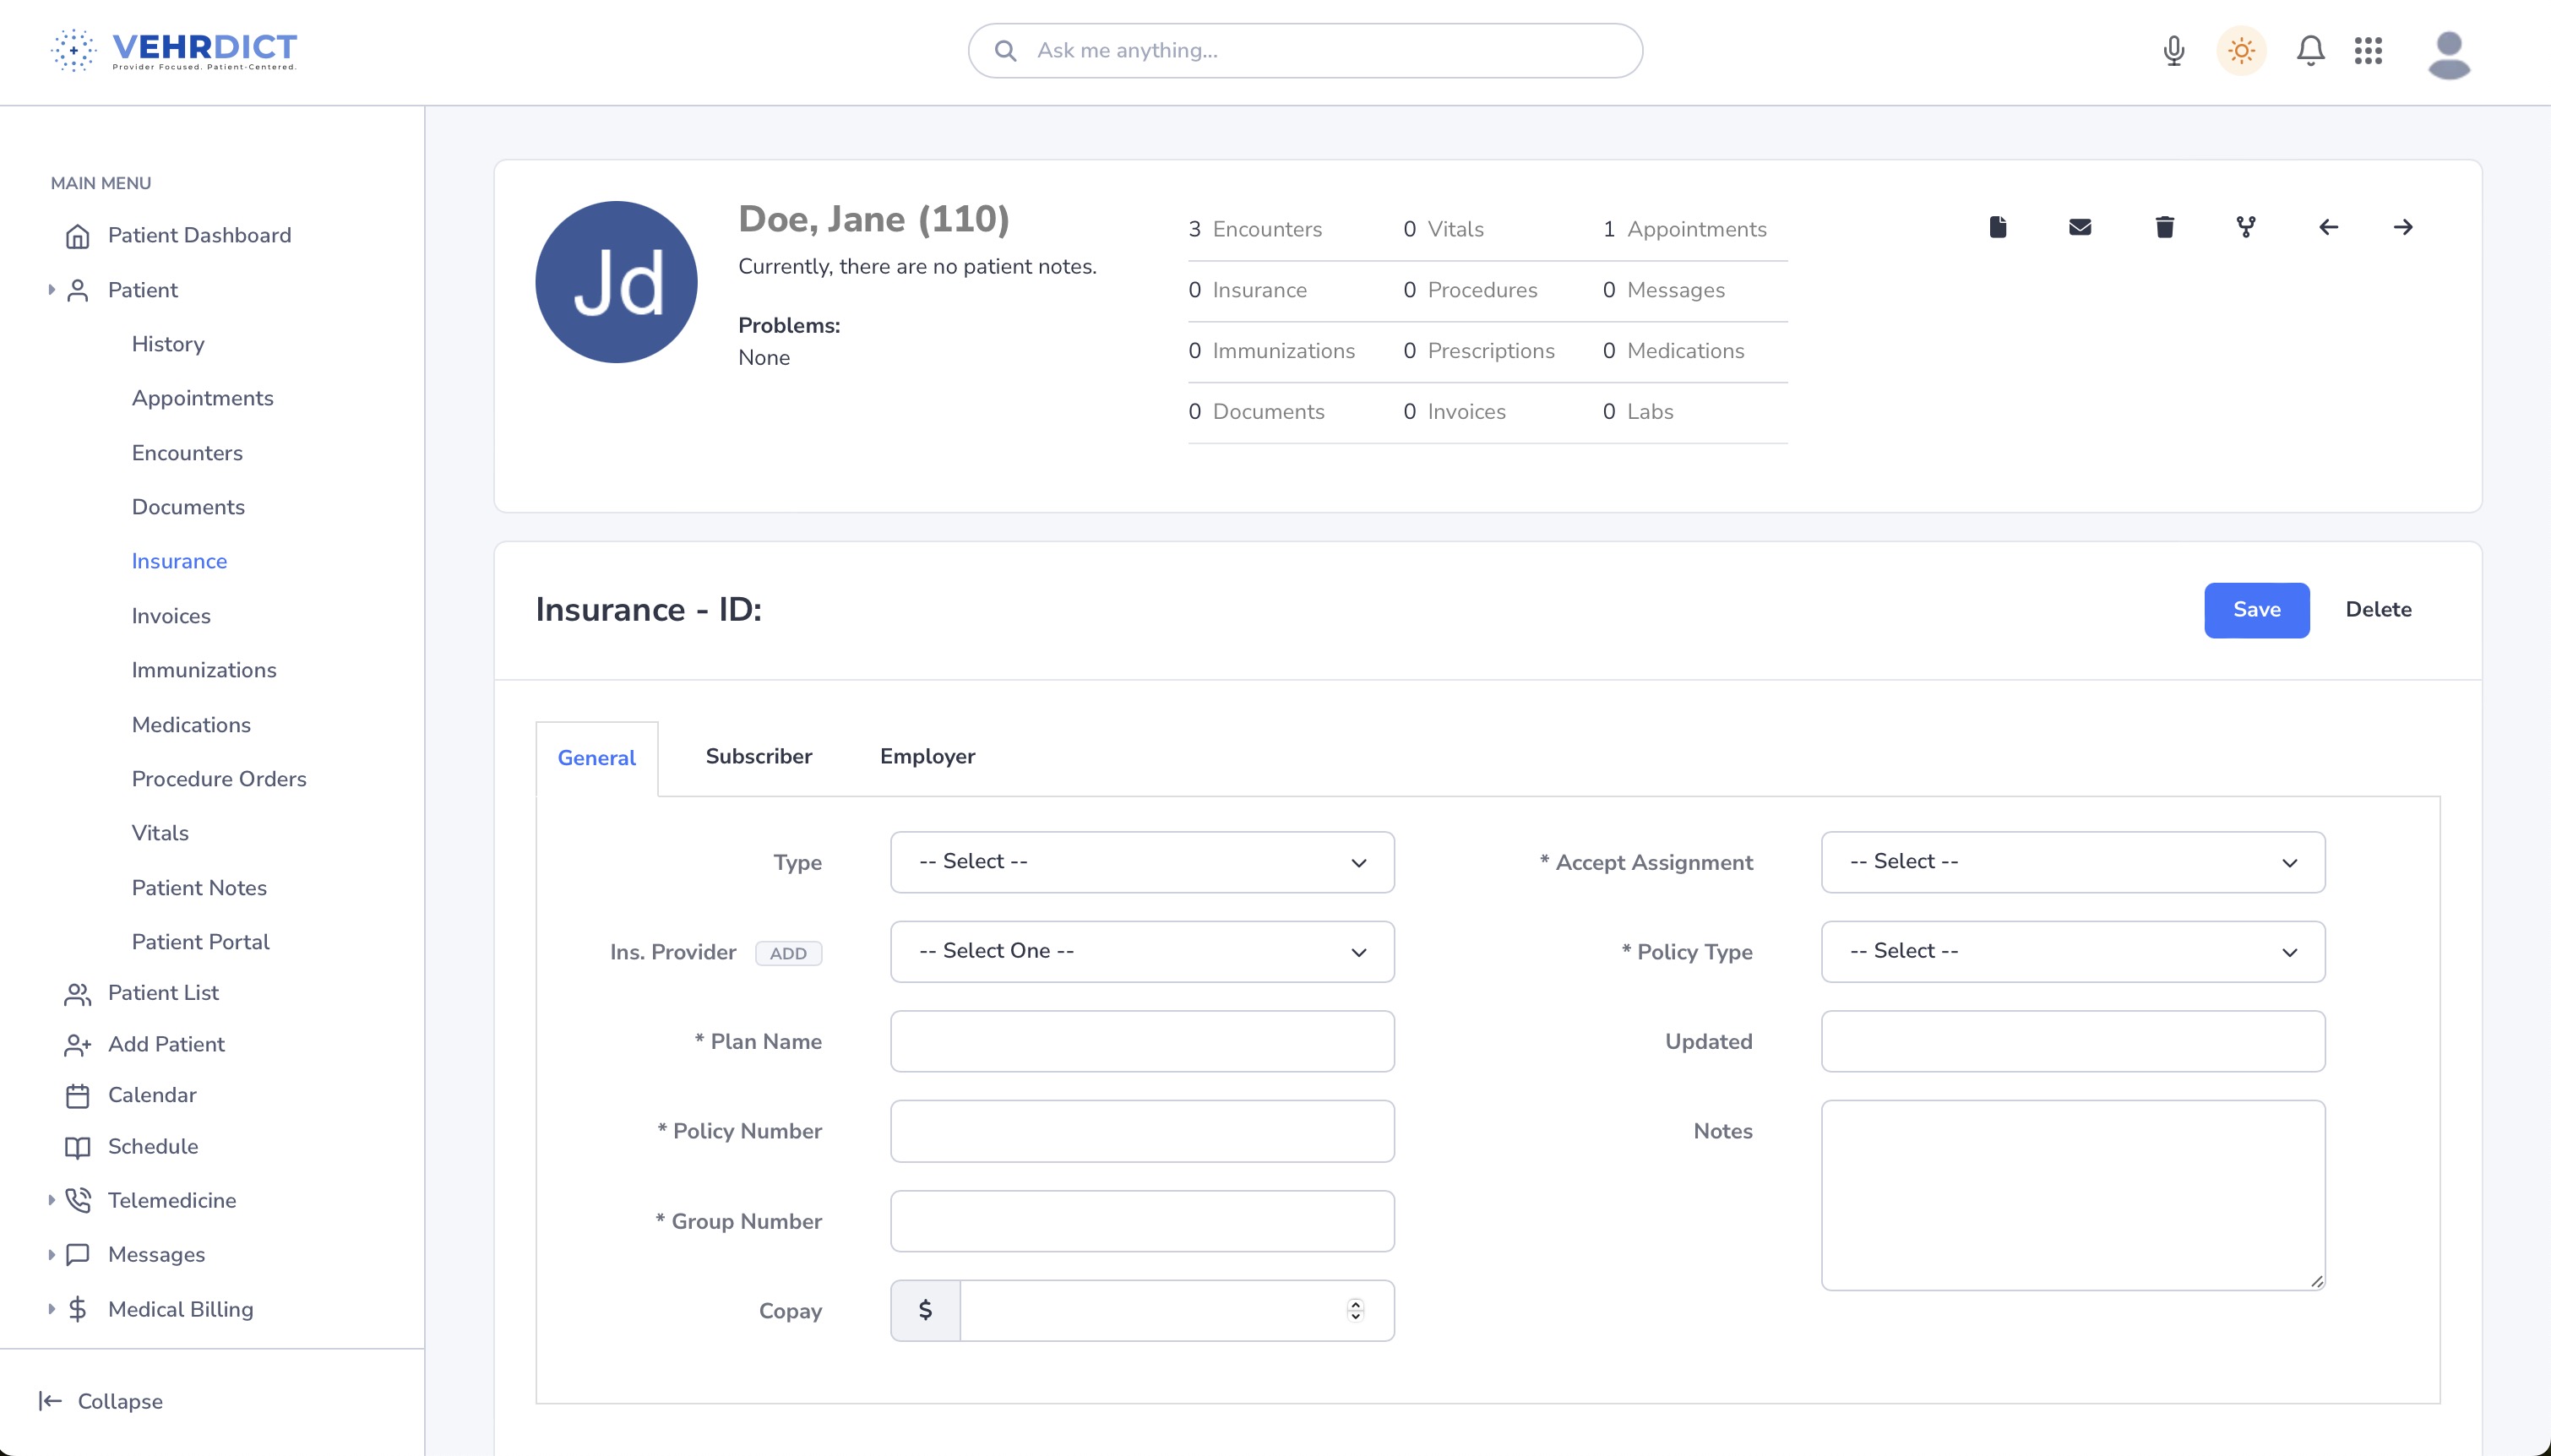
=== 1. General Tab === | |||
* Select an insurance provider from the dropdown list. | |||
* If the provider is not listed: | |||
* Click '''Add''', then '''Import''' to search and add the company. | |||
* Ensure all fields are completed before saving. | |||
[[File:insurance_general_nx.jpg|800px|'''General Tab''' – Select and configure the insurance provider.]] | |||
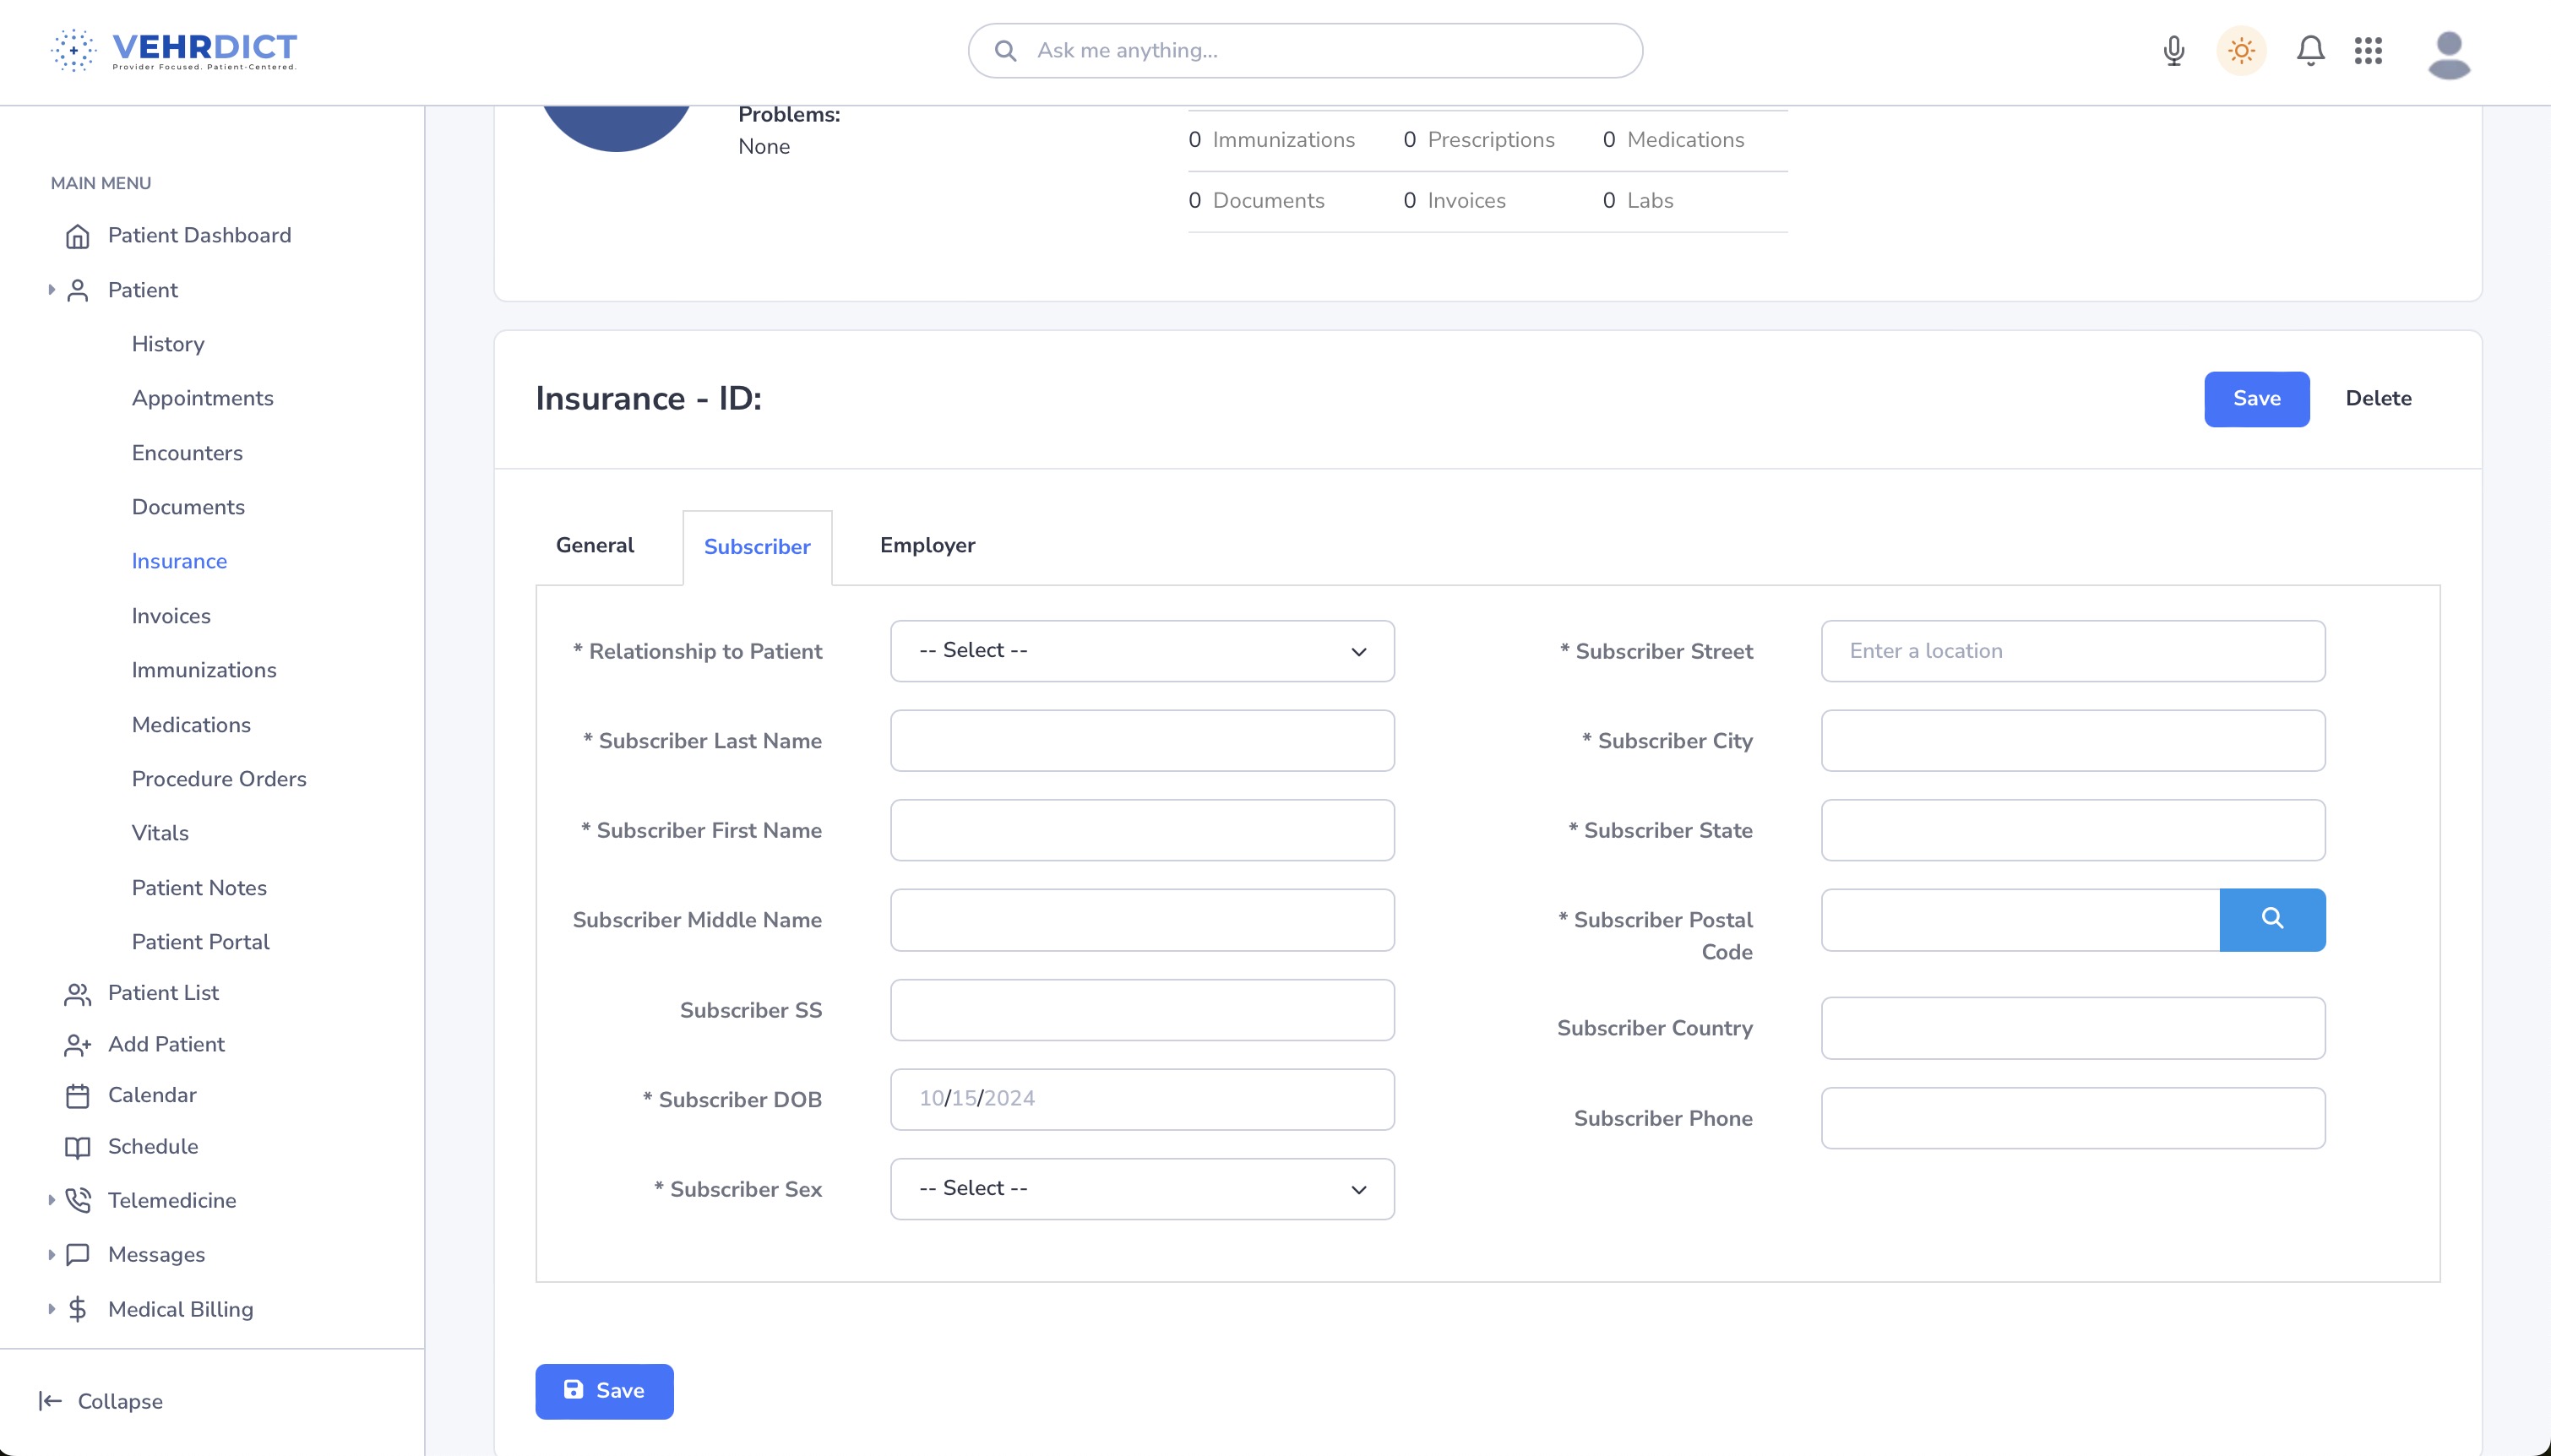
=== 2. Subscriber Tab === | |||
* Enter the subscriber’s personal information, including name, date of birth, and relationship to the patient. | |||
* These details are crucial for accurate claim processing. | |||
[[File: | |||
[[File:insurance_subscriber_nx.jpg|800px|'''Subscriber Information''' – Ensure accuracy for smooth claims.]] | |||
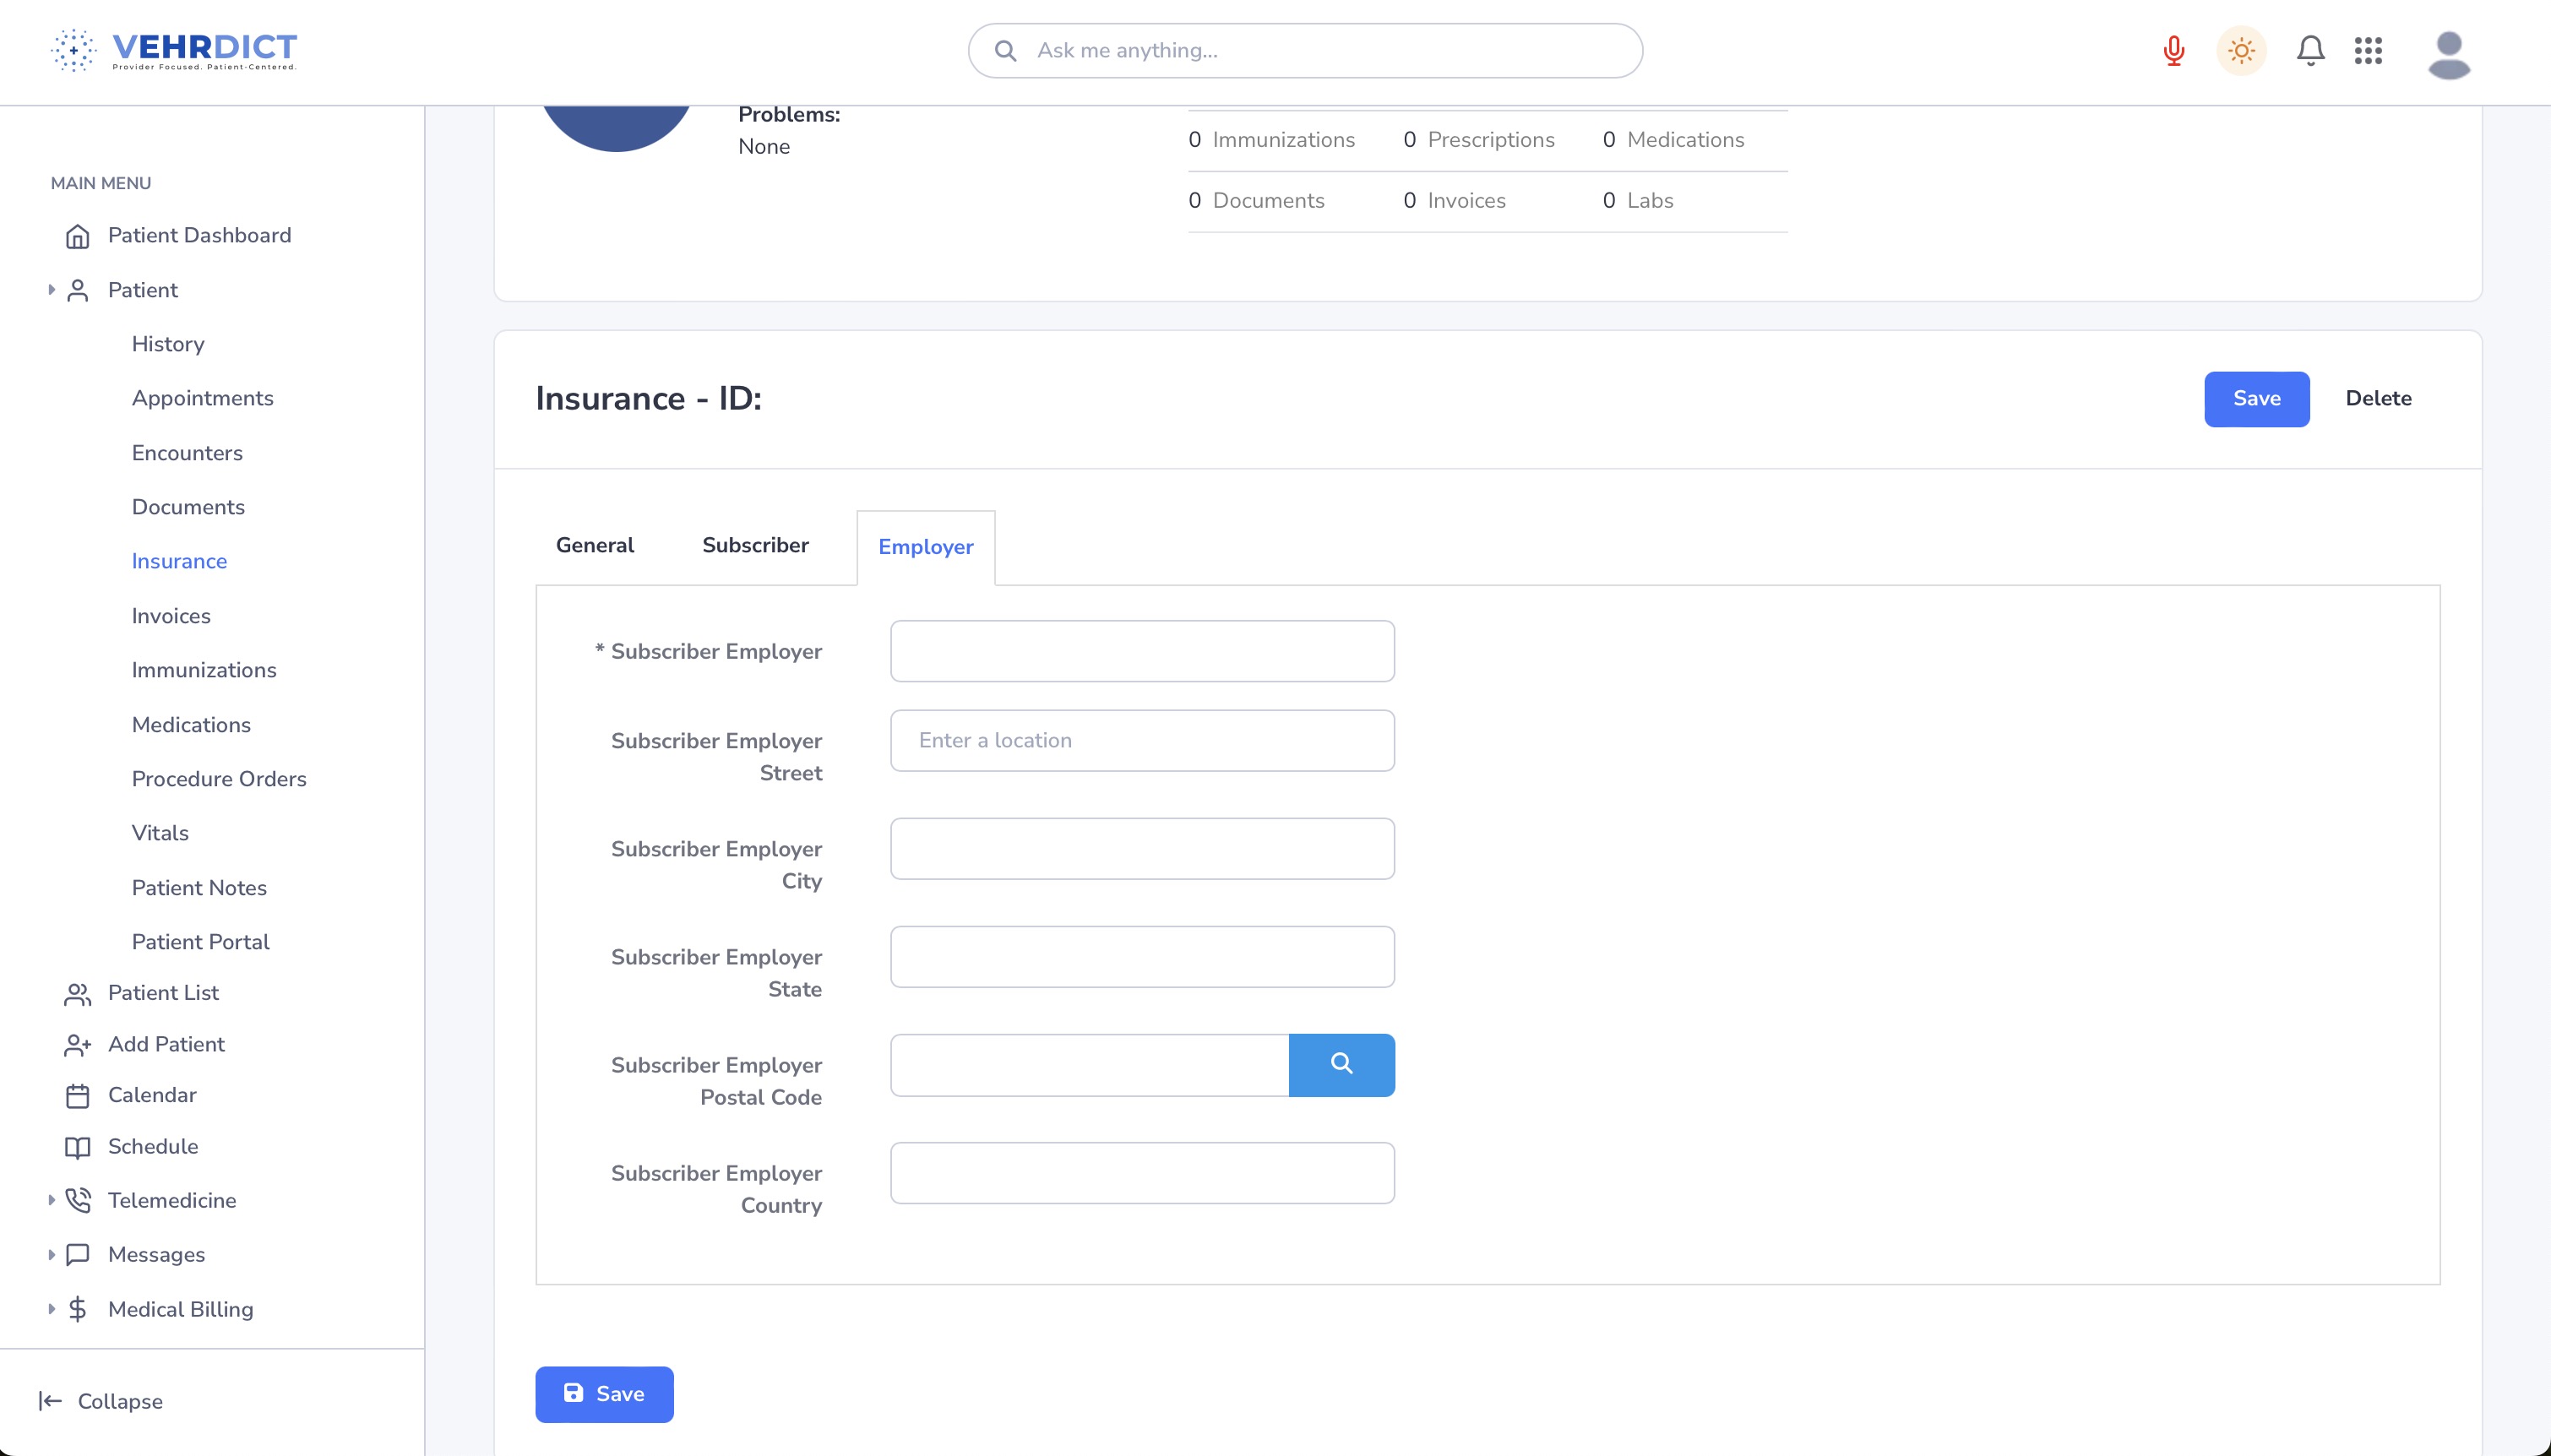
=== 3. Employer Tab === | |||
* If applicable, enter the employer’s details (name, address, contact info). | |||
* This information is often required for workplace-based insurance policies. | |||
[[File:insurance_employer_nx.jpg|800px|'''Employer Tab''' – Add employer-related insurance details.]] | |||
== Voice-Powered Insurance Entry == | |||
To enter insurance information quickly using voice: | |||
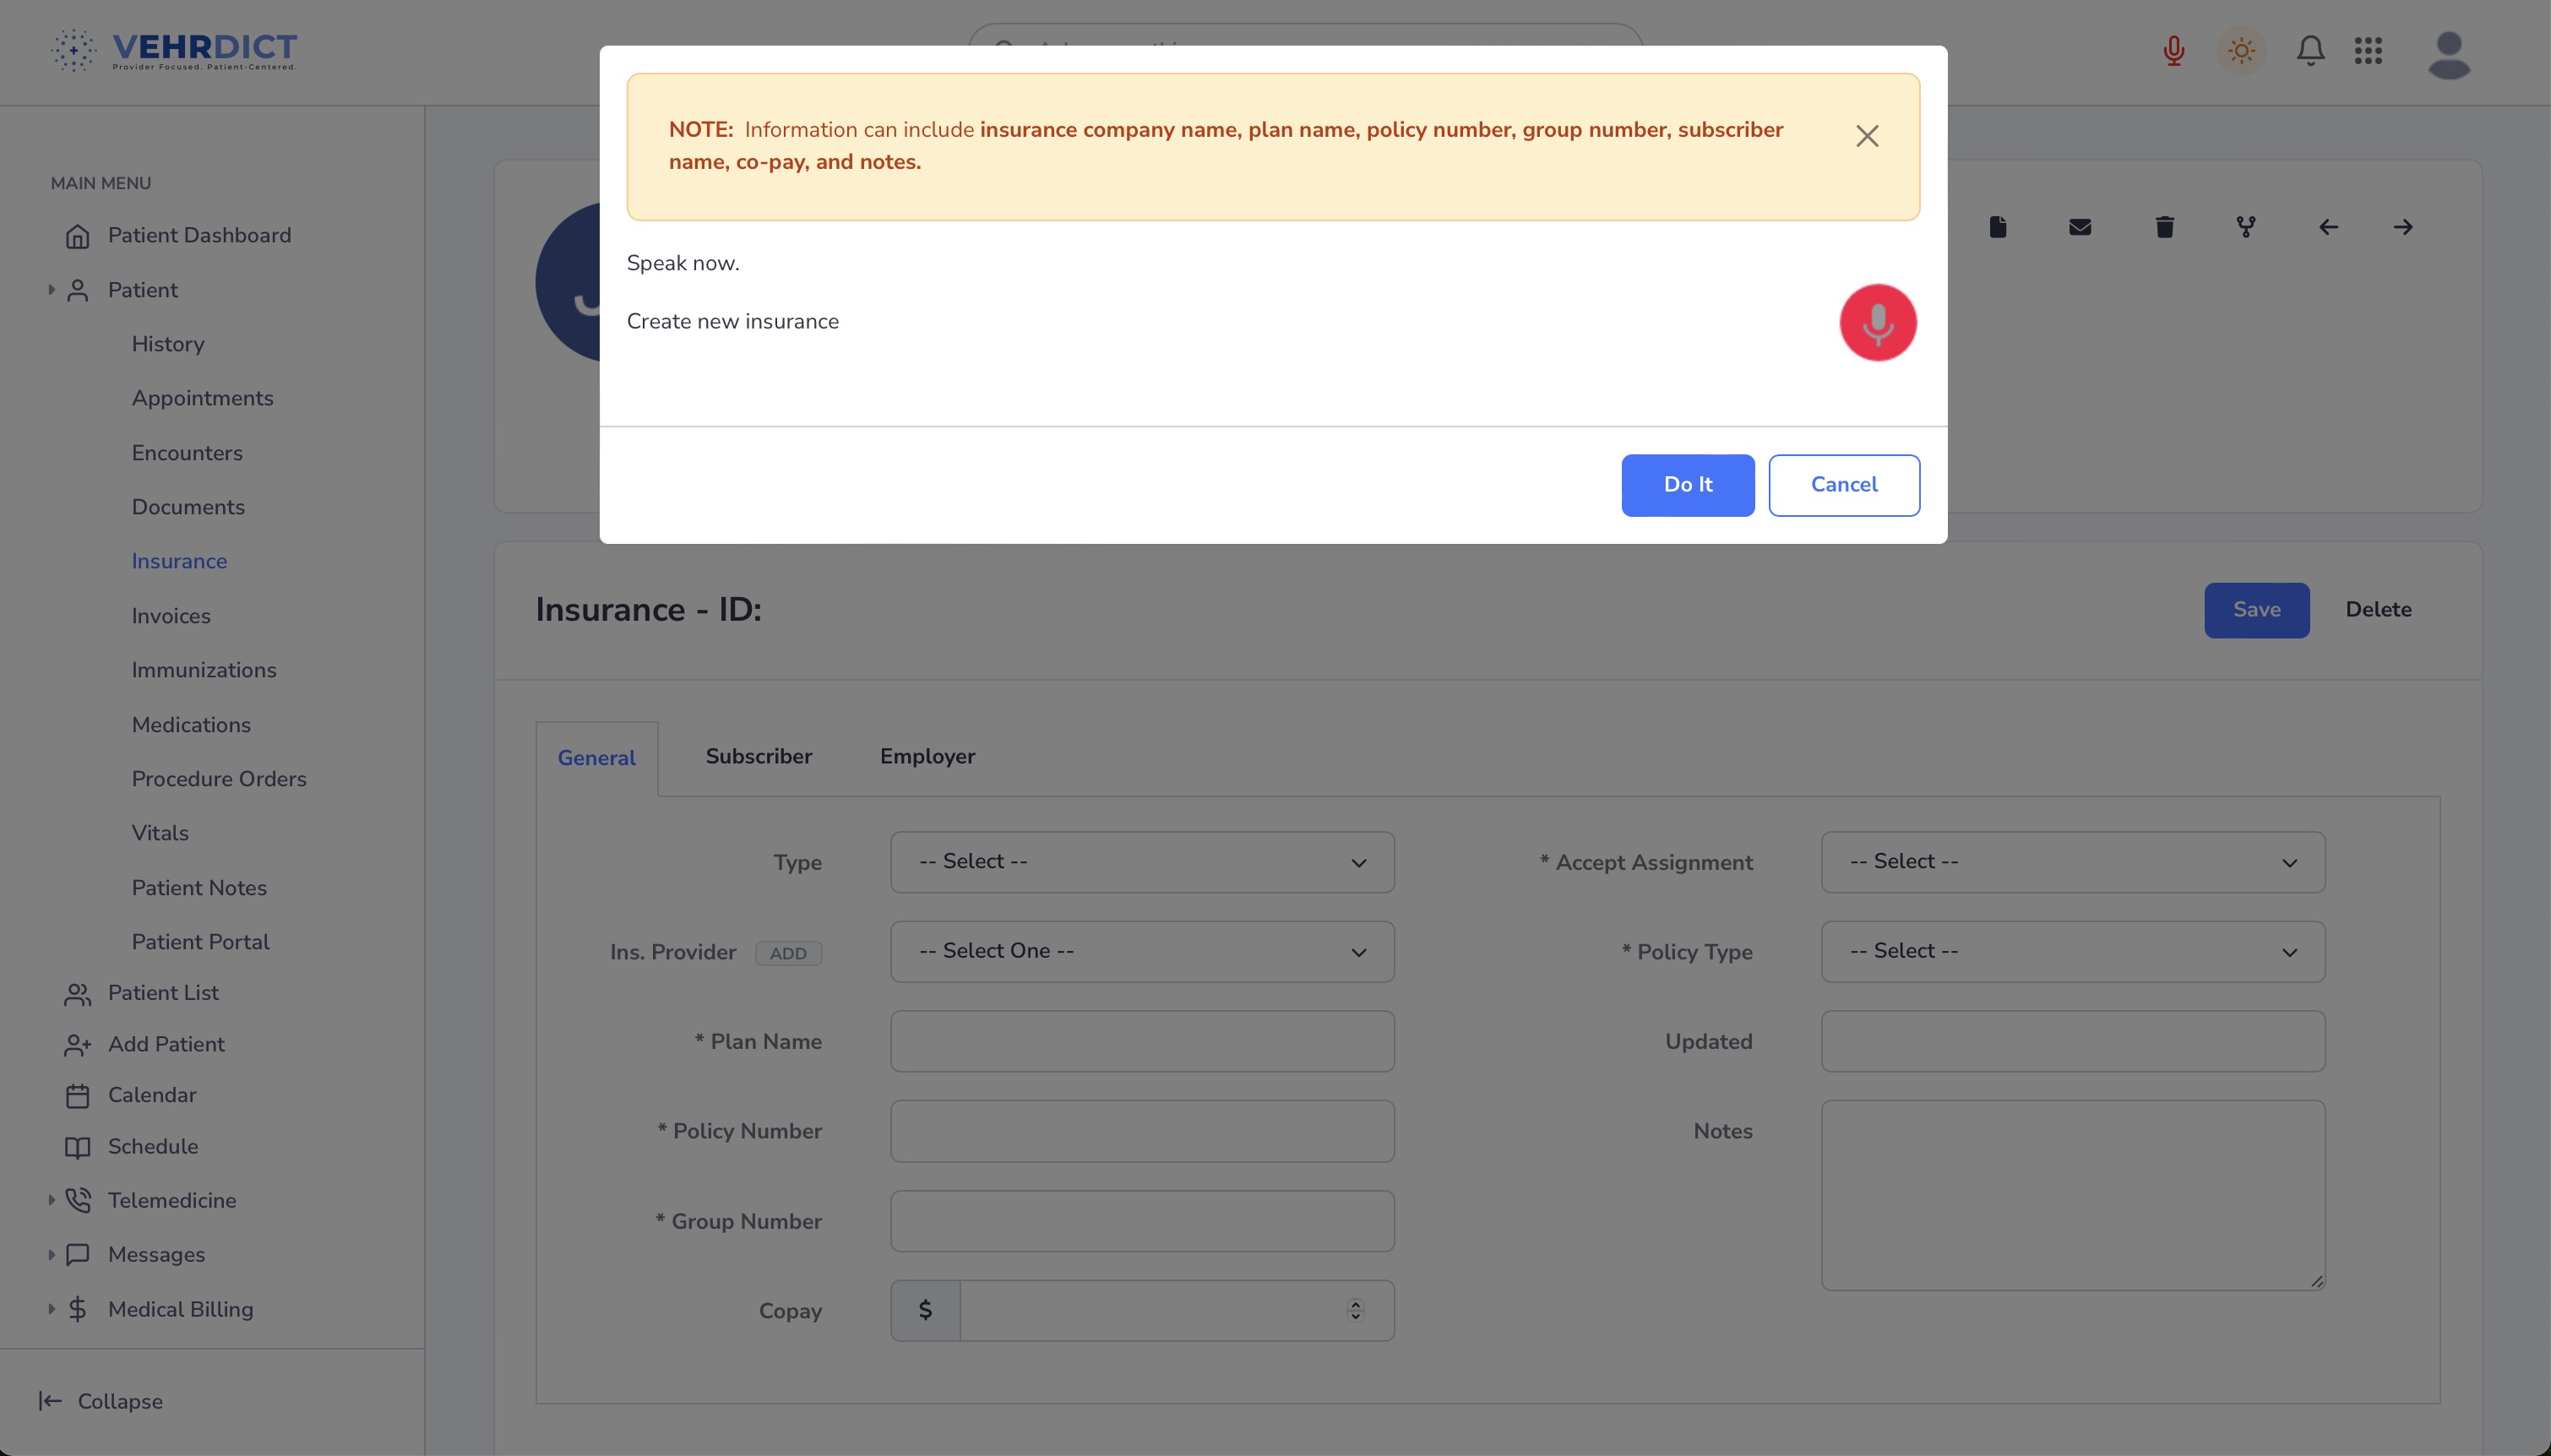
* Click the microphone button at the top-right. | |||
* Say: '''"Create new insurance."''' | |||
* Then continue: | |||
* "Company is Blue Cross" | |||
* "Policy number is 123456789" | |||
* "Copay is 20 dollars" | |||
* "Subscriber is John Doe" | |||
The system will auto-fill the insurance form based on your input. | |||
[[File:insurance_ai_nx.jpg|800px|'''Voice Assistant''' – Use voice commands to fill insurance data quickly.]] | |||
By keeping insurance details complete and up to date, your practice ensures seamless billing, eligibility verification, and claim submission for each patient encounter. | |||
Latest revision as of 14:38, 4 July 2025
Maintaining accurate insurance information in VEHRDICT is essential for smooth processing of medical services and claims. To add or update insurance information, navigate to the Insurance section under the Patient Dashboard and click Add New. Insurance details are organized into three tabs: General, Subscriber, and Employer.
Adding or Updating Insurance Information
1. General Tab
- Select an insurance provider from the dropdown list.
- If the provider is not listed:
* Click Add, then Import to search and add the company.
- Ensure all fields are completed before saving.
2. Subscriber Tab
- Enter the subscriber’s personal information, including name, date of birth, and relationship to the patient.
- These details are crucial for accurate claim processing.
3. Employer Tab
- If applicable, enter the employer’s details (name, address, contact info).
- This information is often required for workplace-based insurance policies.
Voice-Powered Insurance Entry
To enter insurance information quickly using voice:
- Click the microphone button at the top-right.
- Say: "Create new insurance."
- Then continue:
 * "Company is Blue Cross"
 * "Policy number is 123456789"
 * "Copay is 20 dollars"
 * "Subscriber is John Doe"
The system will auto-fill the insurance form based on your input.
By keeping insurance details complete and up to date, your practice ensures seamless billing, eligibility verification, and claim submission for each patient encounter.
